Sometimes you need to run a desktop environment in virtualization mode rather than the typical desktop (X11) mode. Maybe your development machine doesn't support X11. Maybe you're accessing your virtual machine over a network connection and you don't have access to the hardware that displays X frames. Or maybe you're using VirtualBox from within another operating system such as Windows and you want to share the desktop session that way.
What is desktop virtualization? It's a kind of emulations of a system in the form of software. By using specific software like Hypervisor or Microsoft Hyper-V you can emulate a computer system. There is a real or physical device or computer and you can create several different computers under it that use different operating systems. Also, they can run different programs for different purposes. Simply saying that there will be a single client device or hardware that can separate using the software. Various kinds of desktop virtualization exist currently. They are VDI, RDS, and DaaS.
In this article, I’ll discuss the most common and user-friendly way of enabling desktop in virtualization mode using the device you have. Using Windows 10 now anyone can create virtual machines as they want and it is simple too. So, carefully follow through with all the steps and enjoy!
Before You Get Started
For running a desktop in virtualization mode you need to ensure some things first. Firstly, you must need Windows 10 OS for this purpose. You cant use this feature directly in other versions of windows. Even, in Windows 10 not all versions are suitable. You need Windows 10, 64-bit version where Hyper-V is available for use. If you use the home edition of windows 10 please consider converting or installing which one is required for this task. Another important thing is your pc needs to support SLAT. Which is “Secondary Level Address Translation”. If your processor doesn’t support SLAT you cant work with desktop virtualization. Also, the last and mandatory thing is to check if the Virtualization is enabled in your BIOS or not. You can enable it in many ways you can find this in this article this too.
Run desktop in virtualization mode
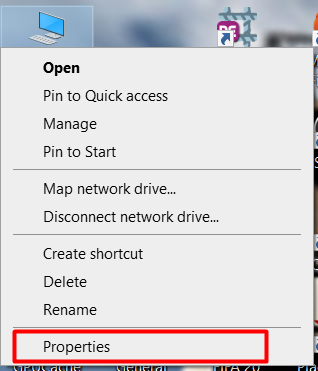
- First, check your windows version from your pc. Right-click on the This PC icon from your desktop and click on the properties option.
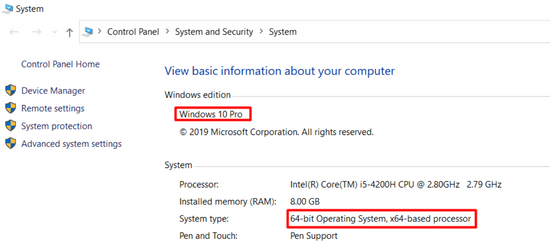
- Check the Windows operating system version and system type, if it's 64-bit supported.
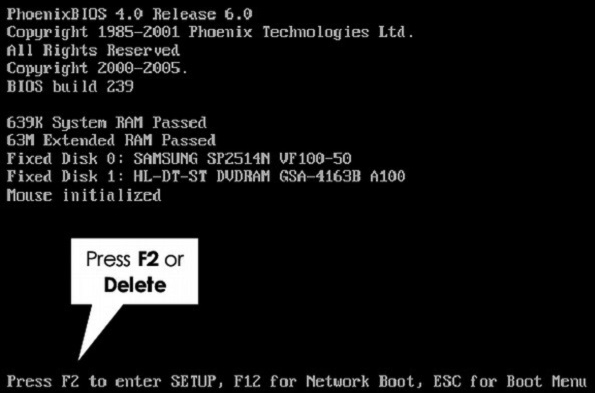
- After checking your windows version restart your pc. Then from there, you have to get to your BIOS settings. For this various processors have various keys assigned, try F2, F10, or Delete keys or you can see the instructions on the booting screen which one will open BIOS.
- Enable Virtualization from the BIOS option. Though the option may vary in various processors you need the find the option labeled virtualization.
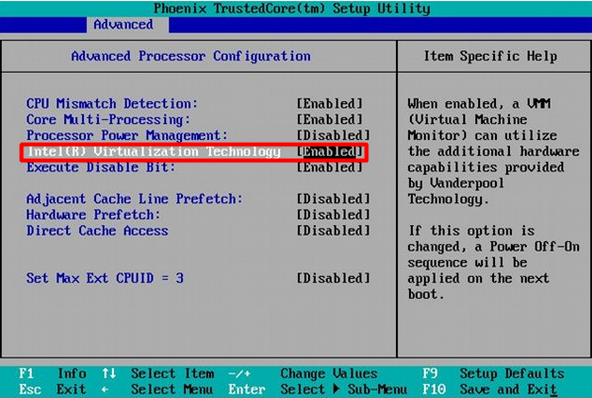
- After enabling the option you can save and exit the BIOS setup option and restart your PC.
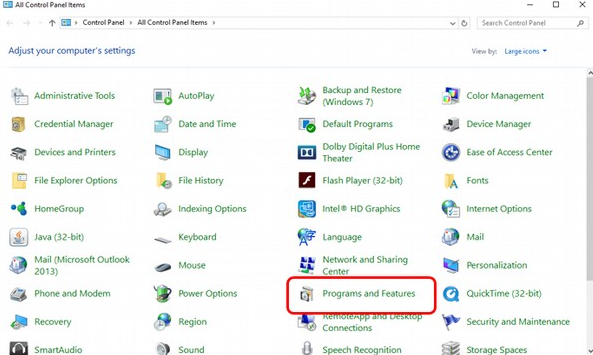
- Then we come to the main part of the article, installing Hyper-V. For that first open the control panel.
- From there go to the Programs and Features option and click on it.
- From the click on the options from the left side “ Turn windows feature on or off”

- From the features find the option Hyper-V and then you have to select or check all the boxes.
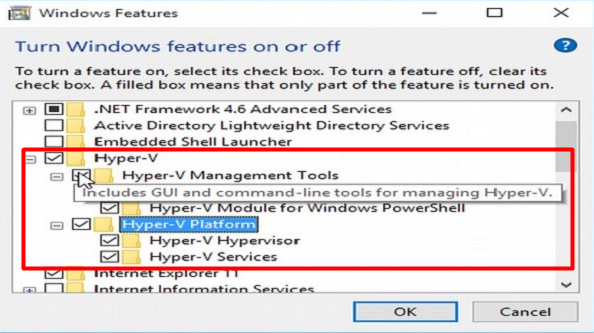
- Then it’ll take some time and may restart a few times. It’ll be installed on your device.
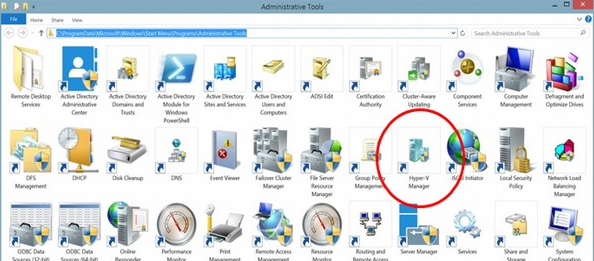
- Now for creating a Virtual machine open the control panel and from there click on the Administrative Tools.
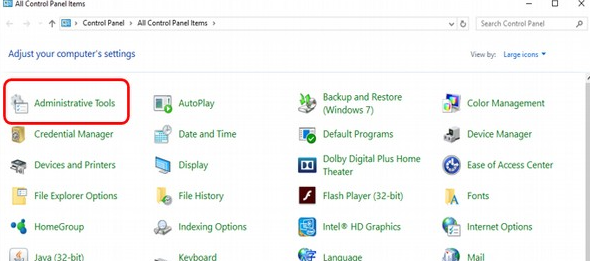
- There you’ll find the Hyper-V manager tool. Open it.
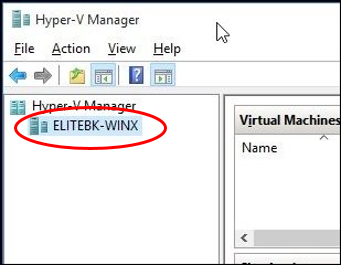
- After Hyper-V starts. On the left side, you will see your PC name. Click on it.
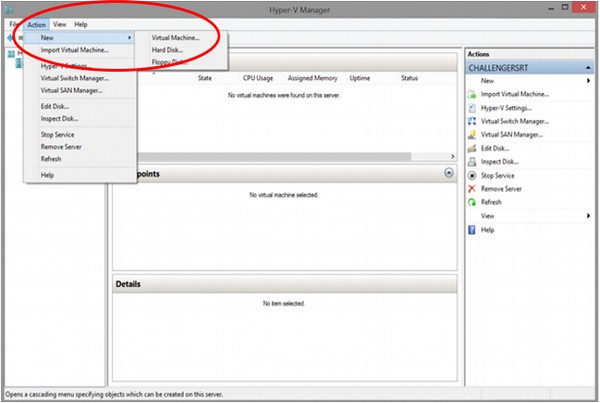
- Now go to the Action option from the top and now from New click on the Virtual Machine option.
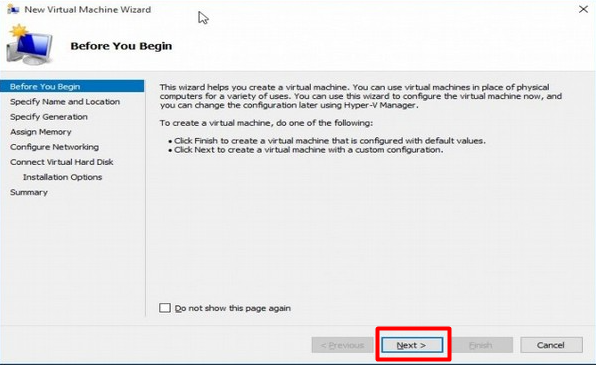
- Now you need to configure some basic configurations from these options that are suitable for you. After finishing click on the next option.
- You can see your Virtual desktop now inside Hyper-V.
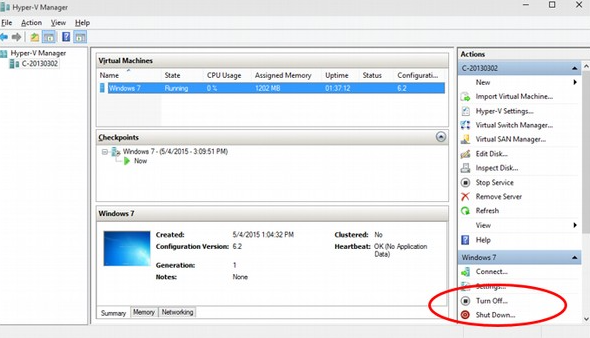
So, after following these steps like any other machine you can install a separate OS to run them also turn them off or on as you like.
Summary: Do I run desktop in virtualization mode
- Desktop virtualization, in the traditional sense, is a slow and expensive way to run desktop applications.
- Desktop virtualization is a great way to scale out desktop applications.
- Desktop virtualization is an attractive option for companies that do not have physical desktops or laptops.
- Desktop virtualization is considered to be a mature technology by most industry experts.
- Desktop virtualization will become the primary way that people access their applications and data in the future.
- Desktop virtualization has many benefits over physical PCs and laptops.
- it means to run your desktop in virtualized mode.
