The Mac operating system does not add printers automatically so you will have to find the correct drivers before you can print. The method for doing this is different to a PC. In this tutorial we will show you how to add a printer to a Mac and print from it once it's been added.
Adding a printer to Mac has a straightforward process. By following a few steps accordingly, you can easily do it yourself. We have reviewed the process of connecting both wired and wireless printers to Mac below for your convenience. Check it out.
Connecting Wireless Printer to Mac
Here is the step-by-step process that you need to follow to connect your wireless printer to a Mac.
- Turn on the computer and printer device. Connect the wireless printer to your computer’s wireless network.
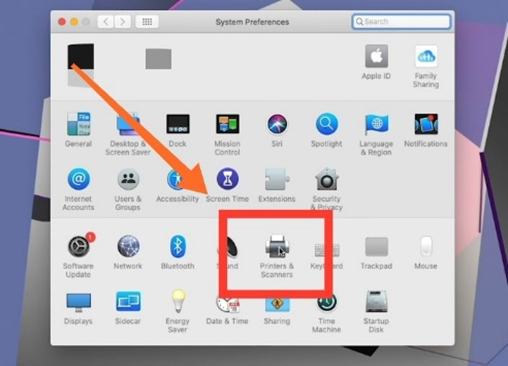
- From your computer screen’s top left-hand side, click on the “Apple” icon and select the “System Preferences” option.
- A new window will appear on your screen with a bunch of options. Go with “Printers and Scanners” from there.
- A new dialog box will open, showing you the list of connected printers. Click on the “Addition” button from the bottom left corner.
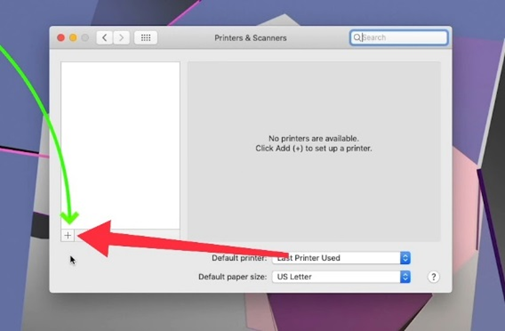
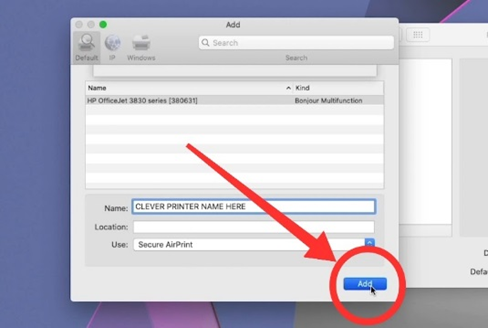
- A small dialog box will pop up showing you the printer’s name if it’s connected properly to your computer.
- Select the printer name, and it will autofill the “Name” and “Use” options. You can edit the printer name by selecting the “Name” option.
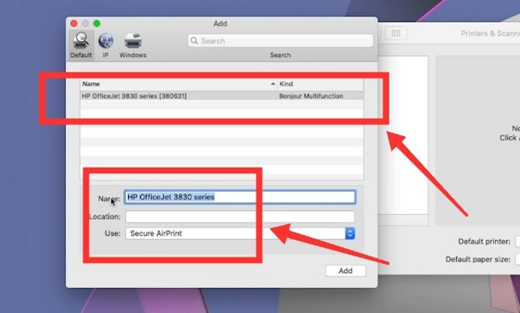
- Click the “Add” button from below and wait until the process finishes. When done, your printer will get connected to the Mac.
Connecting Wired Printer to Mac
If you want to connect a wired printer to Mac, follow the step-by-step instructions given below.
- Turn on the Printer and Mac device. Connect the printer with the Mac through a USB cable.
- Select the “Apple” symbol visible on the top left corner and go with “System Preferences.”
- Select “Printers and Scanners” from the new window visible on your computer screen.
- The Mac detects the printer and connects it to Mac automatically.
Removing Old Printer to Add New
If your Mac is already connected to another printer and you want to add it to a new device, this process is for you. Here you go.
- Open the new printer. Now, connect it to the Mac device.
- Go to the “Apple” logo and select the “System Preference” option. A new window will open up. Select “Printer and Scanners” from there.
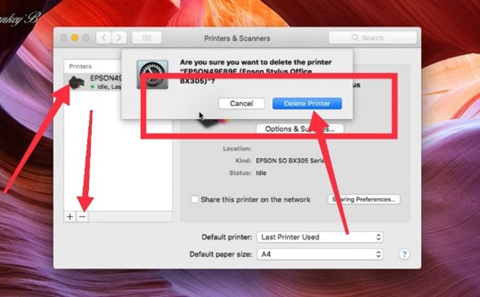
- Select the old printer name and click on the “Minus” button from the bottom left. Choose “Delete Printer” from the pop-up notification on your screen.
- Now, click on the “Addition” button from the bottom left side and add the new printer from the printer list that appears on your screen.
- Click the “Add” option from the bottom right corner. Your new printer device will be connected to the Mac successfully.
How to Find A Printer on Mac
Sometimes, even after connecting the printer and Mac to the same network, we can’t find the device name on settings. Here is how to fix this problem.
- Connect your printer and Mac to the same network and open the “Apple” icon on the top right corner of your computer screen.
- Select “System Preferences” and then click on “Printers and Scanners” from the newly opened window.
- A new dialog box will appear on the screen. Click on the “Addition” button from the bottom left corner.
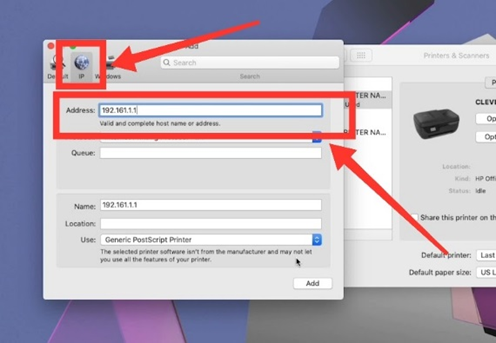
- Click the “IP” option from the top. Write the printer “IP Address” on the “Address” dialog box. You will find the “IP Address” on Mac “Printer or Wireless Settings.”
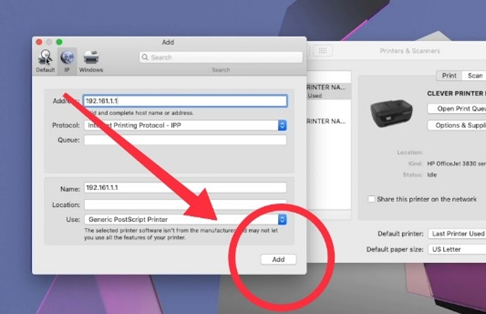
- Click the “Add” button from the bottom left corner. Your wireless printer will be connected to the Mac.
Summary: Add a Printer to a Mac
- Plug the printer into your Mac.
- If it’s a wireless printer, turn it on.
- Open System Preferences from the Dock, Launchpad, or from the Apple menu in the top-left corner of your screen.
- Click Printers & Scanners.
- If you don’t see your printer listed here, make sure it’s on and connected to the same Wi-Fi network as your Mac.
- Section: 5. Click the Add button, select the printer that you want to add and click Add again to confirm selection.
- Now your printer will be added to your list of printers in Printers & Scanners preferences so you can use it with your Mac.
