Zoho CRM gives away the equal privilege to all its users to create views of the data in Zoho CRM. It is done so to give power to the users to form the reports and retrieve them at a later stage from the reports folder in Zoho CRM. This article helps you learn how to allow a user to create a view in Zoho CRM.
Zoho CRM is a Zoho Corporation software that manages sales, marketing, and support in one CRM platform. Most of the companies and professional uses Zoho CRM for building an everlasting customer relationship. For using Zoho CRM, you have to purchase the user license. After buying the license, you can allow another user to have access to your account. The user can create a view if they have access. So, in this article, we will show you how to allow a user to create a view in Zoho CRM.
Before You Get Started
Zoho CRM offers purchasing as many user licenses as you want from a single account or company account. If you want 10 users to have access to your account, you have to purchase 10 users license. Whether anyone of your user is active or not, you have to pay the amount of 10 users. You can swap the deactivated user to any active user. After purchasing, you can define and manage the user profiles. The users can also create a view from your account if you allow them. Here, we will give you a basic idea about the user profiles and access and how to allow them to create a view.
Allowing a User to Create a View in Zoho CRM
- Open Zoho CRM and log in to your account.
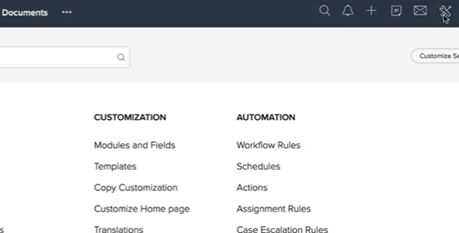
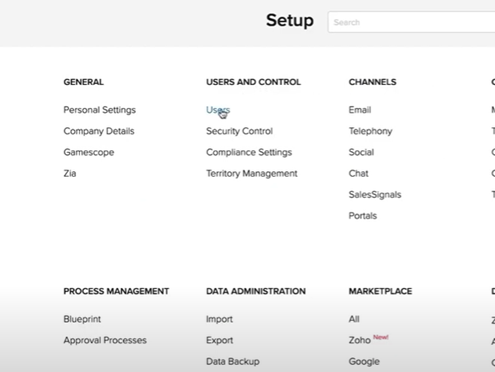
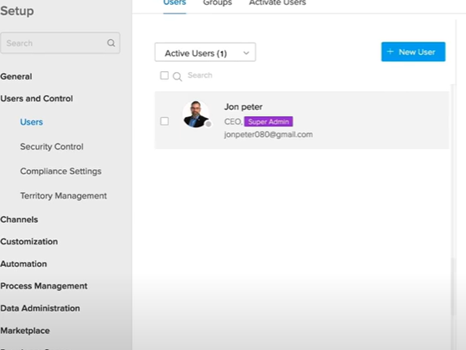
- For allowing a user to create a view, you have to add them first. For that, find the “Setup” icon from the top left and click on it.
- See the “Users” option under the “Users and Control” section. Click on it.
- There, you will see the existing user of this account. If the account has only one user, that user will automatically become the CEO and have an administrator profile.
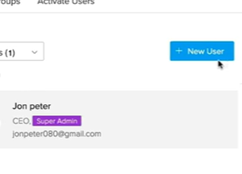
- Click on the “New User” option to add a new user.
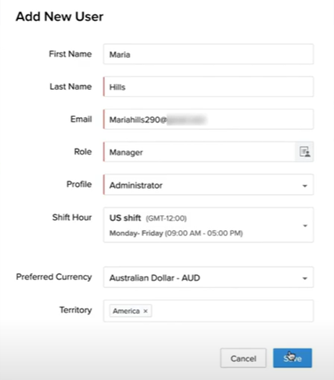
- An editing window “Add New User” will emerge and write information about the user. You must give a valid email address so that the user can connect to your account.
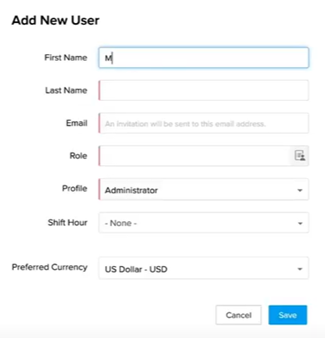
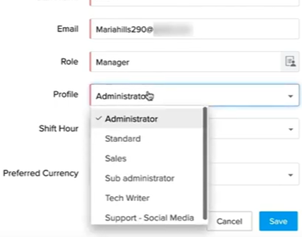
- Choose the role the user going to have by clicking on the “Role” option. After choosing a role, you have to choose the profile as an “Administrator” profile from the “Profile” option.

- Then, complete the creation of the profile adding all relevant information. Click on “Save”.
- When the user is added as a new user in Zoho CRM, he/she will get an invitation email on the provided email. He/she can confirm the account by clicking on the link sent to the email.
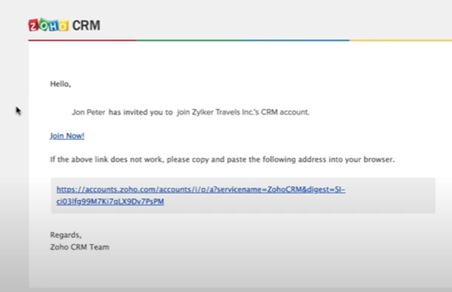
- If the user doesn’t have a Zoho CRM account, he/she can create a new account by clicking on that link. After creating an account, the user will have access to your account.

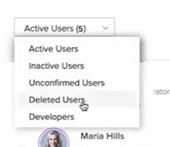
- You can see the active, inactive, unconfirmed, and delete users from that account. You can also customize the user account if you want.
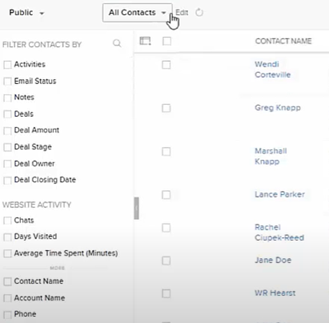
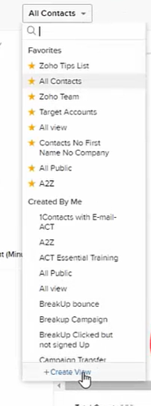
- Now, the user can create a view from the account. Just go to the “All Contacts” option and find “Create View” at the bottom of the drop-down list. Click on it. Then, add necessary information on the view.
So, that’s how you can allow a user to create a view in Zoho CRM.sa
Summary: Allow a User to Create a View in Zoho CRM
- The user will log in to their Zoho CRM account.
- Once logged in they will click on the module that they want to create a view for.
- Then click on the drop down next to the view that is currently selected and click on create view.
- Name your view
- Set permissions for it
- Configure your criteria
