If you are a computer technician who is going to work with desktops, laptops and other hardware devices, you will be frequently asked questions such as how to assign IP address to printer? If you don’t know the answer, you shouldn’t feel ashamed. Many people are asking this question without knowing what it means. What does “assigning IP address to printer” mean? Well, the task being referred to here really isn’t complicated for those who understand it. This article will make all these things clear for you
A printer’s computer device creates a permanent depiction of visuals or text, typically on paper. Printers, like other computer-connected devices, get their IP address allocated to them. If you wish to attach your printer to the network or solve any issues, you’ll need to know its IP address. The IP address of any printer is similar to its street address. You can’t submit print jobs to your printer or grant it any other directives unless you have them.
You can use the network configuration option of the printer to assign a static IP address to it. Usually, printers, by default, utilize a dynamic IP address that varies occasionally and can cause trouble using the printer. Today, I’ll discuss how to assign an IP address to a printer.
Assigning IP Address to Printer
First, you need to note down the present IP address of your printer. Typically, on a printer’s display, the current IP address is shown. But if you can’t find it on display, then go along with the instructions below –
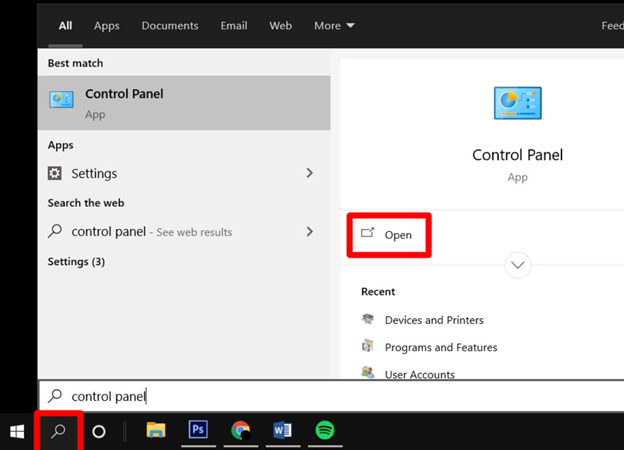
- Type “control” in the search bar. Go to “Control Panel.”
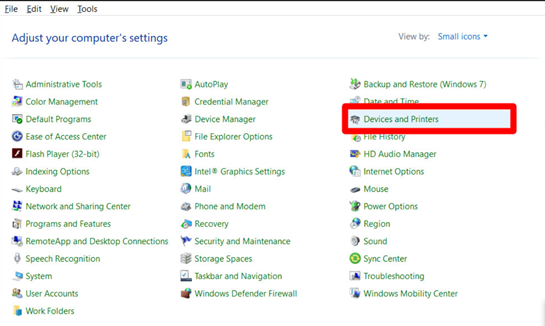
- Navigate to the “Devices and Printers” option.
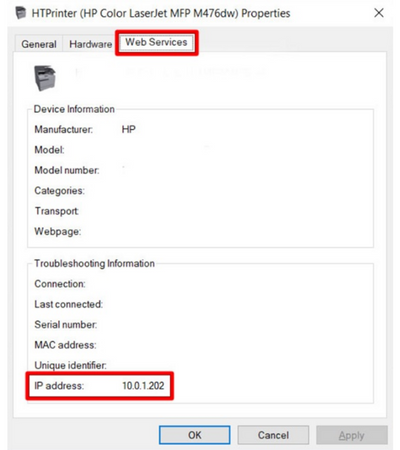
- Right-click on the name of your printer, then navigate to the “Properties” option.
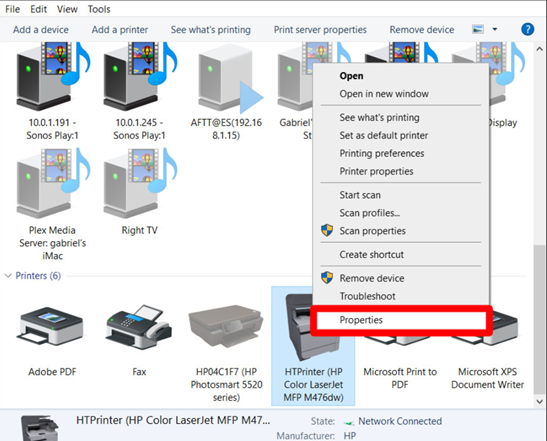
- Locate the “IP address” option under the “Web Services” tab.
Now, ensure the printer and the computer you’re using are on the same system. Search the printer’s present IP address on any browser. Provide the username and password information for the printer if needed (use “admin” in the username section if there’s no password set and leave the password section empty) and follow the instructions below to assign an IP address to your printer –
- Go to the “Network” tab from the printer’s page. Go to the “IP Configuration” section. Change the network option to manual or static.
- Enter the IP address you prefer and assign it to your printer in the “Manual IP Address” section.
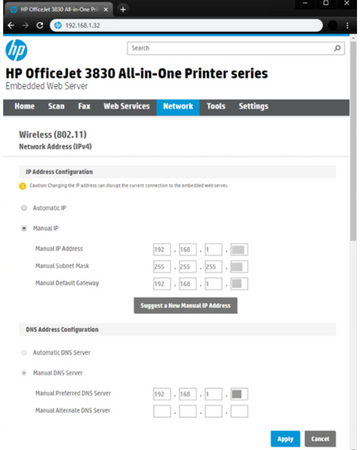
- Save your settings and close the window. Now, whenever you connect the printer, it will be allocated to this IP address promptly.
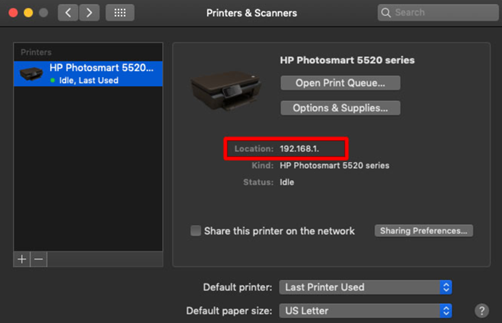
Finding and Changing the Printer’s IP Address on Mac
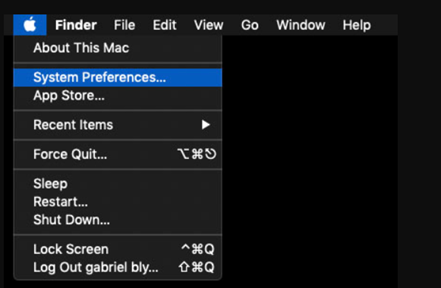
- Go to the Apple sign and navigate to “System Preferences.”
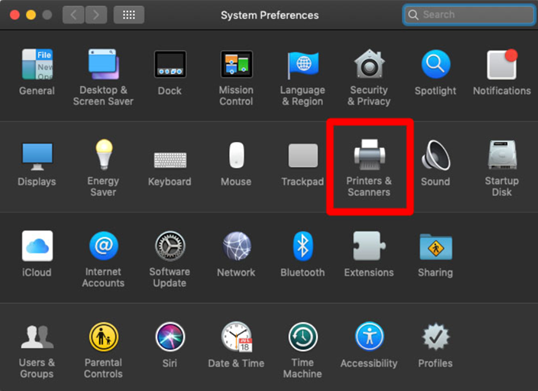
- Click on the “Printers and Scanners” button.
- Select your printer from the left sidebar. The IP address is shown in the “Location” section.
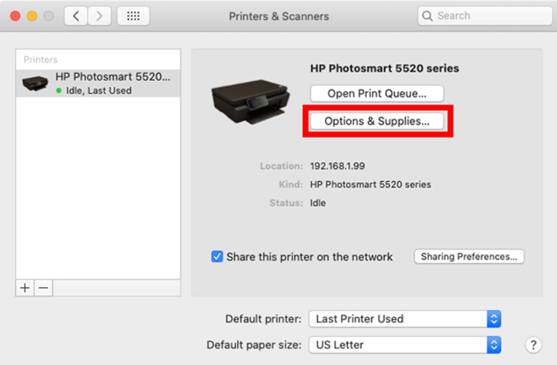
Now, to change/assign your printer’s IP address –
- Go to the “Printers and Scanners” option again from the “System Preferences.”
- Select your printer and click on the “Options & Supplies” option.
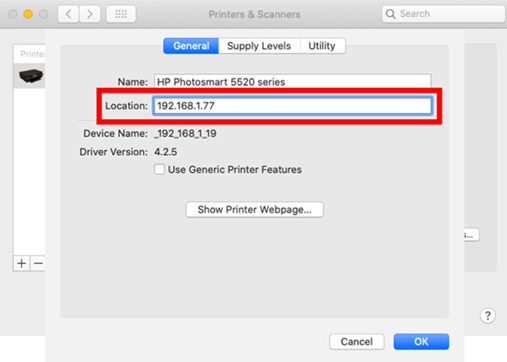
- Change the present IP address to your preferred one in the “Location” box. Click on the “Ok” button to save the changes.
Can I Assign Any IP Address?
You can grant specific IP addresses to the devices you regularly use rather than allowing your router to generate whatever IP address is available at the moment. Using a static IP for devices is a better choice. For example, if your home server’s IP address is 192.168.1.9, you can use the IP address 198.168.1.10 for your main computer; it’s easy to remember and unchanging.
Summary: Assign IP Address to Printer
- From your computer, open a new browser window, and type the printer IP address in the address bar.
- Click login.
- If you have not set up an administrator password, select Configuration, Network Configuration, Wired TCP/IP.
- Click on IPv4 and IPv6. On these two pages you will see all the current settings for the network card.
- Select IPv6 and click Manual to change this option to Manual.
- Complete the following fields: IP Address, Subnet Mask, Default Gateway, DNS Servers, and Host Name. Here is an example of what the fields should look like.
