If you see the Audio Servicer is Not Running error on your Windows 10. Don't worry. Because here you will learn possible solutions to fix it.

You see this error on your Window for several reasons, such as the outdated audio drivers, the driver being damaged, or not installing it correctly. With this error, you will not be able to hear the sound on your computer.
So, without wasting time, let's proceed with the possible fixing option.
Restarting the Audio Services
Whenever you see this error on your Windows 10, try to fix it by restarting the audio services. Here is how you can do it.
- Go to the Run dialogue box by pressing and holding the window key + R.
- In this Dialogue box, write services.msc and then press Enter. It will direct you to the services window
- Locate the Window Audio services in this windows menu and right-click on it. Find the properties option and click on it.
- In properties, search for startup type and set it to Automatic.
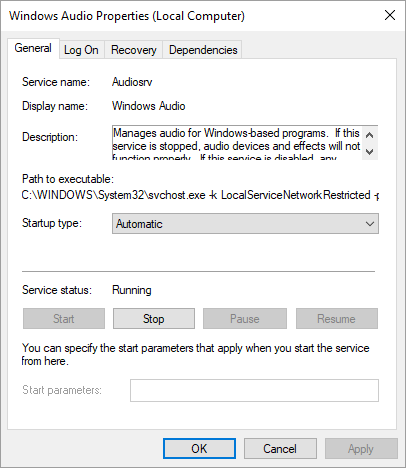
- Check the service status if it is running. It's ok. But if it is not running, then press the Start button. Apply changes and press Enter.
The same steps should be repeated for the Windows Audio Endpoint builder service. When you change both services to Automatic, reboot your computer and check the Audio. The Audio will start working on your windows.
Starting the other needed audio services
Some other services may be disabled because the Audio services are not responding error occurred on your Window.
- Again, Open the Run Dialogue box by pressing and holding the Window + R key on your keyboard.
- In the box, write services.msc and press Enter. You will open the Service Window.
- Locate the following services in this menu (DCOM Server Process Launcher, RPC Endpoint Mapper, Remote Procedure Call (RPC)
- And right-click on them one by one. Click on the properties option of each service.
For each of the following services, the startup type should be set to Automatic and ensure that the services status is Running. Apply the properties and click ok.
Reboot your computer and check the Audio sound.
Installing the Sound Drivers
When you reinstall the sound drivers, it can also help you fix this error
- Open up the Start menu by clicking on it. In the Start menu, click on Settings.
- In settings, navigate to System, then Advance System settings by scrolling down the right side menu.
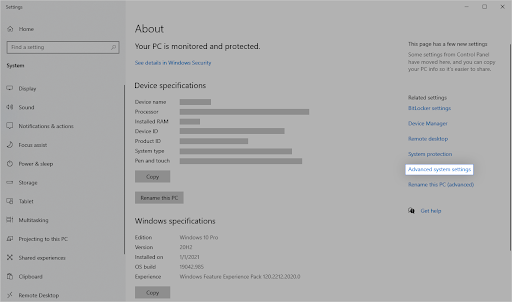
- In Advance System properties, click on the Hardware tab.
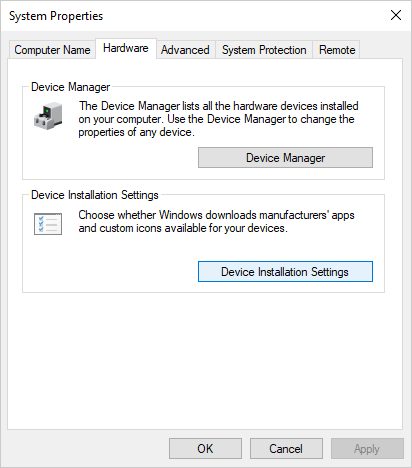
- Then you have to tap the Device installation settings.
- Choose the No option and hit Enter.
Using Command prompts
Note that the account with administrative permission will be required to perform this action on your Window.
- Open the taskbar and Write cmd.
- The command prompt option will be visible to you, right-click on it, and click on Run as Administrator.

- Click Yes when you are prompted with the User Account Control permission.
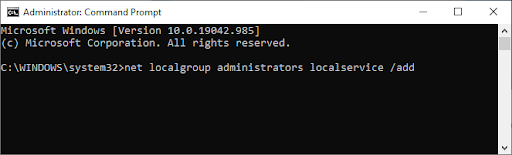
- Now, you will see the command prompt window. Write net localgroup administrators /add networkservice here and Enter it.
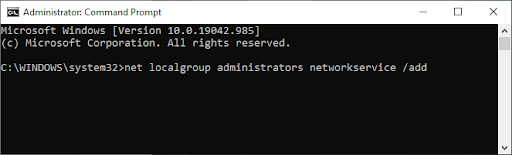
- Next, write net localgroup Administrators /add localservice and Enter it.
- Wait until the command is completed. Now, restart your computer.
Check the audio services if it is working.
Installation of High Definition Audio Device
High Audio Device installation also works for many users to solve the issue. Let's see how we can install it.
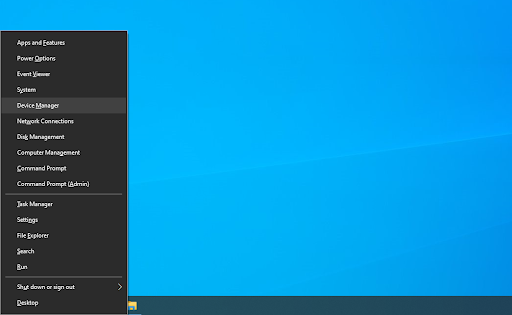
- Press and hold window key + X, and then from the quick start menu, select Device Manager.
- Move down to Sound, Video, and game controller and double click on it. Select the drive and right-click on it.
- Then click on the option of Update Driver. You will see the dialogue box having two options.
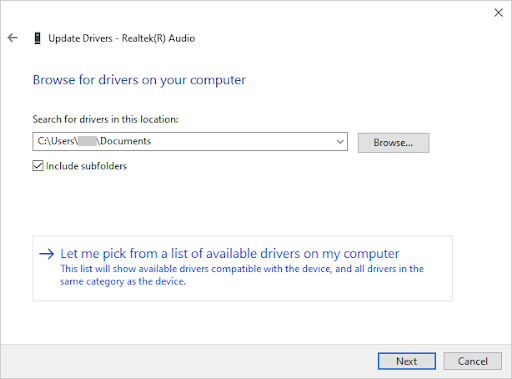
- Choose the option of browse my computer for driver software.
- After that, you will select. Let me pick from a list of available drivers on my computer.
- Search for the High Definition Audio device option in the search list and choose it.

- Then install it by carefully following the on-screen instructions.
After that, Restart your computer and check the audio services on your PC.
Restoring the Windows to the Last Restore Point
If nothing works for you, then you have to restore your Window. It can help you fix the error of Audio Services is not responding.
- Click on the start menu and write restore.
- Click on create a Restore Point. In system properties, click on system restore. It will open up the on your screen. Follow the instructions given by pressing next.
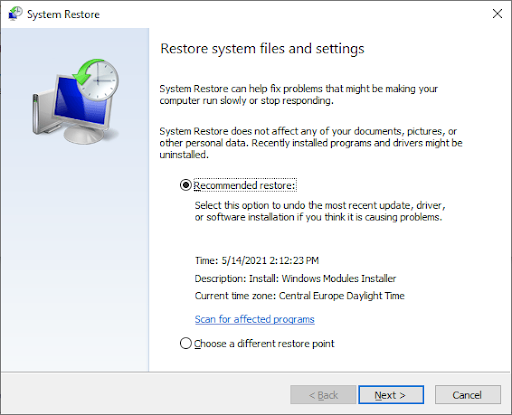
- Now choose the restore point from the given options. Then press Finish and wait for the Window to complete the process.
- After that, go to your Audio services and check Audio if it is fixed or still not working.
In last, you can Reinstall Windows 10 on your computer. It will help you to fix Audio services is not responding errors.
Conclusion
Here, all the possible solutions to resolve the error of Audio services is not responding are discussed. Try using these methods one by one on your Window, and you will see that one of these methods will help you resolve the issue.
