Have you ever wondered how you can record desktop or any screen within your Windows 10 PC? Many people wonder about this because sometimes it's a pain to keep taking screenshots of what you are doing on your laptop or computer. We're going to take a look at the best different way that you can use to record your desktop using Screencast in Windows 10.
So your boss asked you to record your process when doing the project. However, you found yourself in a pinch! You don’t know how to record your screen on desktop computers!
Thankfully, with screencast, you can record your desktop on Windows 10 without a problem.
What is Screencast?
Screencast is a process of video recording that takes place on your desktop. There are various software that can aid you in doing a screencast. In this tutorial, we will use Screencast-O-Matic which is a free software available to download on their website.
How to record on the desktop with Screencast-O-Matic?
The process consists of installing, recording, and saving the video file. Let’s get started!
Part 1: Installing the software
- Go to their official website at https://screencast-o-matic.com/ by entering the URL in the Address Bar on your browser.
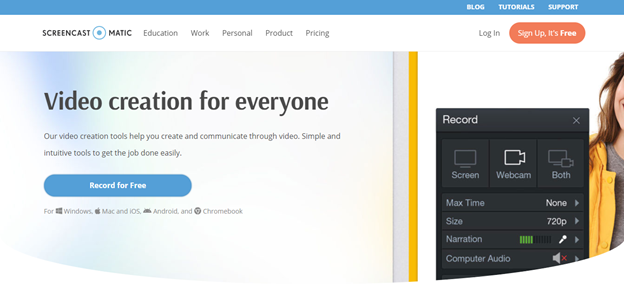 Click the Record For Free button on the homepage. The website will then bring you to the download page.
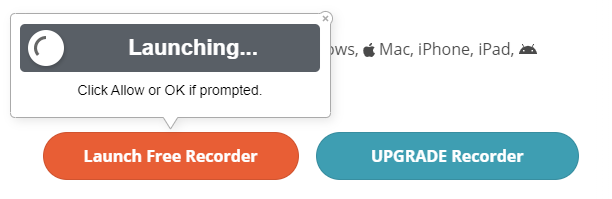
 - In this tutorial, we will use the free version of Screencast-O-Matic. Click the Launch Free Recorder button on the download page.
- After clicking the Launch Free Recorder button, it should indicate where the software is launching. Make sure to click Allow or OK when prompted by your browser.
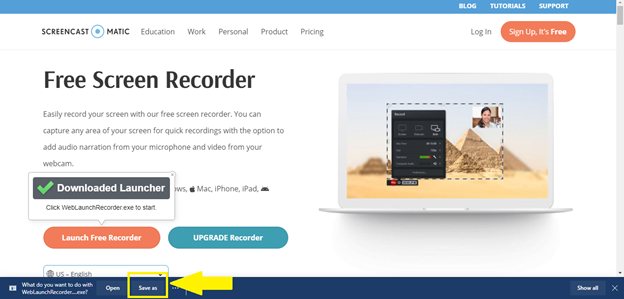
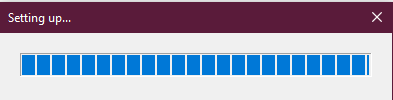
 It should look like this when the software is ready to download.
 - Your browser will ask you about what you want to do with the file. Click the Save As button as shown in the photo below.
- After downloading the software, click Open File.

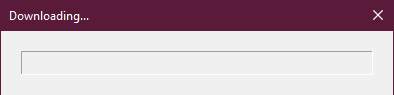
- A new window should appear on your desktop as the software starts to download. It should look like this photo below.
- After downloading and setting up, you can now use the Screencast-O-Matic software.
Part 2: Recording the desktop
- Let’s say that we will record the process of drawing in Microsoft Paint. Your screen should look like this after a successful download of the software.
There will be a dashed border that indicates the screen’s size that you want to record on your desktop.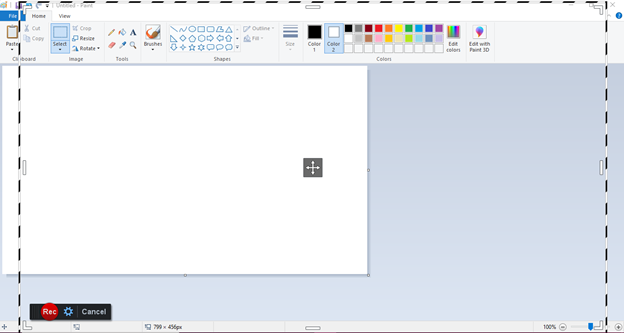
- You can resize your screen. To do this, locate the white lines in the dashed border. Click one of the white lines and drag your mouse to extend or shrink the dashed border in the size that you desire.
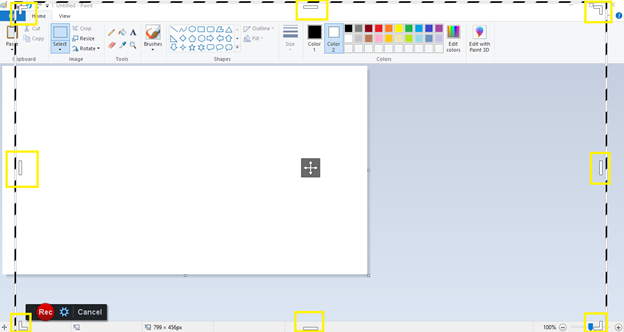 You can also change the screen’s size by clicking the settings beside the record button.
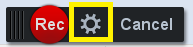 Click the size option in the settings and select the size that you want in recording your desktop.
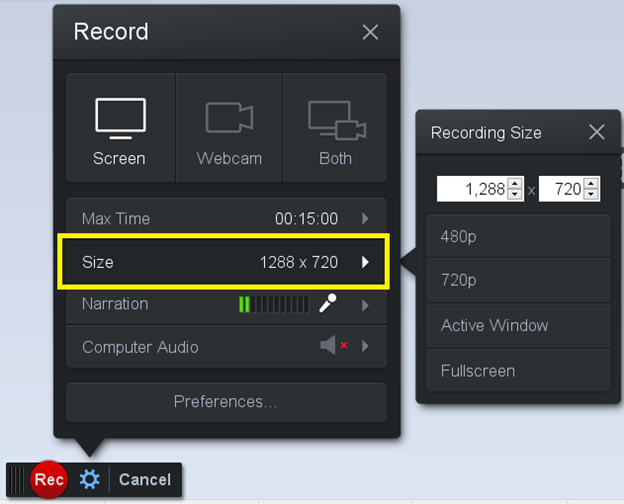
- In the settings, choose between the screen mode, webcam model, or both when recording your desktop. You can also edit the settings for the maximum time, narration, computer audio, and your preferences.
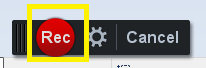
- Click the Rec button with a red circle to start recording.
Part 3: Saving your video
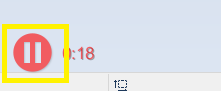
- To stop the recording, click the pause button which appears at the bottom-left of your screen. If you are in fullscreen mode, press the ESC button on your keyboard instead.
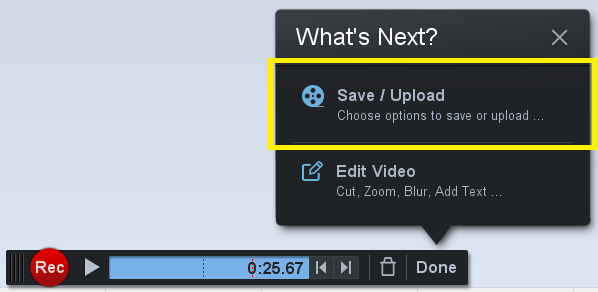
- Click Done to save the video.

- If you do not wish to make any edits, click the Save/Upload option. Otherwise, select Edit Video. In this tutorial, we are going to choose the Save/Upload option.
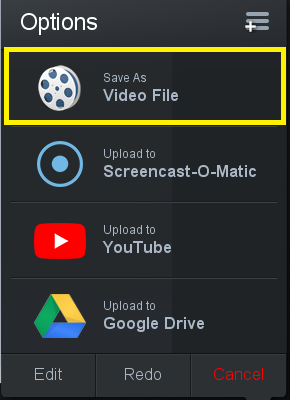
- There are four ways to save your video record. In this tutorial, we will save our recording on our desktop by clicking the Save as Video File option.
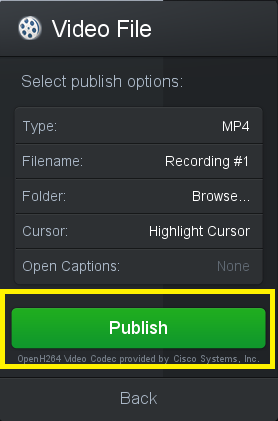
- Decide where you want to save your recording by clicking the folder option.

- Click the Publish button to save your file.
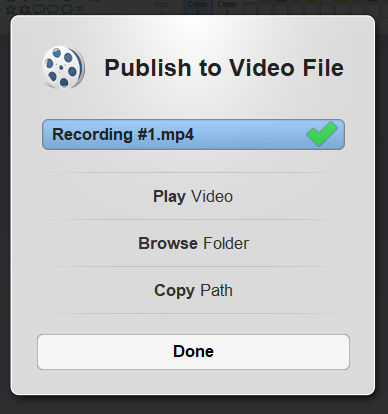
- A window like below should appear when Screencast-O-Matic processes your video recording like.
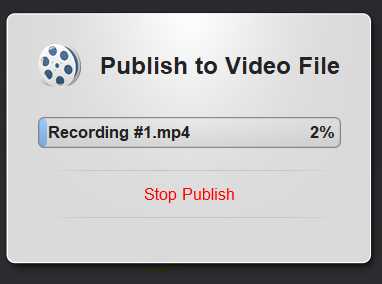
- Once published to the video file, click Done to finish the process. You can also play the video, browse the folder, or copy the path directly.
Congratulations!
Hopefully, with the steps mentioned above, you can now learn how to record your desktop using Screencast-O-Matic in Windows 10. Now, you wouldn’t have to worry about your boss asking you to record your desktop screen. Enjoy!
Summary: Record desktop using Screencast in Windows 10
- Screencast allows you to record your desktop in Windows 10.
- You can record your voice and the sound from your computer with the Screencast option.
- You have to have a microphone plugged into your computer.
- Click on the start button.
- Type "Windows Speech Recognition" into the search bar.
- Select "Windows Speech Recognition" from the list of results in the menu and click "Open."
- Hold down "Windows" key and then press "H" key from keyboard and then click on "Record screencast" option.
- Then, click on "Microphone" icon at top right corner of window, switch it to ON position to start recording audio commentary along with video recording.
