Did you know that it is possible to use Google Home and Google assistant on devices running Windows 10? To do this, all that you need is a device running Windows 10, then your favorite PC microphone.

Today’s advancement in technology has allowed assistance from devices in your daily life. Two products from Google that can help you in many things are Google Home and Google Assistant.
Google Home is a device that looks like speaker but functions more than just a speaker. Google Home can do many things, such as, informing you about your schedule, setting your alarm, or turning light on and off.
On the other hand, Google Assistant is AI-powered assistant software. This software is available on mobile phones and smart home devices. With Google Assistant you can easily do many tasks with your voice.
However, Google Home and Google Assistant are not available on Windows 10 yet. Thus, to get them on your computer, you need to do custom installation. Now, read the instructions below to get Google Home and Google Assistant on your computer.
How to Get Google Assistant on Windows 10?
As you will see below, the steps for getting Google Assistant on your computer are quite complicated. Therefore, it is a good idea for you to make a system restore point first before you begin. This is to prevent irreversible damage to your computer’s operating system.
Install Python on your computer
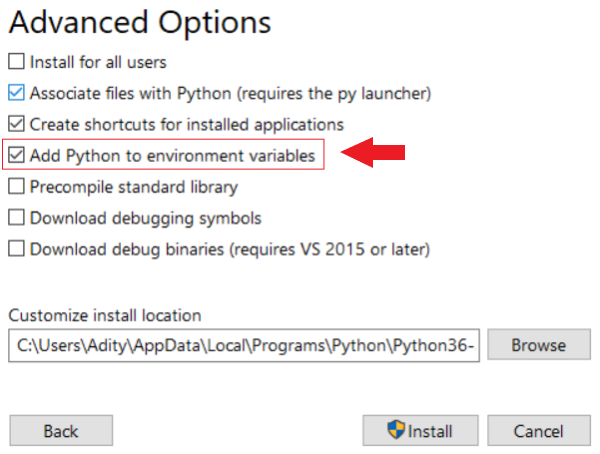
You can download Python from their official website. Just run the installer and make sure you put tick mark on “Add to environment variables” during the installation process.
2). Make a configuration for the Google Assistant Application Programming Interface (API)
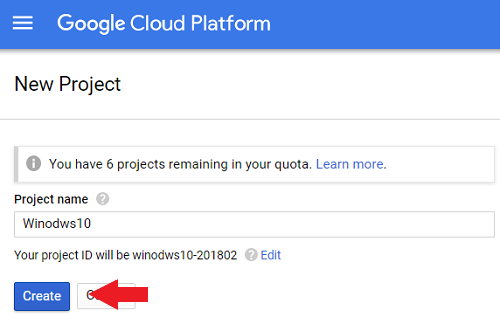
- Go to https://console.cloud.google.com/project and then select Create Project.
- Give your project API a unique name and then choose Create.
- Notice that there will be a spinning circle on the bell icon at the upper right corner of the screen. It means it’s processing your project. When it’s done creating your project, it will give you a notification. Click on the notification to access your project page.
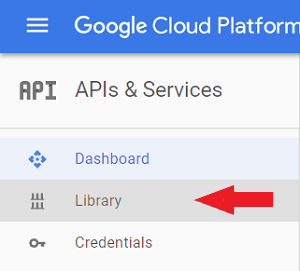
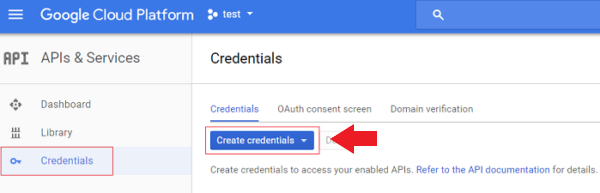
- Look for APIs and Services on the left part, and select Library.
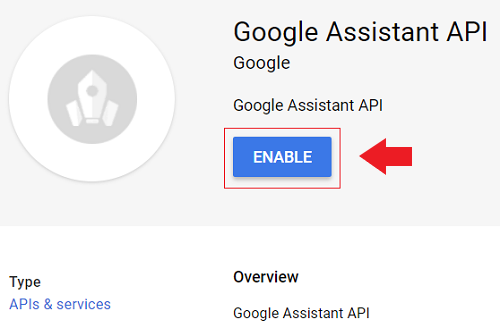
- Then, try to find Google Assistant by typing it on the search box.
- Click on the API you’ve just made and choose Enable.
- Now, on the left part of the screen, select Create Credentials. When asked about your preferences, select Help me choose option.
- Fill all the needed credentials, configure where you want to use this API configuration, and configure what can of access you will give.
- Next, Google will ask you to make OAuth 2.0 ID. Create a client ID then click Done.
- Download the credentials you made.

3). Make an prototype Python project
- Open Command Prompt.
- Put this command (replace “*” with space) and hit Enter:
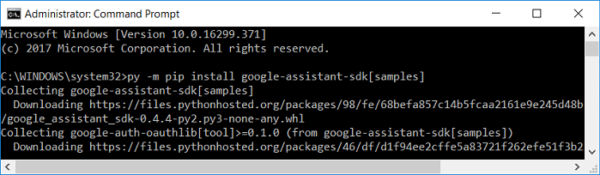 py*-m*pip*install*google-assistant-sdk[samples]
 - Put this command (replace “*” with space) and hit Enter again:
pip*install*--upgrade*google-auth-oauthlib[tool] - Locate the previously downloaded JSON file. Right click and select Properties. Copy the name and attach it to a Notepad file.
- Now go back to command prompt and enter this:
google-oauthlib-tool --client-secrets path/to/client_secret_XXXXX.json --scope https://www.googleapis.com/auth/assistant-sdk-prototype --save --headless
Don’t forget to replace the path with the path of your JSON file. - Next, you will get an URL as an output.
- Open your browser and go to this URL.
- Select the corresponding Google Account.
- Click Allow for all the permissions.
- You will be given a code as your access token.
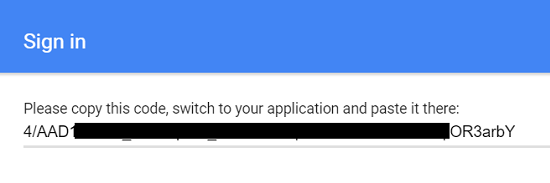
- Go back to command prompt and enter the code.
4). Test how does the Google Assistant works on your computer
- Open Command Prompt.
- Test whether Google Assistant can use the microphone by entering this command:
py -m googlesamples.assistant.grpc.audio_helpers - Register your computer by entering this command:
cd C:GoogleAssistant - Enter the command below and replace “project-id” with your project id:
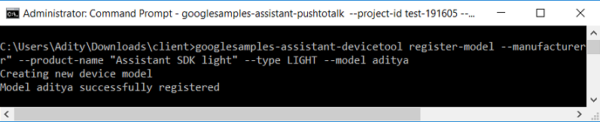 googlesamples-assistant-devicetool --project-id register-model --manufacturer "Assistant SDK developer" --product-name "Assistant SDK light" --type LIGHT --model "GA4W"
 - Now you have succeeded in installing Google Assistant on your Windows 10.
How to Get Google Home on Windows 10?
The easiest way to get Google Home on Windows 10 is by using an Android emulator. Here, we will use a free and reliable android emulator called “Bluestack”.
- Install Bluestack on your computer.
- When Bluestack is installed, you can open the Playstore in it and install Google Home.
- Now you can use Google Home on your computer by using Bluestack.
Summary: Run Google Home and Google Assistant in Windows 10
- Install Google Chrome.
- Download and extract Google Assistant SDK.
- Set up your Device Registration information.
- Activate the Google Assistant API.
- Download and install Python 3.6.2
- Add Python to Path environmental variables.
- Configure Windows Firewall.
- Start Google Assistant in Windows 10.
Conclusion
We hope that the above steps are useful to help you run Google Home and Google Assistant in Windows 10.
