Taking great screenshots is very important when using an operating system. These operations can help people share information and instructions or to share their work on the internet by posting them on social media accounts such as Facebook or Twitter. You can take a screenshot of any display window through a simple keyboard shortcut.
We can take screenshots on Windows by print snipping tool and print screen button. The screenshots taken by the print screen button are saved to the clipboard, which we later paste to Paints or any other program. We also can take screenshots of the entire screen or any part of the screen.
But that’s not all there is to it. Some users complain that these snapshots are of low quality and are hard to edit later. The screenshots they capture are usually blurry and not of the standard quality. They want to capture high-resolution screenshots. To capture the high-resolution screenshots, you will have to change some settings on your Windows.
This article will show you how to change settings to capture high-resolution screenshots in Windows 10 and Windows 11. First, we will discuss the steps involved in taking high-resolution screenshots in Windows 10.
High-resolution screenshots in Windows 10
If you are a Windows 10 user, follow the steps below.
- Open Settings on your computer and select System.
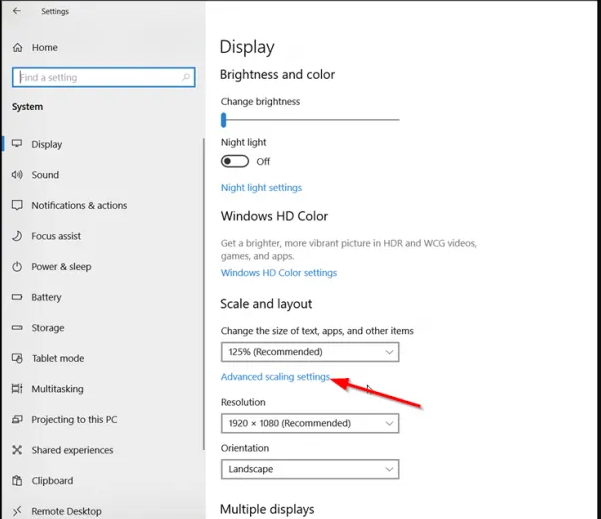
- Click on the Display option.
- Locate the Advance scaling settings under the Scale and Layout section. Click on it.
- You will see the toggle below “Let Windows try to fix apps, so they are not blurry.” Slide this toggle to turn it on.
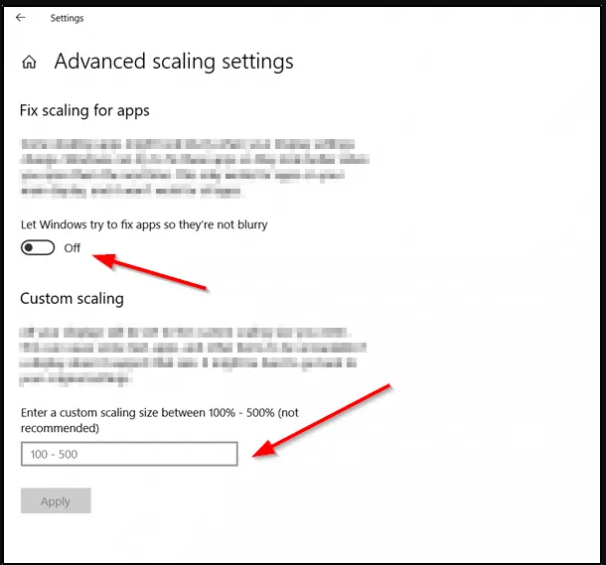
- Alternatively, you will find the customization option in the scaling size, which ranges between 100 and 500.
- Go to the bottom left side and click on Apply to make changes.
Now you have successfully made the changes, the screenshots you will capture on Windows 10 will be of a high resolution.
High-resolution screenshots in Windows 11
The Windows 11 users will follow these guidelines to capture the high-resolution screenshots.
- Go to the Settings of Windows 11 and click on System.
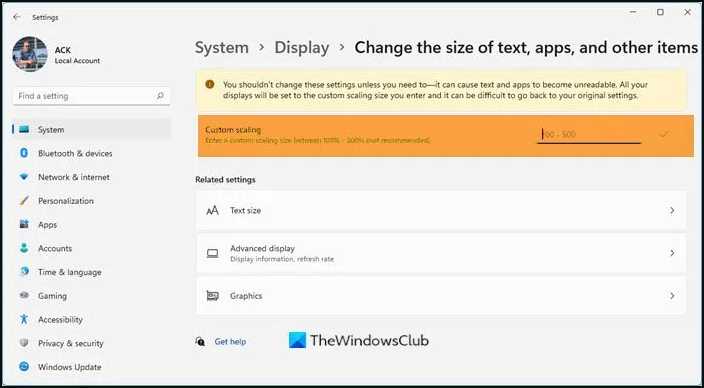
- Click on Display and choose Custom scaling.
- You can select the scaling size between 100 and 500.
You are now ready to capture the screenshots in high resolution. But if you have changed the custom scaling settings, it can cause some texts or items to be unreadable.
Installing GIMP
GIMP is a free photo editing software that lets you improve the quality of your captured screenshots.
- Download the Software from Gimp.org and install it on your Windows.
- Now, open the Software and select your file.
- Now select “Open” and choose the Screenshot.
- After that, click “Open” and choose the “Image” menu
- Check mark the box with the “Scale image” option.
- Locate the resolution section and make changes
- When changes are made, select “Scale,” then choose “File” and save it.
You are done with it.
Final words
Depending on your Windows version, follow the above methods, and it will help you to take high-resolution screenshots on Windows. After reading this article, you will get to know how it is no more a difficult task to do.
