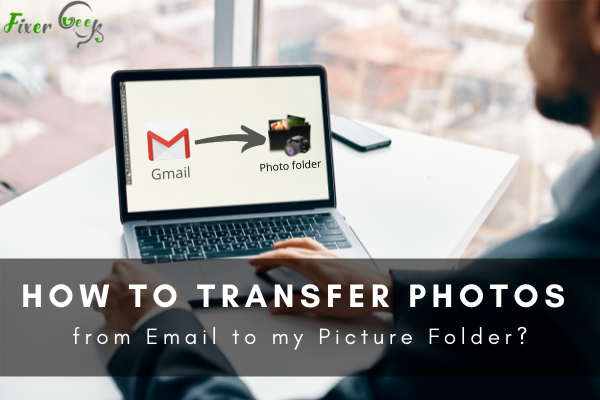
Photos stored in your email account is kind of out of sync with the rest of your life, at least when it comes to storage. It's handy to be able to send photos directly from your email account and attach them to documents, but they too must become part of a library that can be accessed offline. In today's advanced technology, this is pretty straightforward. However, you do need to know how to move photos from email accounts so you know where they are and can work with them on your PC.
There might be instances where you have to archive some of your memorable photos in a folder for future reference. It could either be to have something important to cherish and remember in the future or some form of evidence that might have its purposes later on.
In some cases, your close associates may have sent you some pictures via email. You might have also received several emails containing images that you want to transfer to your computer. The problem is, you don’t know how.
Fortunately, we got you covered! Below are the steps you should follow to transfer your photos from email to your Pictures folder with ease. Let’s get started.
Step 1
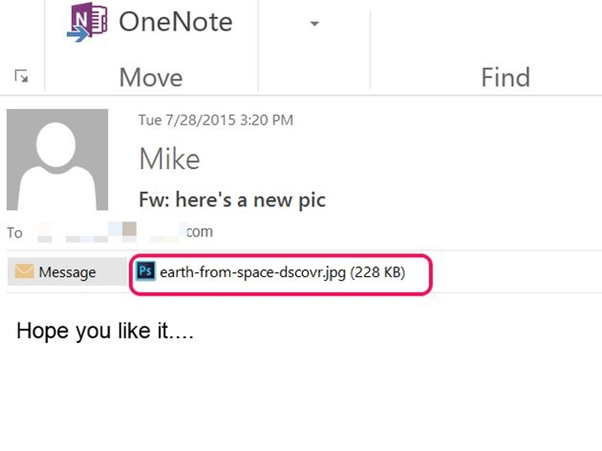
To start, you simply have to open your email. If you are using Gmail, simply open your browser and log in to your Gmail account. Look for that email that has the attached image you want to download. Open the message to see the attachment inside.
Step 2
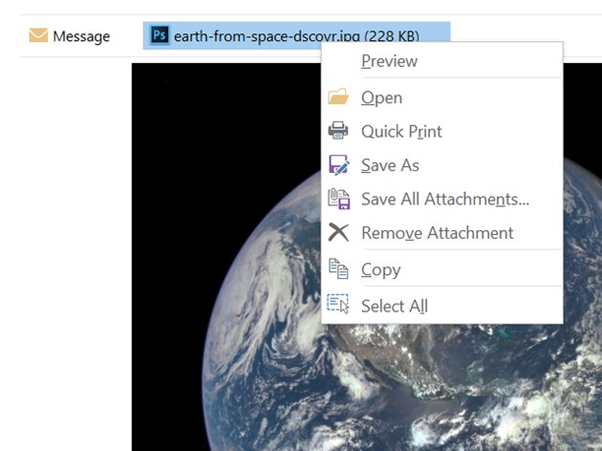
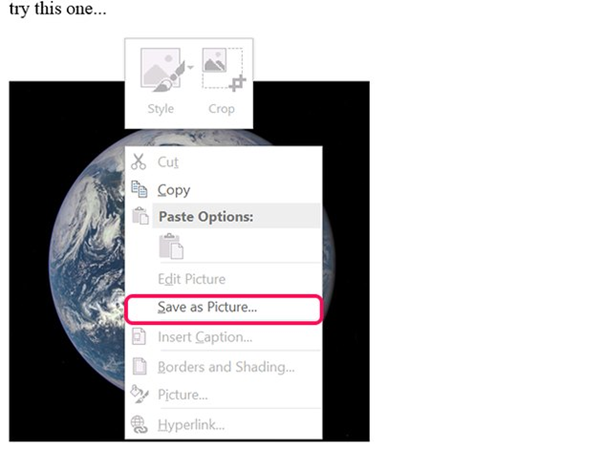
The next step is to click on the attachment to get a preview of what was sent. After that, you may now right-click on your file to get a list of various options which are shown in a drop-down list.
Choose the Save As option if you only want to download a single image. In case you have several attachments you want to be transferred, you need to choose the Save All attachments option instead.
Step 3
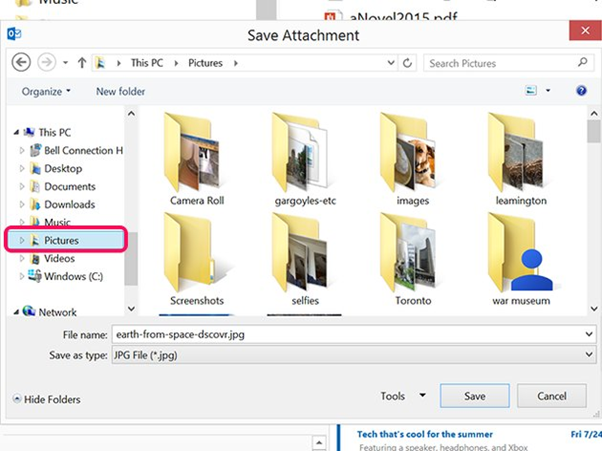
After choosing either the Save As or Save All Attachments option, you then have to choose which folder to save those files on your computer. Make sure you choose the Pictures folder.
There are also other subfolders that you can find within your Pictures folder. We highly recommend creating categories via separate folders so you can easily identify your files.
They could be folders for selfies, main albums, camera pictures, and random images, among others. Choose the specific subfolder where you want to save your pictures, then click Save at the bottom right.
There can also be instances wherein some images are embedded in your email. What we’re talking about are those images that come together with a text. There are no attachments when it comes to embedded images, but it’s still possible to transfer them to your computer. Just make sure to follow these steps:
- Locate your email which contains the images you want to save. Select the message and double click on it to open. Select the picture that you intend to save and right-click on it. You will then get a drop-down list with various options, some of which are grayed out. Choose the Save As option which will be active in your case.
- You will then get a File Save wizard which will give you access to several folders. From there, you will see your Pictures folder; proceed to open it. You will then find several subfolders depending on how you have categorized your pictures earlier. Choose the specific folder where you want to save your picture(s). Don’t forget to rename the image based on your preference then click on Save at the bottom right.

Summary: How to Transfer Photos from Email to My Pictures Folder?
- Open your email and look for the email that has the picture file as an attachment.
- Once you find the email, open it.The way in which you will save this file to your computer depends on what operating system your computer uses.
- If you are using Windows NT/2000/XP, click on the File menu and select Save As.
- You will see a box that shows where you can save the file on your computer.
- Navigate to My Documents, My Pictures, or wherever you want to save the file.
- Click Save and your picture should be saved to your computer.
- If you are using Windows 98/ME, go to the File menu again but this time select Save Attachments instead of Save As.
- A dialog box will open for you to select where you want to save it on your computer.
- Navigate to My Documents, My Pictures, or wherever you want this file to go and click OK.
- Transfer a picture from an email attachment to a folder on your computer so you can use it later.
Conclusion
As you can see, transferring your images from your email into your Pictures folder is actually pretty easy. It’s all a matter of opening your email, right clicking on your images, choosing the Save As option, then navigating to your Pictures folder.
We highly recommend creating subfolders for your pictures beforehand as this will allow you to easily find specific images you need. We hope the above steps we mentioned above can help you.
