- What causes the 0xC1900101 error code in Windows 11?
- How to fix Windows 11 update error 0xc1900101?
- Update Your Drivers
- Update BIOS
- Disable Your Antivirus Software
- Check Your Hardware
- Windows update troubleshooter
- Check your computer's memory
- Check for pending updates
- Clean up your hard drive
- Disable fast startup
- Create a new user account
- Restore your computer
- Clearing the Software Distribution folder
- net stop wuauserv
- Checking for pending updates
- Temporarily disable your firewall.
- Temporarily disable your antivirus software
- Perform a clean boot
- Reset the Windows Update Components
- Run the System File Checker tool
- sfc /scannow
- Perform a clean installation of Windows
- Run DISM Scan
- DISM.exe /Online /Cleanup-image /Restorehealth
- Disable your network adapters
- Unplug extra hardware
- Remove third-party security software
- Fix Windows 11 OS errors with Restore PC Repair Tool
- Reinstall Windows
- Contact Microsoft support
- Conclusion
Microsoft has released a new update for Windows 11. However, some users report seeing the error code 0xc1900101 when installing the Update. Several different errors can occur when trying to install Windows 11. One of the most common errors is 0xc1900101. This error typically occurs when there is a problem with the drivers or hardware on your computer. This article will show you how to fix the Windows 11 update error 0xc1900101.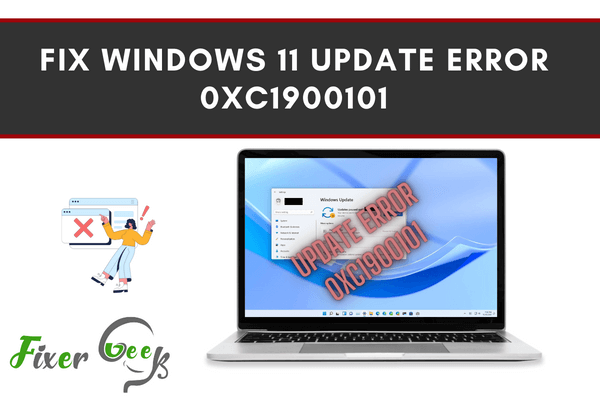
The 0xC1900101 error code is a general error code that indicates a problem with the drivers or hardware on your computer. This error can occur for several reasons. Typically, it occurs when there is a conflict between the drivers and the hardware. It can also occur if there is a problem with the driver's signature.
What causes the 0xC1900101 error code in Windows 11?
- Outdated BIOS.
- Faulty hardware.
- Incompatible drivers.
- Antivirus software is interfering with the installation process.
- Not enough free space on your hard drive.
- Corrupted system files.
- Pending Windows updates.
- Third-party software conflicts with the installation process.
How to fix Windows 11 update error 0xc1900101?
Windows 11 is the latest version of Microsoft Windows, and like all previous versions, it comes with its own set of updates and errors. One of these errors is the 0xc1900101 error, which can occur during installation. Fortunately, there are a few things you can do to fix this error.
Update Your Drivers
If you see the 0xc1900101 error, there's likely a problem with one of your drivers. To fix this, you'll need to update your drivers. The best way to do this is to use a driver updater tool. Driver updater tools scan your computer for outdated or corrupt drivers and automatically update them to the latest version.
Several different driver updater tools are available, but we recommend using Driver Easy. Driver Easy is a free tool that makes it easy to update your drivers. To use Driver Easy, just follow these steps:
- Download and install Driver Easy.
- Run Driver Easy and click the Scan Now button. Driver Easy will scan your computer for outdated or corrupt drivers.
- If any updates are available, click the Update Now button to install them. Alternatively, you can click the Update All button to automatically install all available updates.
- Restart your computer and try installing Windows 11 again.
Update BIOS
- Download the latest BIOS update for your computer from the manufacturer's website.
- Extract the ZIP file's contents to a folder on your hard drive.
- Open the folder and double-click the executable File to start the installation.
- Follow the prompts to complete the installation.
- Restart your computer: After you've updated your BIOS, it's important to restart your computer to ensure that all changes take effect. To do this, just go to Start > Shut down and select "Restart".
Disable Your Antivirus Software
Another potential cause of the 0xc1900101 error is antivirus software. Antivirus software can sometimes interfere with the Windows 11 installation process. To fix this, you'll need to temporarily disable your antivirus software.
Once you've disabled your antivirus software, try installing Windows 11 again. If the installation succeeds, you can re-enable your antivirus software.
Check Your Hardware
If you're still seeing the 0xc1900101 error, your hardware may have a problem. In particular, this error can occur if you have a faulty hard drive or memory.
We recommend using the Windows Memory Diagnostic tool to check for hardware problems. This tool checks your computer's memory for errors. To use the Windows Memory Diagnostic tool, just follow these steps:
- Type Memory into the Start menu and select Memory Diagnostics Tool.
- Click Restart now and check for the option of the problem.
- Your computer will restart and run a memory test. The test may take several minutes to complete.
- If any errors are found, they'll be displayed on-screen. You can then try replacing the affected hardware.
- Alternatively, you can use a tool like HD Tune Pro to test your hard drive for errors.
Windows update troubleshooter
This built-in tool in Windows can help identify and fix many common problems with updates. Go to Start > Settings > Update & Security > Troubleshoot, and then select Windows Update under Get up and running.
Check your computer's memory
As mentioned earlier, the 0xc1900101 error can sometimes be caused by a faulty hard drive or memory. We recommend using the Windows Memory Diagnostic tool to check for hardware problems. This tool checks your computer's memory for errors. To use the Windows Memory Diagnostic tool, just follow these steps:
- Type Memory into the Start menu and select Memory Diagnostics Tool.
- Click Restart now and check for the option of the problem.
- Your computer will restart and run a memory test. The test may take several minutes to complete.
- If any errors are found, they'll be displayed on-screen. You can then try replacing the affected hardware.
Alternatively, you can use a tool like HD Tune Pro to test your hard drive for errors.
Check for pending updates
It's also worth checking for any pending updates that haven't been installed yet. Go to Start > Settings > Update & Security > Windows Update, then click Check for updates. If any updates are available, they'll be downloaded and installed automatically.
Clean up your hard drive
Another potential cause of the 0xc1900101 error is a lack of storage space. You can use the Disk Cleanup tool to free up some space on your hard drive. Just type Disk Cleanup into the Start menu and select the program from the results.
Disable fast startup
Fast startup is a feature in Windows that can help your computer start up faster after a shutdown. However, it can also sometimes cause problems during installation. To disable fast startup, go to Start > Power > More power options, and then click Choose what the power buttons do.
Create a new user account
If you're still having trouble installing Windows 11, creating a new user account is worth trying. To do this, just go to Start > Settings > Accounts, then click Family & other users. Click Add someone else to this PC and follow the on-screen instructions.
Restore your computer
If you've tried all of the other solutions in this article and still see the 0xc1900101 error, you can try restoring your computer to an earlier point. To do this, just go to Start > Settings > Update & Security > Recovery, then click Get started under Reset this PC.
Clearing the Software Distribution folder
This folder is where Windows stores temporary files related to updates. If this folder is corrupted, it can cause problems with installing updates. To clear the folder, click Start > Run, type cmd, and press Enter. In the Command Prompt window, type the following command and press Enter:
net stop wuauserv
This will stop the Windows Update service. Next, open File Explorer and navigate to C:WindowsSoftwareDistribution. Delete everything in this folder, and then restart your computer. The Windows Update service will now be reset, and you should be able to install updates without any problems.
Checking for pending updates
It's also worth checking for any pending updates that haven't been installed yet. Go to Start > Settings > Update & Security > Windows Update, then click Check for updates. If any updates are available, they'll be downloaded and installed automatically.
Temporarily disable your firewall.
If you're having trouble installing updates, your firewall may be blocking them. To temporarily disable your firewall, go to Start > Control Panel > System and Security > Windows Firewall. Click the Turn Windows Firewall on or off option, and then select the Off option for private and public networks. Once you've done this, try installing updates again.
Temporarily disable your antivirus software
Antivirus software can also sometimes block updates from being installed. To temporarily disable your antivirus software, right-click the icon in your taskbar and select Disable. Once you've done this, try installing updates again.
Perform a clean boot
A clean boot is a way of starting Windows with only the minimum number of programs and services. This can help to eliminate software conflicts that might be causing problems with installing updates. To do a clean boot, go to Start > Run, type msconfig, and then press Enter. In the System Configuration window, click the General tab, select Selective startup, and then clear the Load startup items checkbox.
Reset the Windows Update Components
The Windows Update Components include files responsible for downloading and installing updates. If these files are corrupted, it can cause problems with installing updates. To reset the Windows Update Components, go to Start > Run, type cmd, and then press Enter. In the Command Prompt window, type the following commands and press Enter after each one:
- net stop wuauserv
- net stop bits
- net stop cryptsvc
Run the System File Checker tool
The System File Checker tool is a built-in utility that can scan for and replace corrupted system files. To run the System File Checker tool, go to Start > Run, type cmd, and then press Enter. In the Command Prompt window, type the following command and press Enter:
sfc /scannow
This will scan your computer for corrupted files and replace them if possible.
Perform a clean installation of Windows
If you're still having trouble installing updates, you might need to perform a clean installation of Windows. This will delete all of your files, so make sure to back up anything important before doing this. To do a clean installation of Windows, just go to Start > Settings > Update & Security > Recovery, and then select the Get started option under Reset this PC.
Run DISM Scan
You can try running the DISM scan if you're still having trouble. This utility can fix problems with your computer's Windows Update components. To run the DISM scan, go to Start > Run, type cmd, and then press Enter. In the Command Prompt window, type the following command and press Enter:
DISM.exe /Online /Cleanup-image /Restorehealth
This will scan your computer for issues and try to fix them automatically.
Disable your network adapters
You can try disabling your network adapters if you're still having trouble. This will prevent your computer from connecting to the internet, so do this only as a last resort. Go to Start > Control Panel > Network and Sharing Center to disable your network adapters. Click the Change adapter settings option on the left-hand side. Right-click each of your adapters and select Disable. Once you've done this, try installing updates again.
Unplug extra hardware
If you're still having trouble, you can try unplugging any extra hardware from your computer. This includes things like USB devices, printers, and scanners. Once you've unplugged all the extra hardware, try installing updates again.
Remove third-party security software
If you're still having trouble, you can try removing any third-party security software from your computer. This includes things like antivirus and antimalware programs. Just go to Start > Control Panel > Programs and Features to remove these programs. From here, find the program that you want to remove and click the Uninstall button. Once you've uninstalled the third-party security software, try installing updates again.
Fix Windows 11 OS errors with Restore PC Repair Tool
You can try using the Restore PC Repair Tool if you still have trouble. This utility will scan your computer for errors and fix them automatically. Download and install the program from Restoro's website to use the Restore PC Repair Tool. Once the program is installed, run it and click the Scan button. Once the Scan is complete, click the Fix button to fix any errors that were found.
Reinstall Windows
If you're still having trouble, you can try reinstalling Windows. This will erase all of the files on your computer and install a fresh copy of Windows. Just insert your Windows installation media and boot from it to reinstall Windows. From here, follow the prompts to reinstall Windows.
Contact Microsoft support
If you've tried all of the above solutions and still can't install updates, you might need to contact Microsoft support for further assistance.
These are some of the possible solutions to your problem. If you have any other questions, feel free to ask in the comments below.
Conclusion
If you're having trouble installing the latest Windows 10 update because of Error 0xc1900101, don't worry—you're not alone. This is a common problem, but you can try a few things to fix it. Hopefully, one of the above methods will work for you, and you'll be able to successfully install the latest Windows 11 update without any issues!
