Before we discuss how to eject iPhone from Mac, you need to know that by simply connecting your iPhone to your mac via a USB cable, there are several things you can do with it. You can use it to sync the songs and videos from your mac to your iPhone. Any new contacts you add on iTunes (on your Mac) automatically get added on your iPhone. If you have bought a lot of music on iTunes, syncing music and videos is a great way to transfer them to your iPhone for further use. Similarly, if you have some interest in taking photos and videos, connecting your iPhone with a Mac will let you use the iPhoto app and iMovie app so that you can edit and organize the images and videos respectively.
Simply unplugging or disconnecting the iPhone from your Mac is not a good idea. If you do so, the data on the iPhone or Mac might corrupt, or sometimes in worst cases, your iPhone can become inoperable. Before ejecting the iPhone from Mac, make sure that any process happening between your iPhone and Mac is completed. After that, follow the steps we have written down to properly eject the iPhone from Mac.
Eject iPhone From Mac Using iTunes Icon
Go through the below-stated steps to make sure that you have ejected your iPhone from Mac facing no complications.
- Launch the iTunes on your Mac by clicking on its Dock icon and head back to the desktop of the Mac.
- Right Click on the iTunes desktop icon on your Mac.
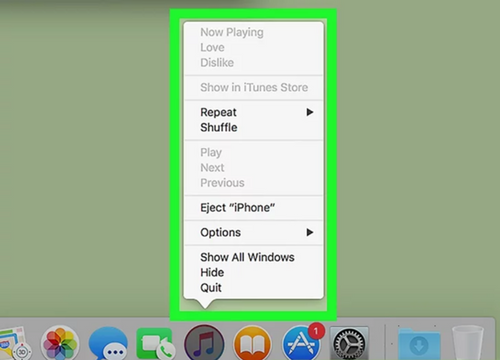
- From the list of options, choose the Eject iPhone option.
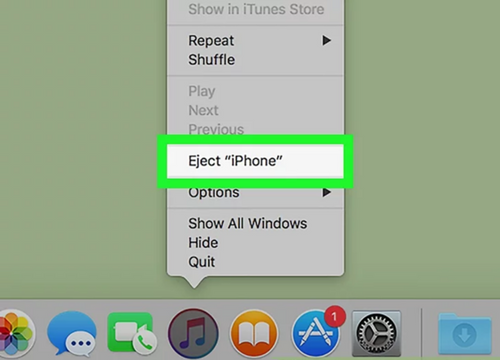
- Now you will see the name of your iPhone. Click on it to eject the iPhone from Mac.
- Now you can simply unplug the iPhone from Mac.
Eject iPhone From Mac Using the iTunes Panel
This is another effective way to safely eject the iPhone from Mac. All you need is to follow a couple of the steps written down.
- You need to click on the iTunes icon to launch it on your Mac.
- On the iTunes screen you will see an iPhone icon located beneath the volume slider.
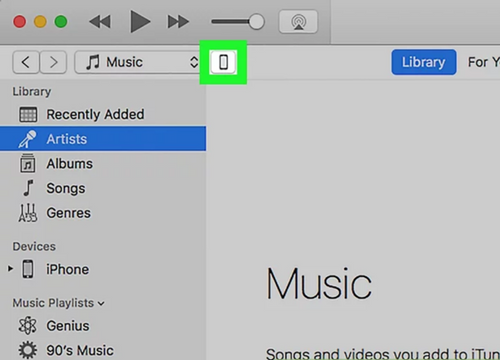
- This will lead you to the Summary panel of iTunes.
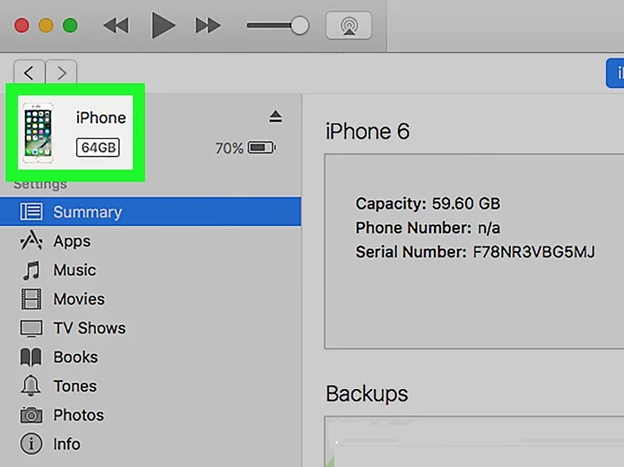
- You will see an upward icon next to your iPhone name. Click on this icon to safely eject the iPhone from Mac.
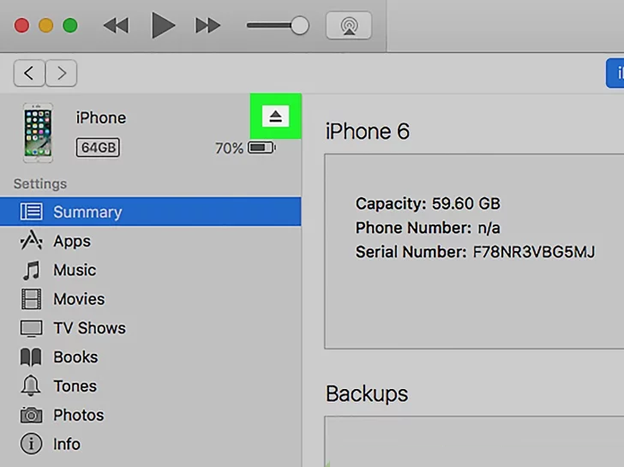
- Now you are safe to pull out your USB cable.
Eject iPhone From Mac Using Finder
If you have connected your iPhone with your Mac as a drive, then this is another effective method you can give thought to eject iPhone from Mac. To assure a safe ejection, follow the below steps exactly as we have mentioned them.
- Head to the Mac Finder and press Command+Shift+G on your keyboard to invoke Go to folder.
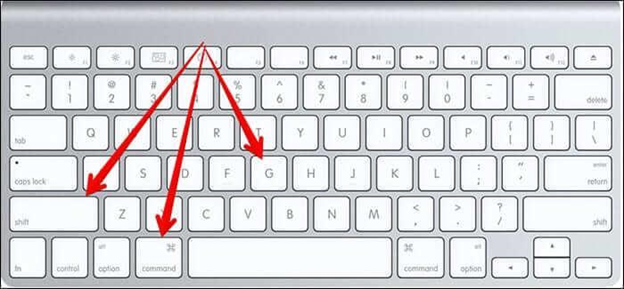
- Now enter Volumes in the Go to Folder search box. This will lead you to the Volumes folder on your Mac.
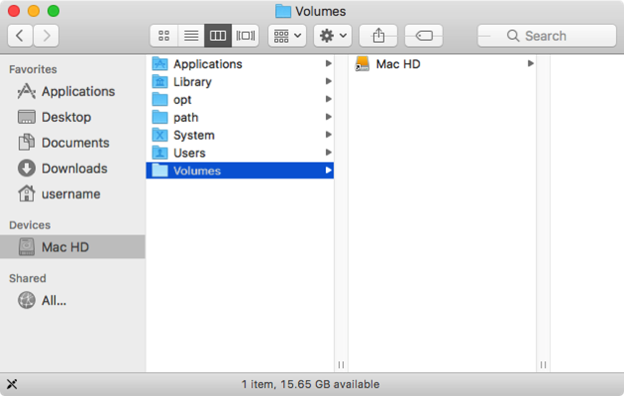
- Here you will be able to see your iPhone name as an attached device. Remember that this option works only if your iPhone is connected with your Mac as a drive.
- If your iPhone appears in Volumes, then press Command+E on your keyboard to eject the iPhone from the Mac.
I hope by applying any of the above methods, you will be able to eject your iPhone safely from Mac. You are free to choose any of the methods that seem preferable to you. I suggest you follow these steps carefully and before pulling the USB cable from your Mac to ensure that your iPhone is safely ejected to prevent any complications. Hopefully, there is no question you have right now regarding how to eject the iPhone from Mac.
Summary: Eject iPhone From Mac
- One-Click Eject iPhone From Mac.
- Drag and Drop Eject iPhone From Mac.
- Using a Terminal Command to Eject iPhone From Mac.
- A Quick Feature to Disconnect and Eject All Devices From Your Mac at Once!