Are you one of the many people with the infected computers? This worm is the most dangerous ever. It was originally thought to have been written by a group whose goal was to cause enormous losses on stock markets by manipulating shares. The same group has already attacked Yahoo and eBay, bringing them down for a few hours.

MyDoom is a malicious program that carries out distributed denial-of-service (DDoS) attacks. This self-sufficient computer worm poses a threat to the device integrity of the operating system.
This worm is distributed through junk email and is believed to have been originally programmed in Russia. This worm can also penetrate your PC in a file with CMD extension. It spreads quickly by sending a version of itself to the email contacts of the victim.
For this reason, it is important to get rid of this worm from your computer as soon as possible. Since this worm is a DDoS attack, it cannot be stopped by blocking one source. Luckily, there are several ways that you can remove it as we will see in this article.
Method 1: Update Your Antivirus Program
A quick way to get rid of MyDoom worm is by updating your antivirus program. Most of the antivirus programs have been updated to detect this worm and eliminate it. A good antivirus program will protect your computer against malware attacks and remove any active infections.
Method 2: Using Autoruns Application
Malware removal can be a bit complicated and it is best to automatic removal by antivirus or anti-malware programs. However, if you wish to still do this manually, you can follow the steps below:
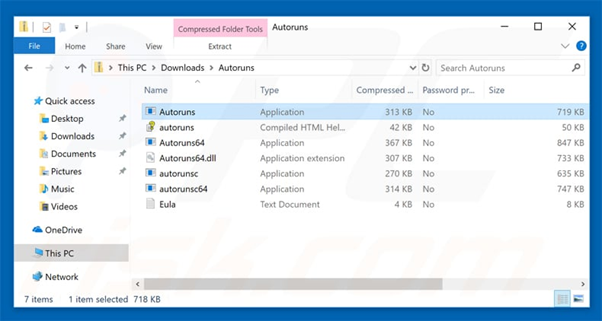
Step 1: Download Autoruns program, which shows the location of file system, auto-start applications, and Registry.
Step 2: After downloading the program, restart your computer using “Safe Mode”.
Windows XP and Windows 7 users can do this by following the steps below:
- Click Start and then select Shut Down and click Restart. Then click Ok.
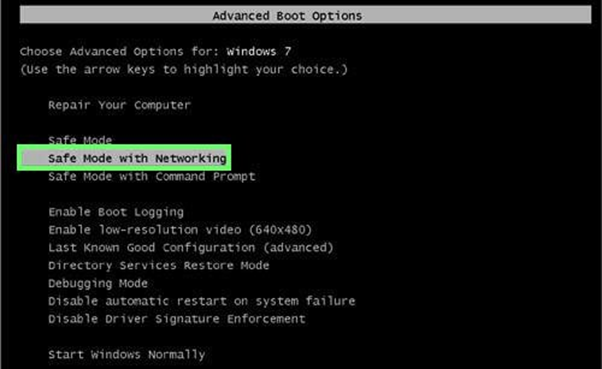
- As your computer starts, press the F8 key several times until the Windows Advanced Option Menu appears.
- From the list, scroll down to Safe Mode with Networking and click on it.
 If you are using Windows 8, here is how to restart your computer with Safe Mode.
 - On the Start screen of Windows 8, type Advanced.
- Select Settings and click on the Advanced Startup option.
- Click on the Restart Now button. This will prompt your PC to restart in the Advanced Startup Options menu.
- Next, click on the Troubleshoot button and then select the Advanced options button.
- Click the Startup settings and the click on the Restart button.
- Your computer will restart into the Startup Settings screen where you will see several options to choose from.
- To select the Safe Mode with Networking option, press F5 on your keyboard.
For Windows 10 Users:
- Click on the Windows button and tap on the Power icon.
- Click on the Restart option and hold the Shift button on your keyboard at the same time.
- The Choose an option window will appear. From it, click on Troubleshoot and choose Advanced Options.
- Then, click on Startup Settings and then on the Restart button.
- Your computer will restart in the Startup Settings window.
- Click on F5 on your keyboard to open your PC in safe mode with networking.
Step 3: Get the downloaded archive. Then, run the Autoruns.exe file.
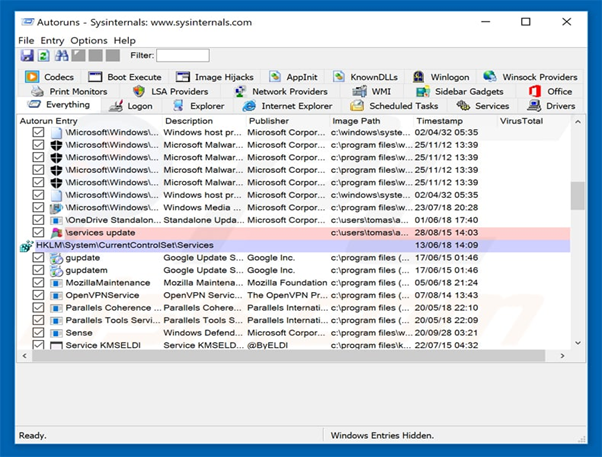
Step 4: When the Autoruns application opens, locate Options at the top and click on it. Then, uncheck the boxes next to “Hide Windows Entries” and “Hide Empty Locations” options. Then, click on the Refresh icon.

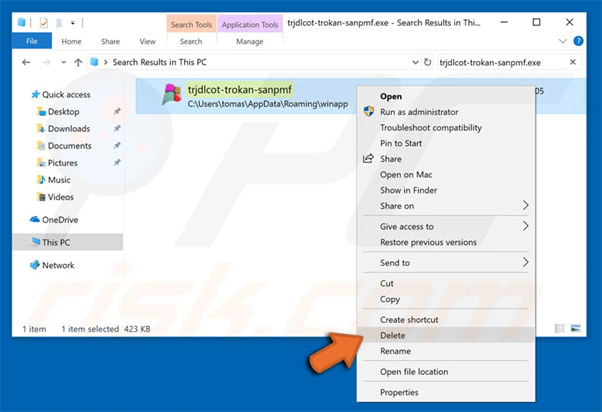
Step 5: The Autoruns application will provide a list of the files. Go through the list and locate the malware that you want to remove. Once you find it, right-click on it and select Delete. This will ensure that the malware does not automatically run during the next system startup.
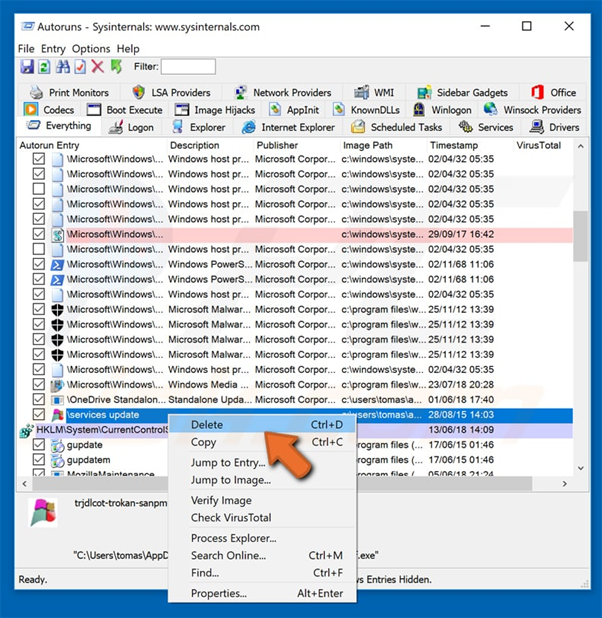
A good tip is to note down the name and full path of the file to avoid deleting system files. This also helps to identify malware since some may hide in Windows process names.
Step 6: After removing the malware, enable hidden files and folders. Then, search for the name of malware on your computer. If the malware appears, right-click on it and select Delete.
Step 7: Lastly, reboot your computer in normal mode.
Summary: Get rid of MyDoom worm
- Disable your computer's file-sharing feature if you have broadband Internet access.
- Open My Computer, and then open your Local Disk (C:) drive.
- On the Tools menu, click Folder Options, and then click the View tab.
- Under Hidden files and folders, click Show hidden files and folders.
- Double-click Program Files.
- Open the folder that corresponds to your version of Windows (for example, WinNT for Windows NT 4.0 or Win98 for Windows 98).
- Open the System32 folder.
- Double-click the Drivers folder.
- Find the file named winsock2 in the Drivers folder just opened. If you find that file, right-click it, and then click Rename. Rename this file to winsock2old , and then press ENTER to save your changes.
- Restart your computer to apply changes made to hid files and folders option on the view tab of folder options properties dialog box.
Conclusion
If MyDoom worm gets to your computer, use antivirus software to automatically remove it. However, if you want to remove it manually, follow the steps above.
Also, ensure that you take measures to protect your computer from this malware. Avoid opening suspicious files and always install the latest updates for your operating system
