If you have decided to set a password for your zip folder, then you are already on the way to being a smart, safe user. A zip folder is a folder that provides protection, security and privacy. It works as a file storage system and provides users' vital information. The information stored in it can be sensitive in nature like bank account details, passwords or other personal data. So, finding out how to set a password for a zip folder in windows is very important.
Whenever you need to send out several files, it’s always a good idea to compress them into zip files. Not only will a smaller file size save on storage space, but it will also drastically reduce the necessary transmission time if you’re sending them to another user.
However, just because it’s in a zip folder doesn’t mean your files are secure. Because of this, it’s always a good idea to encrypt it with a password, especially before emailing it to your intended recipient. This ensures that only those to whom you give the password can access what’s inside.
So, how do you set a password for zip folders, particularly on Windows PCs? Check out this detailed guide to learn more.
Setting a Password for a Zip Folder on a Windows PC
Protecting your zip folders with a password is easy enough to do if you have a Windows PC. This is particularly true if your PC is running on Windows 10. However, you can also encrypt them using a third-party tool, such as Folder Lock.
With that said, here are the two ways to password-protect your zip folders on a Windows PC.
Method 1: Password Protection Using System Resources
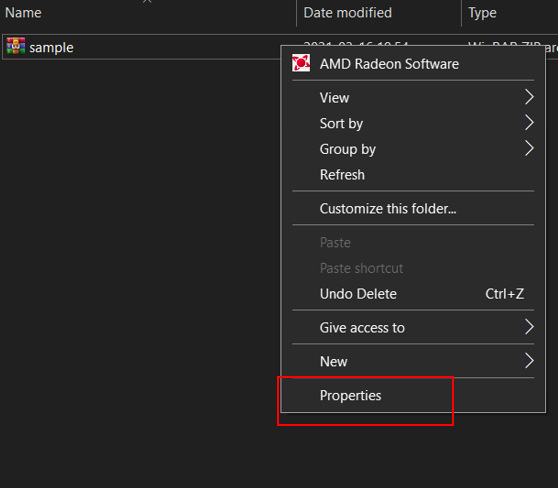
- First, locate the folder you want to lock with a password, ensuring that all the necessary files are inside.
- Once you confirm everything is inside, right-click on the folder and click on “Properties.”
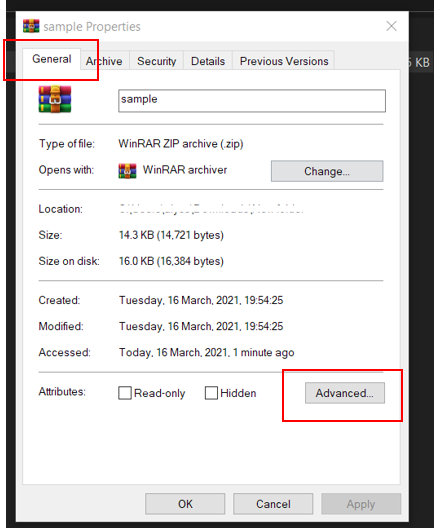
- Doing so will open the Properties window, in which you’ll find several tabs. Go to the “General” tab and locate the “Advanced” option.
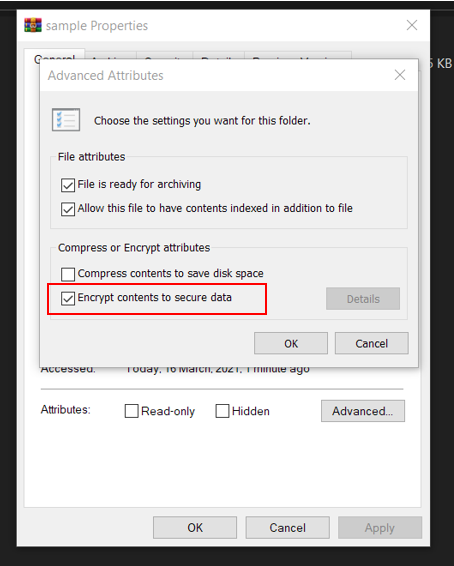
- In the Advanced options menu, tick the box next to “Encrypt Contents to Secure Data” and select “OK.”
- This will bring you back to the Properties folder. To apply the changes, click on “Apply,” then select the option, “Encrypt the file and its parent folder.”
- Click “OK.”
After following these steps, you might be wondering why you can still access it without a password. This is because you still have access while you’re logged in to your Windows user account.
Once others try to access it, they will be locked out. They can only access the file with the key generated by Windows stored in your user account.
Method 2: Password Protection Using Third-Party Software
Another way you can set a password for your zip folders is by using third-party software. An excellent example of this is Folder Lock.
Folder Lock is a convenient tool for locking not just zip folders but also any file or folder on your computer. With this program, you can set a password for your zip folders to ensure your privacy and security.
Once you have installed Folder Lock on your PC, you can now set a password for your folders. To do this, you need to follow the next steps.
- Open the program and select the “Lock Folders” option.
- Click on “Add Items to Lock” and select the “Add Folder(s)” option in the drop-down menu.
- Once you have added the folder, you’ll see that your file is locked with the password you set, indicated by the green lock icon on the right.
To access the locked zip folders, you just need to enter the master password, and you’ll have access to your locked files again.
Final Thoughts
Setting a password for your zip folders on your Windows PC is easy enough to do, especially if you have third-party software such as Folder Lock.
While you can always do it manually, programs like Folder Lock give you an extra layer of protection, not just for zip folders but also for other files on your PC as well.
Summary: Set a Password for a Zip Folder in Windows
- Open the folder containing the zip file.
- Right-click the zip file you want to password protect.
- Select "Add to archive" from the menu.
- Enter a new name for the password-protected zip file in the "Archive name" field.
- Click the "Set password" checkbox.
- Enter a password and confirm it.
