Are you frustrated with time-lapse videos on your iPhone or iPad? If so, I have good news for you: there is an easy way to make time-lapse slow down.Time-lapse photography is a technique that takes a series of images at short intervals, and combines them into a video to show either rapid or slower movements as in processes that would normally take a long time to happen. It also works great for capturing the growth of anything from plants (it's perfect for gardeners) to growing babies. On the other hand, it's not so pleasant when it's used on the videos you recorded with your iPhone. Every time-lapse app for iPhone seems to make your videos excessively quick. Some let you choose the playback speed but don't let you slow it down any further than by half.
Time-lapse is one of the unique types of videography or photography option for cinematic view and nature documentary. You can get a good time-lapse if your subject moves slowly. With the time-lapse, you can easily broadcast movement that hardly sees with an empty eye. iPhone makes it very easy to shoot time-lapse. In the iPhone camera app, there are built-in settings for time-lapse. That’s why anyone any time can take time-lapse.
How to take a Time Lapse on iPhone?
Taking time lapse on iPhone is quite simple to use. Follow the step to take a decent time-lapse:
- Open or unlock your phone.
- Go to the settings. Switch on the airplane mode and switch off the notification. It will forbid any kind of disturbance while shooting.
- To stabilize your phone set the phone on the tripod. All of the variants of the tripod are suitable for this job.
- Open the camera app and go to the time-lapse option.
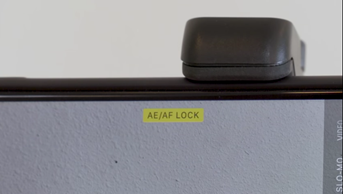
- Set the camera for what you want to shot. Now hold the focus option. It will lock your AE/AF. This option will forbid your camera from auto exposure and autofocus.
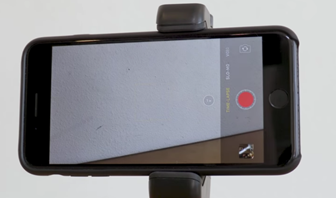
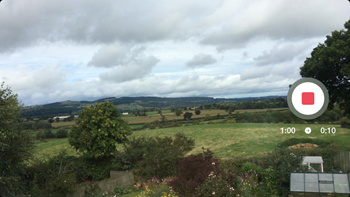
- Click on the red shooting option. It will start your shooting.
- Time-lapse shooting will not stop shooting automatically. You have to stop it manually. That’s why after finish the shooting video you have to click again on the red shooting option. It will stop your video.
That’s how you can take a proper time-lapse video on your iPhone. You can edit your video as your desire and make your time-lapse video more beautiful and enjoyable.
The process to slow down time-lapse on iPhone
The iPhone camera app is a simple use app. This app does not have many customizable options. For this, while taking time-lapse video, you cannot slow down time-lapse. You have to use a third-party app to slow down time-lapse.
Hyper lapse from Instagram app one of the best app for taking time-lapse. Hyper lapse also a user-friendly app. With this app, taking time-lapse will be much easier. You also edit the video after shooting time-lapse by using Hyper lapse.
Follow the process to slow down time-lapse on iPhone
- Open or unlock your phone.
- Open App Store and search Hyper lapse from Instagram or click here.
- Install Hype lapse from Instagram.
- Go to the settings. Switch on the airplane mode and switch off the notification. It will forbid any kind of disturbance while shooting.
- To stabilize your phone set the phone on the tripod. All of the variants of the tripod are suitable for this job.
- Open Hyper lapse from the Instagram app.
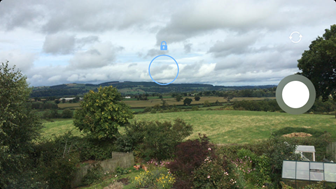
- Set the camera for what you want to shot. Now hold the focus option. It will lock your AE/AF. This option will forbid your camera from auto exposure and autofocus. Click on the white circle shooting option.
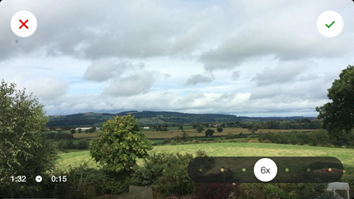
- Time-lapse shooting will not stop shooting automatically. You have to stop it manually. That’s why after finish the shooting video you have to click the top right green tick option. It will stop shooting and save your video. If you want to cancel the shooting video just click the top-left red cross option.
- You can easily control the speed of the shooting after stop shooting video. Bottom right of the display, you will see a slider. You can use this slider to control the speed of the shooting. Slide right to increase speed and slide left to decrease speed.
That’s how you can easily slow down time-lapse on iPhone. After shooting time-lapse, you can easily share video from the Hyper lapse app to social media.
Summary: Slow down time-lapse on iPhone
- Choose a subject and setting.
- Open the Camera app to Time-lapse mode.
- Frame your shot.
- Press the Record button (circle) to start recording time-lapse mode.
- Press the Record button (circle) to stop recording.
- Tap Edit in the upper right corner of the screen.
- Tap Create Slow-mo at the bottom of the screen.
- Set the slo-mo frame rate and duration by dragging the bars.
