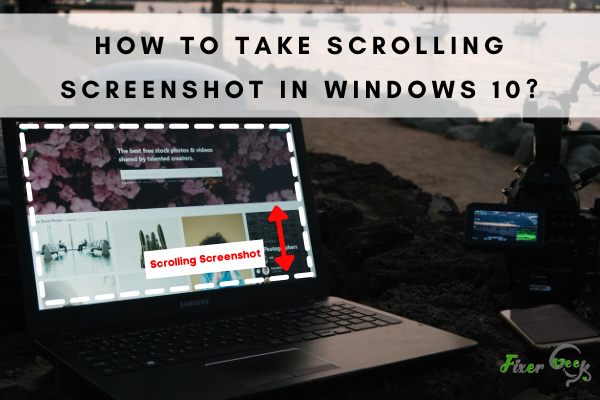
When we are using a mobile phone or tablet, from time to time, we want to capture the screen. We can easily capture the screen in our device. But this thing is not applicable if we are using windows 10 pc. Here, I will give you detailed information on How to take scrolling screenshot in Windows 10? Just follow this article in order to solve your all problems related to How to Take Scrolling Screenshot in Windows 10?
There are several tools that allow you to capture screenshots on Windows 10. You can use the keyboard shortcut or the snipping tool. However, it is a different story if you want to make a full-page screenshot of a long document or website.
The pre-existing tools on Windows 10 only allow you to capture what is visible on the screen. Luckily, several third-party tools will enable you to take scrolling screenshots conveniently.
Tools for Scrolling Screenshots
Here are 2 free tools that will enable you to take scrolling screenshots:
Pick Pick
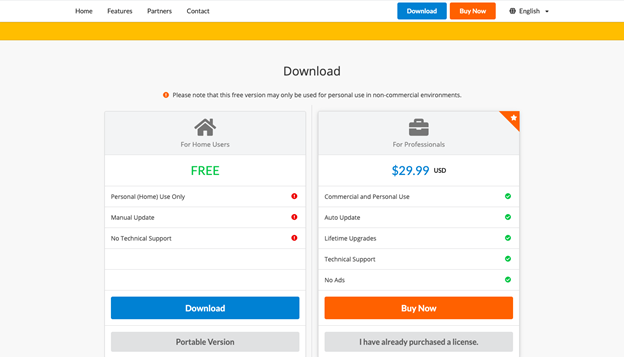
Pic Pick is a screen capture and image editor tool. It is free for personal use, and it is fairly easy to use. However, if you intend to use it for business purposes, you will need a commercial license. Also, the free version does not include any technical support, and it will require you to update the app manually.
Here’s how to use the Pic Pick tool to capture scrolling screenshots
- Go to the official website of Pic Pick and download the software. Once the download is finished, go ahead and install it.
- Press and hold the Ctrl and Alt keys together, then press on the PRTSC button. A rectangular box that is highlighted in red will then appear on your screen.
- After that, press the left mouse button, then hold it and drag on to select the area you want to capture.
- Release the mouse. An auto-scroll will begin shortly then the entire window will be captured.
There you have it, that's how to take a scrolling screenshot on Windows 10 using Pic Pick. Fairly simple, right? Aside from scrolling screenshots, you may also use the other screen capture modes on Pic Pick which are Active Window, Full screen, Window Control, Fixed Region, Region, and FreeHand.
Share X
Share X is also another screen capture tool that you can avail for free. It is widely used in the gaming community because of its wide range of screen-capture features such as region-select, workflows, GIFs, and video capture.
Here are the steps on how to use it:
- Go to the official website of Share X and download the program. After it finishes downloading, proceed with the installation process.
- Launch the dashboard of the program. You will see its core features on the left side of the screen.
- To capture a scrolling screenshot, press and hold the CTRL and ALT keys together, then press the PRTSC button.
- Press and hold on to the left mouse button, then start dragging it to the area that you want to capture.
- Release the mouse button, and the auto-scroll on the document or window will begin. After you capture the images you want, you can find them in the screenshot folder that you can access on the left side of Share X's dashboard.
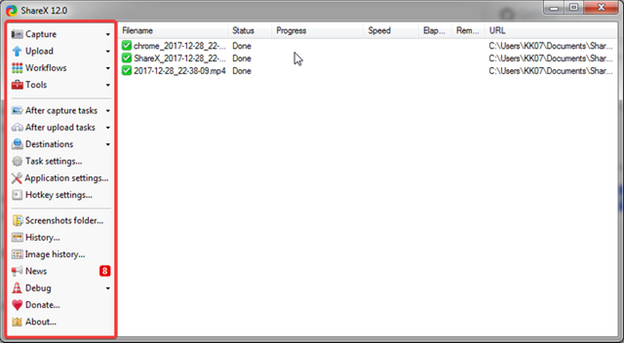
The nice thing about Share X is that it also has an "edit image" feature built-in to the program. This will enable you to customize the image immediately.
Summary: How to Take Scrolling Screenshot in Windows 10?
- In this article, we will explain to you the method through which you can take a scrolling screenshot in Windows 10.
- There are times when you want to take a screenshot of an entire scrollable web page or any other window on your computer.
- Sometimes it is troublesome to take multiple screenshots and then join them up for a single long screenshot.
- However, in this article, we will be using a third-party application that is designed solely for the purpose of taking scrolling screenshots.
- You can download the PicPick from here.
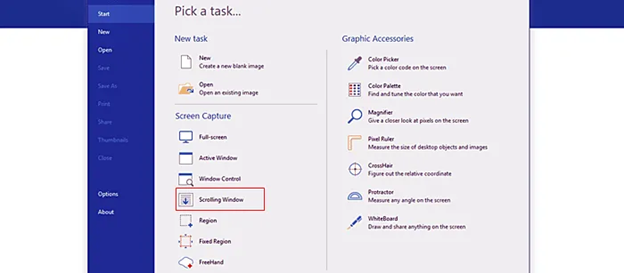
- Once you have installed and opened the PicPick on your computer, click on the Capture button available on the toolbar.
- From the list of options available, click on the Scrolling Window option as shown in the below image.
- Your mouse cursor will now change into a camera icon.
- Now click on a window (in our case Firefox) either by clicking on its titlebar or anywhere else on its window that you want to capture in your scrolling screenshot.
- A crosshair will appear over your window and all you have to do is left-click and drag it over the area you want to capture.
Final Words
Capturing a scrolling screen can help save you a lot of time. However, there is no direct way to achieve this in Windows 10 despite the multiple screen capture methods available.
It's a good thing that there are several free tools that you can use. The nice thing about these tools is that they are free and easy to use.
Although you might find it a hassle to go through downloading them, remember that it's only a one-time thing. Later on, you will be able to capture scrolling screenshots in just a matter of seconds. Plus, you can immediately edit the image and do more actions as well.
