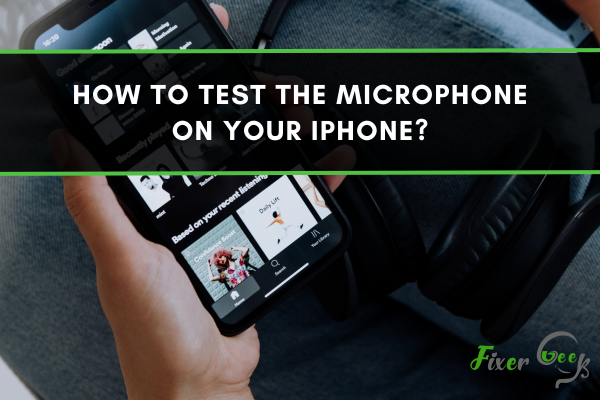
- Test Microphone On Your iPhone
- Introduction
- Steps By Step Explanation
- Why Testing Your Microphone Is Important?
- A Brief Explanation Of How To Test The Microphone On Your iPhone
- The Purpose Of The Article
- Different Microphone Types On iPhones
- The Location Of Each Microphone Type On iPhones
- Preparing To Test Your iPhone Microphone
- Need To Prepare
- How To Test Your iPhone Microphone
- Explanation Of Each Testing Method
- Step-By-Step Instructions For Each Testing Method
- Tips And Tricks For Accurate Testing
- Analyzing Your iPhone Microphone Test Results
- Tips For Accurate Testing
- Conclusion
- Frequently Asked Questions (FAQs)
- What Are The Common Microphone Issues On iPhone?
- How Do I Clean My iPhone Microphone?
- How Do I Prepare To Test My iPhone Microphone?
- How Can I Test My iPhone Microphone?
- How Can I Clean And Maintain My iPhone Microphone?
- What Can I Do If My iPhone Microphone Is Still Not Working After Cleaning And Maintenance?
- How Can I Troubleshoot iPhone Microphone Issues?
Test Microphone On Your iPhone
Introduction
Testing the microphone on your iPhone is an important step in ensuring that your device is functioning properly. The microphone on your iPhone is used for a variety of tasks, such as making phone calls, recording audio, and using Siri. If your microphone is not working correctly, it can cause problems with these tasks. Testing the microphone on your iPhone is an easy process that can help you identify any problems and fix them quickly.
Steps By Step Explanation
1. Open the Settings app on your iPhone 2. Tap on the General tab 3. Tap on Accessibility 4. Scroll down and tap on the Microphone option 5. Tap on the Test Microphone button 6. Speak into the microphone and see if the sound level indicator moves 7. If the sound level indicator does not move, then your microphone is not working properly 8. If the sound level indicator does move, then your microphone is functioning correctly 9. If you are still having problems with your microphone, you can try resetting your device or contact Apple Support for assistance.
Why Testing Your Microphone Is Important?
Testing your microphone is important to ensure that it is working properly. This is especially important if you are using the microphone for voice or video calls, or for recording audio. A faulty microphone can lead to poor sound quality, distorted audio, and other problems. By testing your microphone, you can make sure that it is functioning correctly and that you are getting the best possible audio quality.
A Brief Explanation Of How To Test The Microphone On Your iPhone
To test the microphone on your iPhone, open the Settings app, then select “Sounds”. From there, select “Microphone” and make sure that the “Input Volume” is turned up. You can then tap the “Test” button to hear a sound through the microphone. If you hear the sound, then your microphone is working properly. If you don’t hear the sound, then you may need to adjust the settings or get a new microphone.
The Purpose Of The Article
The purpose of this article is to provide a step-by-step guide on how to test the microphone on an iPhone. It explains how to access the microphone settings in the Settings app, how to adjust the input volume, and how to use the test button to check if the microphone is working properly.
Different Microphone Types On iPhones
The various microphone types on iPhones can be broken down into two main categories: internal and external. Internal microphones are built into the device and are typically used for recording audio. External microphones, on the other hand, are connected to the device through a cable and are used for both recording and broadcasting audio. When it comes to testing the microphone on an iPhone, it is important to understand the differences between the two types of microphones. Internal microphones are typically used for recording audio, while external microphones are used for both recording and broadcasting audio. To test the microphone on an iPhone, it is important to make sure that the microphone is properly connected and that the settings are correct. Additionally, it is important to ensure that the microphone is not too close to any other source of noise, such as a fan or a speaker, as this can interfere with the audio quality.
The Location Of Each Microphone Type On iPhones
The internal microphone on iPhones is typically located near the top of the device, near the headphone jack. The external microphone is typically located near the bottom of the device, near the charging port. Both types of microphones are designed to pick up sound from different directions, so it's important to make sure that the microphone is in the correct position for the best sound quality.
Preparing To Test Your iPhone Microphone
1. Make sure your phone is powered on and unlocked. 2. Ensure that the microphone is properly connected to the phone. 3. Ensure that the microphone is enabled in the settings of your phone. 4. Make sure the volume is turned up. 5. Make sure that the microphone is not blocked by any objects. 6. Make sure that the sound quality of the microphone is acceptable. 7. Download a sound recording app and use it to test the microphone.
Need To Prepare
To test your iPhone microphone, you need to make sure that your phone is powered on and unlocked, the microphone is properly connected to the phone, the microphone is enabled in the settings of your phone, the volume is turned up, the microphone is not blocked by any objects, and the sound quality of the microphone is acceptable. You should also download a sound recording app and use it to test the microphone.
How To Test Your iPhone Microphone
1. Check Settings
Before testing your iPhone microphone, make sure that your microphone is enabled in the Settings app. To do this, go to Settings > General > Accessibility > Microphone. Ensure that the switch next to Microphone is turned on.
2. Check Volume
Make sure that the volume of your iPhone is set to an appropriate level. To do this, go to Settings > Sounds & Haptics > Volume. Adjust the volume to a comfortable level.
3. Use Voice Memos
One of the easiest ways to test your iPhone microphone is by using the Voice Memos app. To do this, open the Voice Memos app, select the red Record button, and speak into the microphone. Once you are finished speaking, press the Stop button and then the Play button to listen to your recording.
4. Use Facetime
You can also use Facetime to test your iPhone microphone. To do this, open the Facetime app, select a contact, and then press the Video button. Speak into the microphone and then ask the person on the other end to confirm that they can hear you.
5. Use Third-Party Apps
There are also third-party apps that you can use to test your iPhone microphone. These apps are designed to record audio and measure the quality of the sound. Some of the most popular apps include AudioTool, AudioTest, and AudioScope.
Explanation Of Each Testing Method
1. Visual inspection: Visually inspecting the iPhone microphone can help identify any physical damage that may be preventing it from working properly. This includes checking for any dirt, dust, or debris that may be blocking the microphone. 2. Audio playback: Playing back audio from the iPhone can help determine if the microphone is working properly. If the audio is muffled or distorted, it could indicate a problem with the microphone. 3. Listening test: Listening tests involve speaking into the microphone and then playing back the audio to see if the sound is clear and accurate. This can help identify any problems with the microphone. 4. Diagnostic tests: Diagnostic tests involve running software tests to check the functionality of the microphone. This can help pinpoint any problems that may be causing the microphone to not work properly.
Voice Memos
Apple's built-in Voice Memos application provides a way for users to jot down quick audio recordings. This can be used to record meetings, lectures, or any other audio that needs to be captured. The audio can then be shared with others or saved for later use.
Voice Recorder Apps
There are many voice recorder apps available for mobile devices, such as iPhones and Android phones. These apps allow users to record audio and save it for later use. Some of these apps also have features like voice-to-text conversion, which can be useful for transcribing audio recordings.
Facetime
FaceTime is an Apple-developed video calling service that allows users to make video calls over the internet. It can be used to record video calls with multiple people, and the recordings can be saved for later use. FaceTime also has audio recording capabilities, which can be useful for capturing conversations or lectures.
Siri
Siri is Apple's voice-controlled virtual assistant. It can be used to record audio conversations, and the recordings can be saved for later use. Siri also has features like voice-to-text conversion, which can be useful for transcribing audio recordings.
Speakerphone
Speakerphone is a type of telephone that allows multiple people to talk to each other at the same time. It can be used to record audio conversations, and the recordings can be saved for later use. Speakerphone also has features like echo cancellation, which can help to reduce background noise during recordings.
Step-By-Step Instructions For Each Testing Method
1. For Voice Recognition Testing
a. Set up a microphone and recording device. b. Ask the user to read a set of pre-determined phrases into the microphone. c. Use the voice recognition software to process the audio and match the user’s voice to the phrases. d. Analyze the results and compare them to the expected results.
2. For Siri Testing
a. Set up a microphone and recording device. b. Ask the user to give Siri a set of pre-determined commands. c. Use the voice recognition software to process the audio and match the user’s voice to the commands. d. Analyze the results and compare them to the expected results.
3. For Noise Cancellation Testing
a. Set up a microphone and recording device in a noisy environment. b. Ask the user to read a set of pre-determined phrases into the microphone. c. Use the noise cancellation software to process the audio and reduce the background noise. d. Analyze the results and compare them to the expected results.
Tips And Tricks For Accurate Testing
1. Do not perform soft switch tests simultaneously with LCR tests. Rather perform the tests separately so that you can accurately compare the results.2. Make sure that the environment is free from any external noise. This will ensure that the test results are accurate. 3. Use a high-quality microphone and recording device for accurate results. 4. Set up the microphone and recording device at the same distance from the user for consistent results. 5. Use the same phrases for each test to ensure consistency when comparing results.
Analyzing Your iPhone Microphone Test Results
1. Review the audio recordings to determine if the audio is clear and free from any background noise. 2. Listen to the recordings to check for any distortion or clipping. 3. Compare the recordings to the expected results to determine if the microphone is working correctly. 4. Check the volume levels to make sure they are consistent across the recordings. 5. Analyze the frequency response of the microphone to ensure it is within the expected range. 6. Check the signal-to-noise ratio to make sure it is adequate for the intended use.
What To Do If The Test Results Are Not Satisfactory
If the test results are not satisfactory, then it is important to troubleshoot the issue. This can involve checking for any loose connections, ensuring the microphone is properly connected to the device, and checking for any software or hardware issues. If the issue is not resolved, then it may be necessary to replace the microphone.
Tips For Accurate Testing
1. Make sure the microphone is in a quiet environment. 2. Speak directly into the microphone. 3. Make sure the microphone is not blocked by any objects. 4. Check the microphone settings in the Settings app to ensure they are correct. 5. Test the microphone using a voice recording app. 6. Make sure the microphone is not damaged. 7. Make sure the iPhone's software is up to date. 8. Check the headphone jack and lightning port for any debris.
Conclusion
The importance of testing and maintaining your iPhone microphone cannot be overstated. It is essential to ensure that your device is functioning properly and that it is able to accurately capture audio. Regular testing and maintenance can help to identify any issues that may arise and prevent them from becoming serious.
Frequently Asked Questions (FAQs)
What Are The Common Microphone Issues On iPhone?
The most common microphone issues on iPhones are related to sound quality or microphone sensitivity. These issues can be caused by software or hardware problems, or simply due to dust or dirt on the microphone.
How Do I Clean My iPhone Microphone?
Start by using a soft, dry cloth to remove any dust or dirt from the microphone. You can also use a compressed air can to blow away any debris. If the issue persists, you can use a cotton swab dipped in rubbing alcohol to clean the microphone.
How Do I Prepare To Test My iPhone Microphone?
Before testing the microphone, make sure that the iPhone is in a quiet environment and that the volume is set to an appropriate level. You should also make sure that any applications that might be using the microphone are closed. Additionally, you should check the headphone jack to ensure that it is plugged in securely.
How Can I Test My iPhone Microphone?
To test the microphone, open the Voice Memos app on the iPhone and record a short clip. After recording, play back the clip and listen for any distortion, static, or other audio issues. If the audio is clear, then the microphone is working correctly. If the audio is distorted or otherwise impaired, then the microphone may need to be replaced or cleaned.
How Can I Clean And Maintain My iPhone Microphone?
The best way to clean and maintain your iPhone microphone is to use a soft, lint-free cloth to wipe away any dust or debris. You can also use a can of compressed air to blow away any stubborn particles. Additionally, you can use a cotton swab dipped in isopropyl alcohol to clean the microphone jack and ensure that it is plugged in securely.
What Can I Do If My iPhone Microphone Is Still Not Working After Cleaning And Maintenance?
If your iPhone microphone is still not working after cleaning and maintenance, you may need to contact Apple Support for further assistance. They can help you troubleshoot the issue and determine if it is a hardware or software problem. Additionally, they may be able to provide you with a replacement part or suggest a repair.
How Can I Troubleshoot iPhone Microphone Issues?
To troubleshoot iPhone microphone issues, start by checking the settings on the device. Make sure that the microphone is enabled and that it is set to the correct input. Additionally, check the volume levels on the device and make sure that the microphone is not muted. If the issue persists, try restarting the device and see if that solves the issue. If not, contact Apple Support for further assistance.
