I’m sure you’ve been there, wanting to play a game on your computer but feeling like the mouse and keyboard interface just doesn’t cut it. Maybe the keys are too small for your taste, or maybe you want to play a fighting game and your standard keyboard just isn’t doing it for you. If you own a PS4 controller chances are that you don’t have a Mac computer and aren’t too interested in spending money on a separate gaming system to play games with your friends. Why not just connect it to your computer?
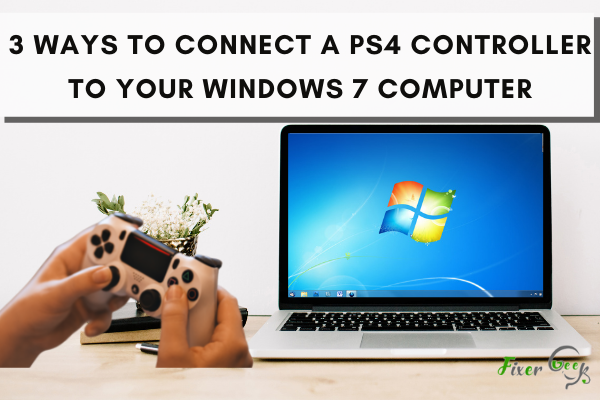
While most computer gamers prefer using their good, old mouse and keyboard, some appreciate the comfort and convenience that joysticks can bring to the table, especially during long hours of gaming.
Gladly, connecting PS4 controllers to your personal computer (PC) is something you can do, without too many hassles.
In today’s post, learn how to enable your PS4 controller for PC gaming in three different ways.
Steam Settings
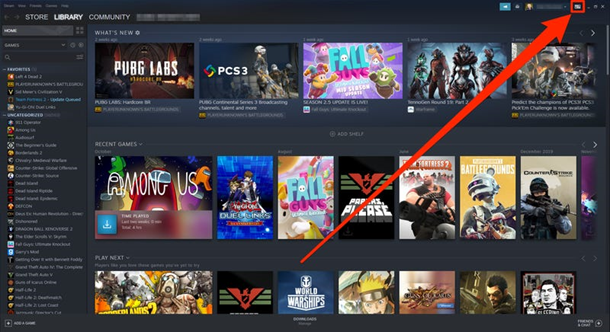
If you are planning to utilize your micro-USB cable that’s originally used for charging your controller to connect it to your PC, open your Steam account and select the “Big Picture Mode” button, with arrows pointing outwards. It can be found on the right side of the screen.
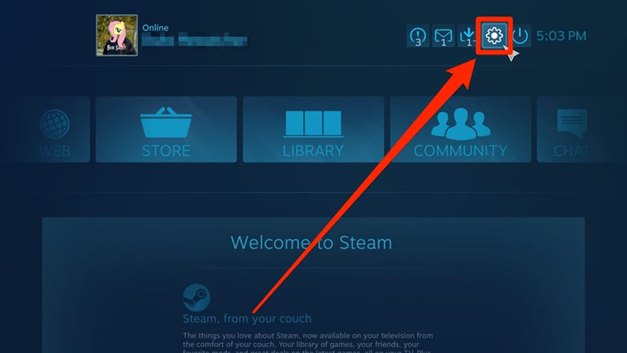
In the “Big Picture” mode, click the gear icon. You’ll then be directed to the “Settings.”
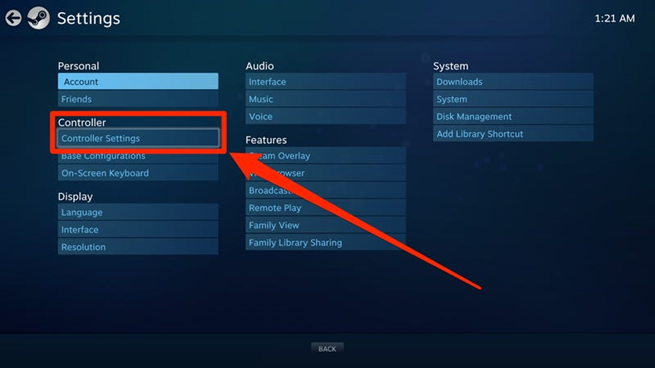
As shown below, go to the “Controller” option and then select “Controller Settings.”
Tick the “Playstation Configuration Support” box.
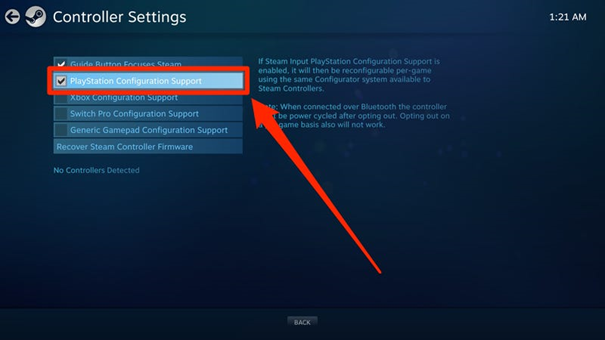
Make sure that your PS4 controller is plugged into your computer. The controller’s backlight will immediately glow, indicating that it has been successfully connected.
Your joystick should be detected by Steam automatically. Select the name of the controller as soon as it shows up at the bottom of the screen.
DS4 Windows Utility
For non-Steam gamers, it’s still possible to connect your controller to your PC. You’ll only need to install DS4 Windows Utility software on your computer.
Download the 2016 version of the app. While it’s quite outdated in a sense, considering that it’s almost 5 years now since it has been released, it still works fine today.
Proceed by locating the .zip file on your PC. Open the file. Double-click “DS4Updater.” Select “Extract all.”
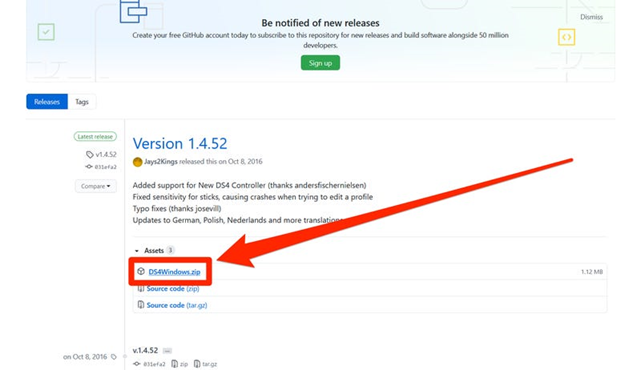
Once you have already extracted all the content of the downloaded file to a folder, click “DS4Windows” twice. Hit the “Run” button. A prompt will then ask you to choose a folder where you want to save the program’s files. The “AppData” and “Program Folder” folders, however, are commonly used.
Press the “Install” button to proceed with the installation of the software.
Now, your PS4 controller is ready to use, but remember to restart your computer after the application has been installed.
Bluetooth
Lastly, you may easily connect the PS4 controller to your computer if it supports Bluetooth.
Using the search menu, enter “Bluetooth.” The results will appear on the left side of the screen. Select the “Bluetooth and other devices settings” from the list. You will then be able to turn on the Bluetooth feature of your computer.
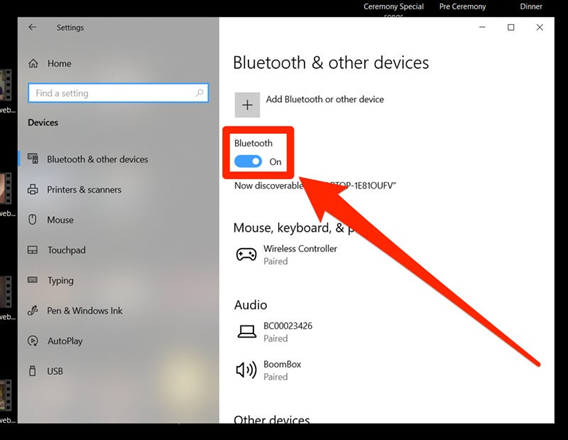
The next step is to get your controller and press the “PlayStation” and “Share” buttons at the same time. The backlight will then begin flashing. Go back to your computer and then hit the “Add Bluetooth or other devices.” Make sure to pick “Bluetooth.”
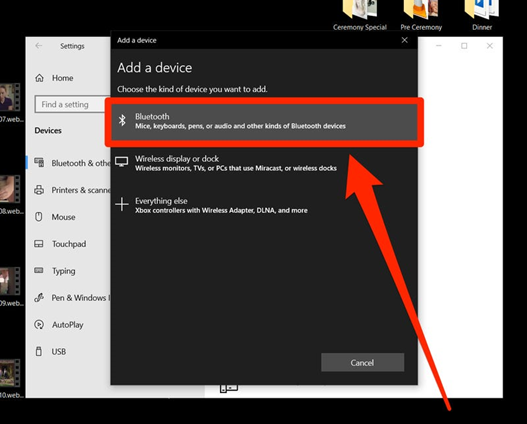
At this point, your PS4 controller will appear as the “Wireless Controller.” Finalize the Bluetooth connection by clicking it.
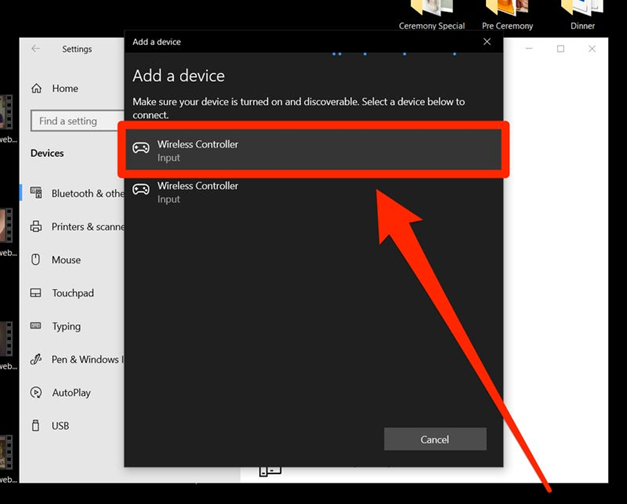
If ever you are asked to enter a password, type in “OOOO.” Now that everything is set, you may now use your PS4 controller via Bluetooth.
The thought of connecting your PS4 controller to your computer may seem intimidating, but it’s relatively easy. Just follow any of these three methods and then you’re ready for your next game.
Summary: Connect a PS4 Controller to Your Windows 7 Computer
- Download the latest version of ScpToolkit.
- Extract the files to a folder.
- From there, click the top bar and select Preferences.
- In the Device Manager window, expand Xbox 360 Peripherals, right-click on Wireless Controller, and select Update Driver Software… from the menu that pops up.
- Section: After everything is installed, run ScpToolkit by pressing the Start button and typing ScpToolkit (if you can’t find it, it should be in \Program Files (x86)\Scarlet.Crush Productions\ScpToolkit).
- Sync Your Controller with Your PS4 or PC.
- Right-click on ScpToolkit Bluetooth Pair Utility in your system tray, and hit Pair Controller.
- The Dualshock 4 should appear as a Dualshock 3 controller to your PC/Mac so there shouldn't be any driver issues.
- Takeaway: With some quick workarounds this can work just as well as a dualshock controller without any extra charge