How Do I Downgrade From Windows 10 Pro To Windows 10 Home?
635 Views
zMicrosoft has been on a mission to bring more users to its latest operating system. In an ideal world, all new PCs would be outfitted with the latest and greatest software on Day 1. Unfortunately, not all users are in a position to upgrade to Windows 8 and now Windows 10 when it is first released. If you have recently upgraded your operating system and wish to roll back to a previous one, there are ways you can do this.
Most of us own personal computers for several different reasons. However, most of the time, we choose the one that best fits our needs and lifestyle. In this case, figuring out the right Windows 10 set-up is for you.
Will you be getting Windows 10 Home or Windows 10 Pro?
Differences Between Windows 10 Pro and Windows 10 Home
Windows 10 Pro
- Increased security features like Bitlocker, Microsoft update for business, and more features geared towards the entrepreneurial side of things
- Additional applications to be installed separately
- Can be connected remotely
- Supports 2 TB (Terabytes) of RAM
- Requires an activation key (to be purchased) upon activation
Windows 10 Home
Lesser data/file protection security features
- Does not need activation key
- Only requires a maximum of 128 GB (Gigabyte) of RAM
If you’re just an average PC owner who doesn’t mind having increased security features and does not want to purchase an activation key, then Windows 10 Home is the better option for you. Now that everything’s out of the way, you can finally start with the downgrading of Windows 10 Pro into a Windows 10 Home.
Remember, before starting the downgrading process, make sure to back up your file online to your online drives or an external hard drive. Some files may get deleted permanently during the downgrading process.
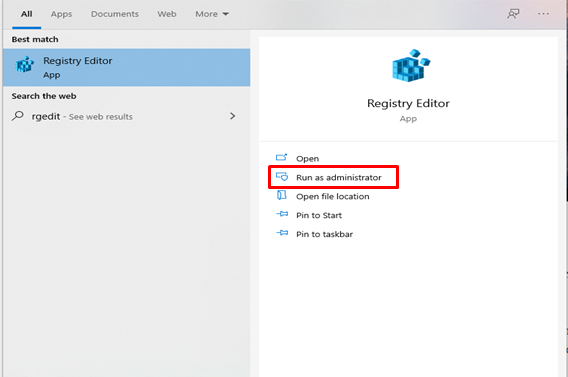
- Start by typing in “Regedit” on the search bar and click on Run as administrator.
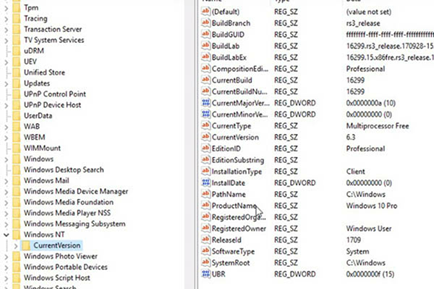
- Navigate the files by following the path ComputerHKEY_LOCAL_MACHINESOFTWAREMicrosoftWindows NTCurrentVersion.
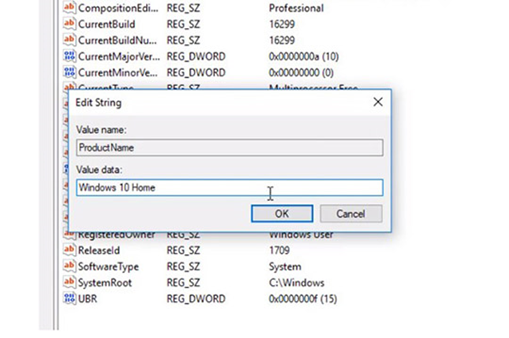
- Search for ProductName. In there, you will find it as “Windows 10 Pro”. Click on the file and change the name to “Windows 10 Home”. Click OK.
- Open “EditionID” and change/edit its name in “Core”.

- Navigate the path: ComputerHKEY_LOCAL_MACHINESOFTWAREMicrosoftWindows NTCurrentVersion.
- Search for the “ProductName” (again), change it to Home.
- Change the “EditionID” to Core.
- Download “Media Creation Tool”.
- Open the tool. Click “Accept” and proceed with the process.
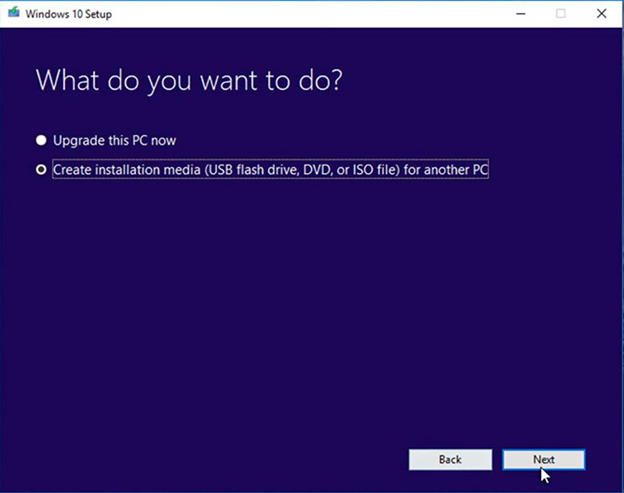
- The screen will show two options: “Upgrade this PC now” and “Create installation media (USB flash drive, DVD, or ISO file) for another PC”.
- Select the “Create installation media (USB flash drive, DVD, or ISO file) for another PC” option, then click Next.
- Click on the “ISO file” and next.
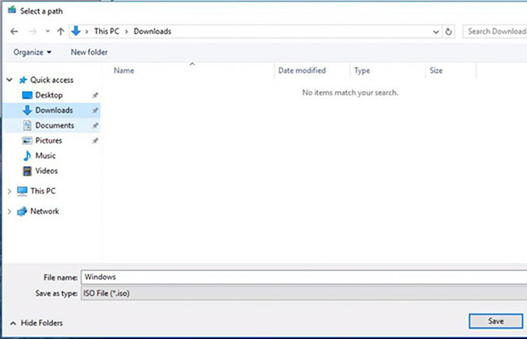
- Save the ISO and double click on it to start the installation process.
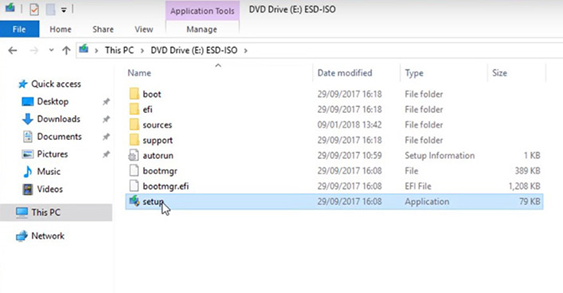
- Click on “Setup”. In the next window, choose the “Not Right Now” option. Click Next.
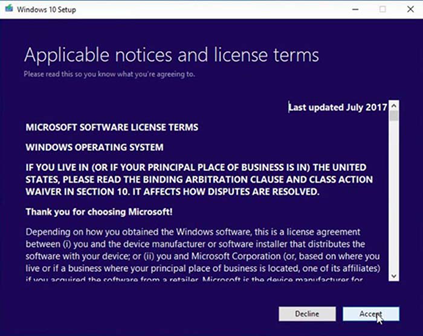
- Accept the license agreement by clicking “Accept”.
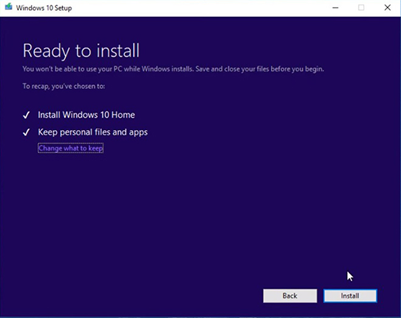
- Click “Install” to start the installation.
Your Windows 10 Home installation is now ready. However, it will take several times of restarting your PC so it can fully adjust to the newly edited version.
This is normal so please don’t worry about it. You can check your PC status by checking into your settings directory.
Summary: Do I downgrade from Windows 10 Pro to Windows 10 Home
- If you want downgrade your Windows 10 Pro to Windows 10 Home, you can do it by removing the license key of the Windows 10 Pro and adding the license key of the Window 10 Home.
- The first step is to remove the Windows 10 Pro license key. This can be done by going to Start > Settings > Update & Security > Activation then click Change Product Key. Now remove your current product key and leave the field blank, then click Next to continue as shown below.
- Now we need to add a new license key, in this case we are adding a Windows 10 Home license key. To do so, we need to go back and click Change Product Key again. Then enter your new product key and click Next to continue as shown below.
- Just wait for a few minutes until it finished verifying your product key as shown below. Voila! You have successfully downgraded your Windows 10 Pro to Windows 10 Home!
- You can do it by removing the license key of the Windows 10 Pro and adding the license key of the Window 10 Home.
Conclusion
For regular PC users, the Windows 10 Home edition is the better option and has enough features to meet the needs of most PC users. It even has free alternatives available to its users that are sufficient to meet the needs of the average Windows user.
Downgrading from a Windows 10 Pro to the Windows 10 Home edition is easy if you follow the aforementioned steps in this tutorial.
