How To Allow A User To Run Programs With Admin Rights?
446 Views
Are you familiar with UAC or User Account Control? In short, this is a security feature that was introduced on Windows Vista and above. It makes sure that only authorized applications are running with admin rights (and can make system changes) by prompting the user to enter credentials or confirm an application’s request. Having said that, there are occasions where you will want a program to run with admin rights without having to ask the user to manually enter credentials every time they run it (or even at all!). I’ve found that is sometimes a requirement when dealing with some proprietary applications.
Unlike the earlier Windows version, the latest Windows version includes User Account Control Account (UAC). This is a security feature that is designed to prevent the user from making unauthorized changes to the operating system. Hence, UAC usually asks for permission before a program is launched.
It always asks for admin password if the program is run from an account without administrator permissions. Luckily, it is possible for a standard user to launch a program with admin rights. Here is how:
Enable the Administrator Account
Usually, the built-in Administrator account is disabled by default. To enable it, follow the steps below:
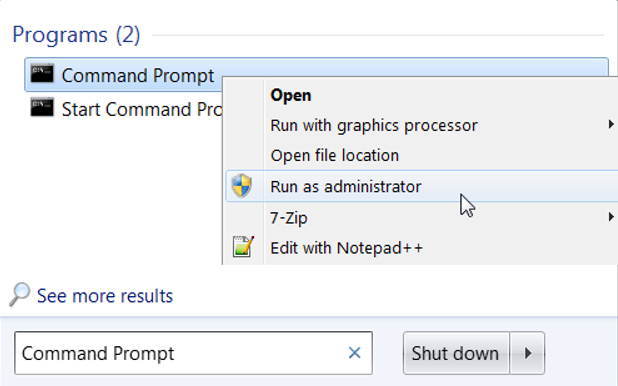
- Go to the Start menu and search for Command Prompt.
- Right-click on Command Prompt and choose Run as administrator from the options provided.
- Type in the following command: net user administrator / active in the Command prompt window that pops up.
- This will enable the Administrator user account.
Create a password
To create a password for the Administrator user account, follow these steps:
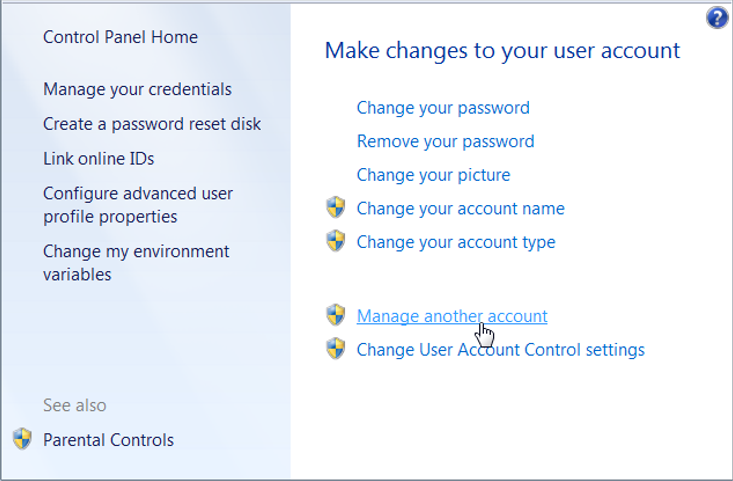
- Open the Control panel and choose User Accounts and Family Safety.
- Click on User Accounts to open the User Accounts window.
- In this window, locate Manage another account and click on it.
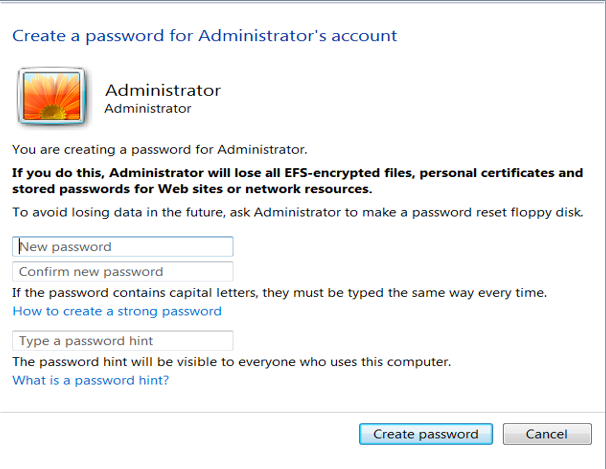
- Choose the Administrator account and click on Create a password for Administrator’s account.
Creating a Shortcut
Creating a program’s shortcut lets you set the program to always run with admin rights without tampering with its main executable. Here is how:
- Go to the program and right click on it.
- Click on Properties from the menu.
- The Properties window will appear. Now, click on the Shortcut tab.
- To open the Advanced Properties window, click on the Advanced button.
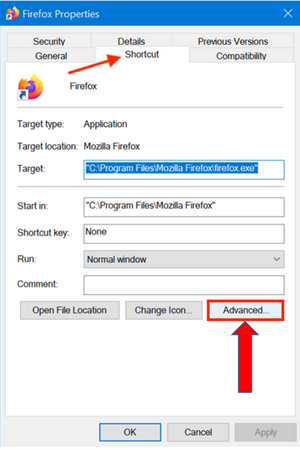
- Check the box that is next to the Run as administrator option and then click OK.

- This will take you to the Properties window. Click Ok or Apply.
Using the Task Manager
A standard user can run an application as an administrator in Windows 10 using the Task Manager.
- Open the Task Manager and click on More details if it opens in compact view.
- In the Task Manager window, select the File menu and then click on Run new task.

- This will prompt the Create new task window to open. You can then enter the name of the program that you want to access with admin rights on the open field or click on Browse to navigate it.
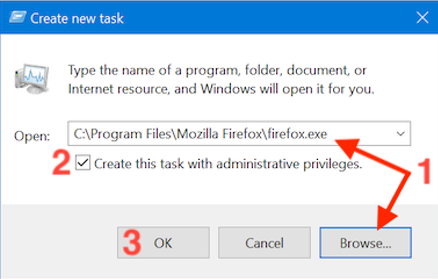
- Check the box next to Create this task with administrative privileges and click Ok.
Once the settings are applied, the program will launch as administrator and won’t ask for a password the next time you use the shortcut.
Using Desktop Shortcut
You can also run a program as administrator through its desktop shortcut. Here is how:
- Locate the desktop shortcut for the program that you intend to run with admin rights. If you don’t have the program, create one yourself.
- Press and hold or right-click on the program to open a contextual menu.
- Navigate to Run as administrator and click or tap on it.
Conclusion
Use one of the methods above if you want to run a program that requires administrator permission. We hope that you find this article useful!
From the Right-Click Menu
Another way to run a program with admin rights in Windows 10 is through its right click menu. To do this:
- Open the File Explorer.
- Locate the desktop app’s executable and right click on it.
- This will prompt the contextual menu to open.
- Then, locate and click on Run as administrator.
Summary: Allow a user to run programs with admin rights
- Execute the following command
- Click Yes on User Account Control
- On the right side, right click on empty space and select New > DWORD (32-bit) value
- Name it as ConsentPromptBehaviorAdmin and double click on it to edit its value data: Change its value data to 2 to allow users to run programs as administrator without being prompted for password.
- Right click on ConsentPromptBehaviorAdmin and select Modify
