How To Choose A Different Location For The Search Index For Outlook And Windows 10?
605 Views
One of the best things about Microsoft is the fact that they offer you many ways to do the same thing. This is definitely true when it comes to searching their software like Windows 10. In this article, I'm going to show you how to choose a different location for the Search index for Outlook and Windows 10 within Windows 10.

Windows 10 has indexing, which runs in the background to index your files. With the Windows Search indexer, the Start menu can search for your files faster. Usually, the search index comprises of selected locations, which can be filtered depending on what you want to index.
By default, the search index data files in Windows 10 are stored in %ProgramData%MicrosoftSearchData. However, you can choose to store the index data files in other internal locations of your choice. It is also possible to change the search index location in Outlook.
Listed below are methods for selecting a different search index location for outlook and Windows 10.
Method 1: How to Change Search Index Location in Windows 10 Indexing Location
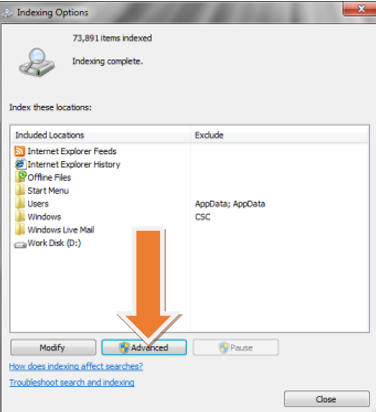
- Open the Control Panel (in All Items view) and then click on the Indexing Options icon. After doing this, close the Control Panel.
- On the Indexing Options window, tap/click on the Advanced button.
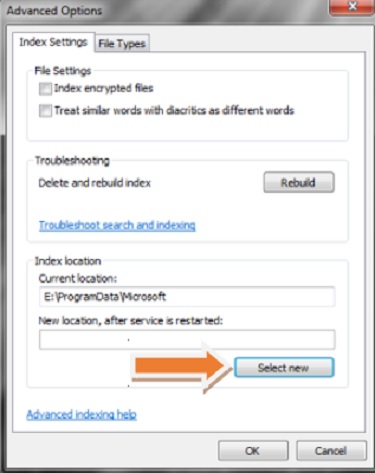
- Under the Advanced Options window, you should be able to see the Index Location option. Click on Select new that is just below it.
- Browse and choose the new location for your index data files from the options provided. Once you have selected the new location, click OK. Search/data folders will be stored in the new location.
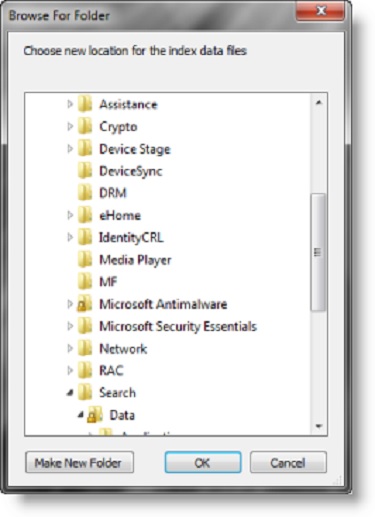
- Then, click OK to apply the changes. Windows 10 will automatically SearchData directory in the new location where the search index will be placed.
Method 2: Change Search Index Location in Registry Editor
Alternatively, you can change the location of your search index in the registry editor. Follow the steps below to do this:
- Open the Run dialog by pressing the Win + R keys.
- To open the Registry Editor, type regedit on the run dialog and click OK.
- Click Yes when prompted by UAC.
- Find the location of the key: HKEY_LOCAL_MACHINESOFTWAREMicrosoftWindows Search in the Registry Editor.
- You should see the DataDirectory string value Windows Search key right pane. Double click on it to modify it.
- The next step is to type in the path of the location where you intend to store the index. After typing the path, include SearchData at the end and then click Ok.
- Shut down the Registry Editor before halting and starting the Windows Search service to apply the changes made.
Method 3: How to Change Default Search Location in Outlook
Follow the steps below if you want to change the search location in Outlook.
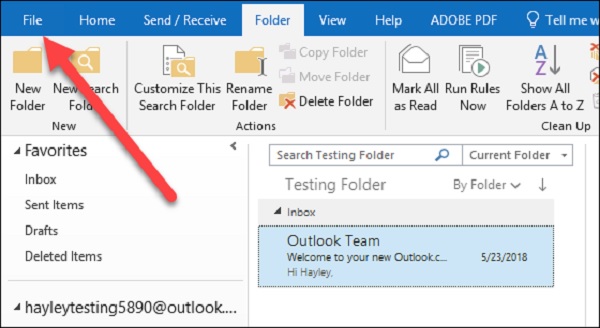
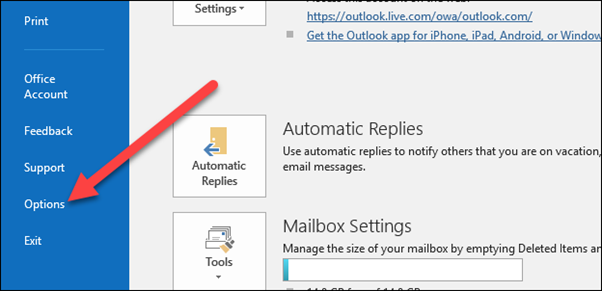
- Click on the File menu.
- Now, click on Options in the sidebar to open the Outlook Options window.
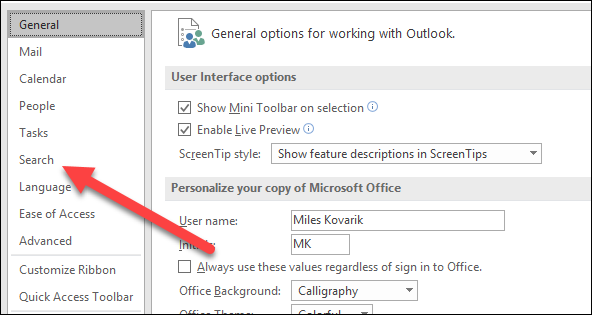
- On the left pane, locate the Search command and click on it.
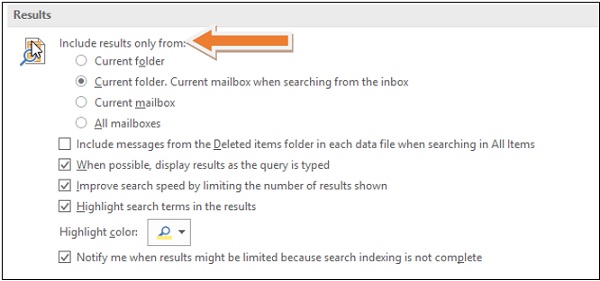
- Under the Results section, select the option that best suits you depending on where you want to get the results from. For instance, you can choose “current folder”, current folder or current mailbox when you search from the inbox, current mailbox or all mailboxes. The second option is usually the default setting while the last option is a great choice if you have many accounts set up.
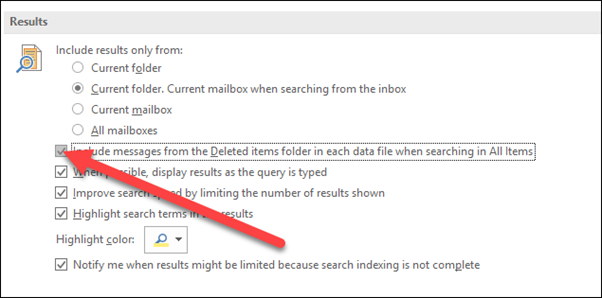
- Also, you can check the box next to the option that lets you include messages from the folder of deleted items in every data file when making your search in All Items. However, doing this is not recommendable since it can interfere with your results.
- Once done, click Ok to apply the changes.
Summary: Choose a different location for the Search index for Outlook and Windows 10
- Choose a different location for the Search index for Outlook and Windows 10
- Select the Start button.
- In the list of results, find and select Indexing Options, then select Modify.
- In the Indexed Locations window, you'll see a list of folders that are currently being indexed.
- Select Show all locations... to see a list of folders that aren't being indexed yet.
- Select the folder or hard drive you want to index, then select Include folder.
Conclusion
Do you want to change the search index location to speed up your search results in Windows 10? Well, you can choose any of the above methods to change the default location of your Windows 10 search index effortlessly.
