Now a LAN cable is used to connect two or more PCs on Network. LAN Cable is mainly used in the office or home network. It is mostly used to share an Internet connection between two or more computers through a router. This tutorial will guide you on How to Connect Two Laptops using LAN Cable in Windows 10? Difficult? Not for me!
If you need files that your friends have or share files or other resources with other laptops in your workplace, you can transfer them from laptop to laptop. One of the effective methods between laptops is to use an Ethernet or LAN cable. The method is simple: join the two laptops with a LAN cable and adjust some network settings.
Connecting Two Laptops applying LAN Cable
- For joining similar devices such as two laptops, crossover cables are more fitting than straight cables. So, use a crossover cable to link both laptops. Then, access the “Control Panel.”
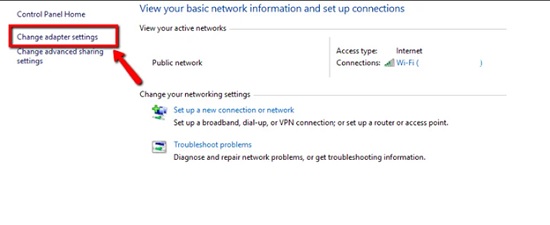
- Select the “Network and Internet” option. Advance to the “Network and Sharing Center” option. Pick “Change adapter settings”
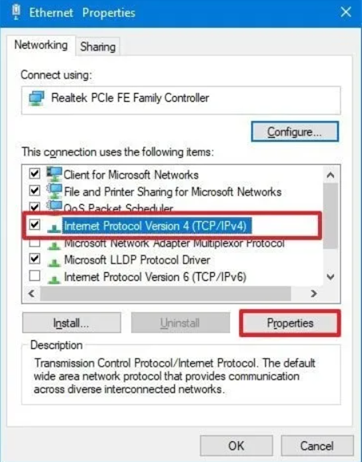
- It will show several types of connections you have on the PC. Choose the appropriate one. Typically, an Ethernet connection is applicable for a LAN connection. Open the context menu of the “Ethernet” connection by right-clicking on it. Go for the “Properties” menu.
- Access the “Networking” section from the LAN properties option. Pick “Internet Protocol Version 4 (TCP/IPv4)”. Then, open the “Properties” page.
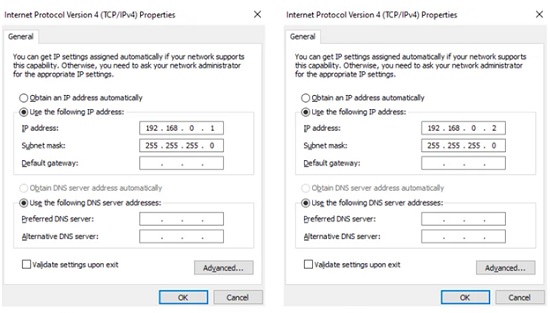
- There, put this address “192.168.0.1” in the “IP address” field and put this “225.225.225.0” in the “Subnet mask” option. You have to do all the steps again for the second laptop and set the “IP address” as “192.168.0.2”. The Subnet mask value will be the same as before.
- If you wish to use the local network and internet together, you have to modify the setting differently. Deselect the “IPv6” option from the “Ethernet Properties” window and choose the “Obtain an IP address automatically” option on both laptops.
- After putting the IP address, return to the “Network and Sharing Center” page and select the “Change advanced sharing settings” menu.
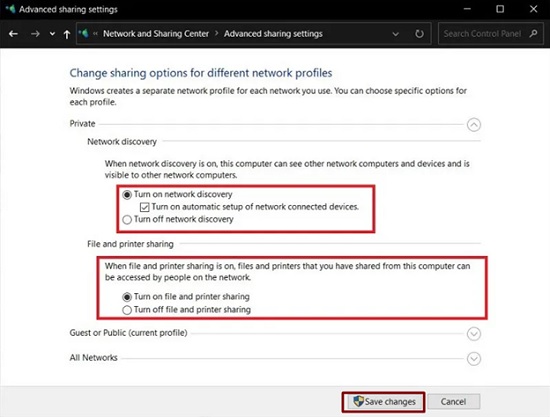
- There, activate the “Turn on network discovery” and the option beneath it by clicking on them. You may select the box beside “File and printer sharing,” too. Select “Save Changes”.
- Access the “Properties” page of your laptop from “This PC.” Select the “Change settings” option from the “System” window.
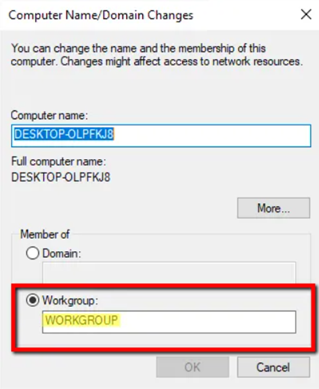
- Pick “Change” from the “Computer Name” section. There at the “Workgroup” field, the title should be the same for both laptops. Typically, it will be “WORKGROUP,” but you may modify it to any other label you wish. The connection between both laptops is active with a LAN cable, and you may share the drives or transfer files between them.
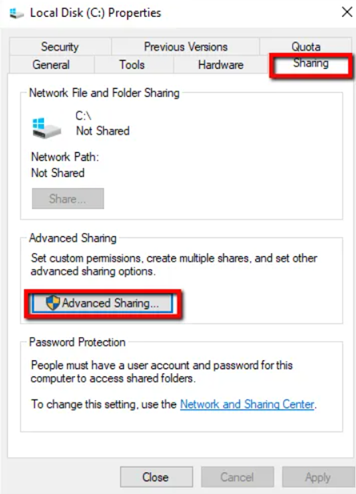
- Open the context menu of the drive you wish to share by right-clicking on it and open “Properties.” Go to the “Sharing” section and select “Advanced Sharing”.
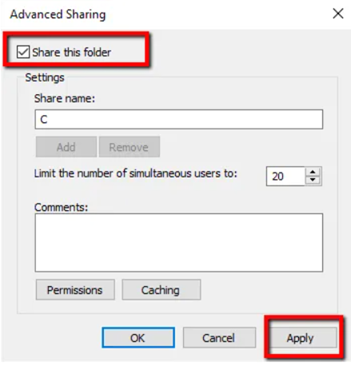
- From the “Advanced Sharing” page, select the “Share this folder” option and pick “Apply.” Then, select “OK” to close the window.
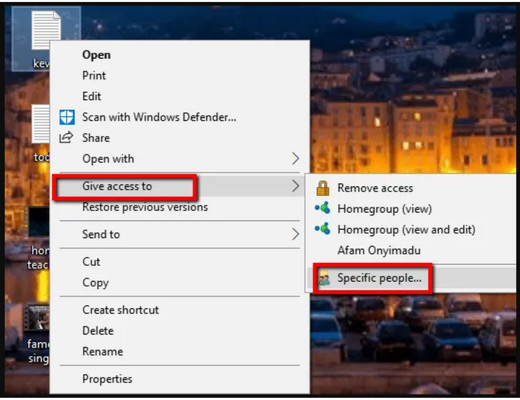
- Again, right-click on the file and go for the “Give Access to” option to transfer specific folders or files. Pick the “Specific people” option and pick “Everyone.” Then click on the “Share” option.
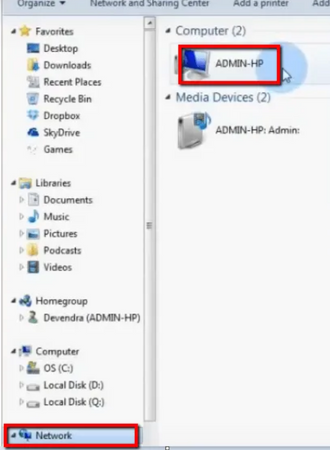
- After that, open “This PC” on the second laptop and select “Network.” Access the joined laptop, and there you will find the shared files. Then, copy-paste the file to transfer.
Summary: Connect Two Laptops using LAN Cable in Windows 10
- Right-click on the Start Button. Go to Device Manager.
- Open Network Adapters in Device Manager and make sure that you have a network adapter installed.
- For example, you might see an entry for Intel® Ethernet Connection or Realtek PCIe GBE Family Controller in the Network adapters category.
- Right-click on the Start Button and go to Control Panel.
- Now click on Network and Sharing Center.
- In the Network and Sharing Center, switch to Change adapter settings in the left pane.
- Right-click on your network adapter and select Properties to open its properties window.
- Uncheck Internet Protocol Version 6 (TCP/IPv6). Then click OK to save changes.
