Let’s imagine the following situation: you bought a brand new flash drive and you put your files on it. However, suddenly you realize that all your files were corrupted or something. You don’t want to lose these files because they are very important for you. In this situation, deleting files won’t help at all. You will just erase your files and won’t solve the problem. That is why we are going to tell how exactly to delete files of the flash drive on Mac OS X

Follow the instructions below to delete the Flash Drive files permanently on a Mac.
Manually Deleting the files from the Flash Drive
Deleting the files one by one
1). At first, connect your Flash Drive to your Mac by the USB port to access the files of the Flash Drive by the Mac.
2). Now click and open the ‘Finder’ application icon from the recent bar of your Mac if you pinned it there before or manually open the ‘Finder’ application.
3). In the Finder, application click on the name of the Flash Drive from the left navigation bar to view the files of the external USB Flash Drive.
a). Moving the files to the trash by clicking on the mouse
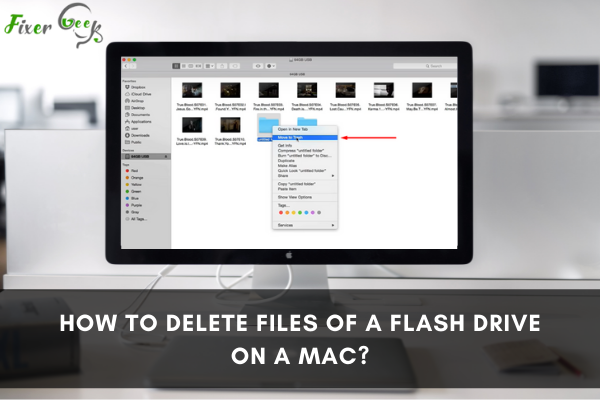
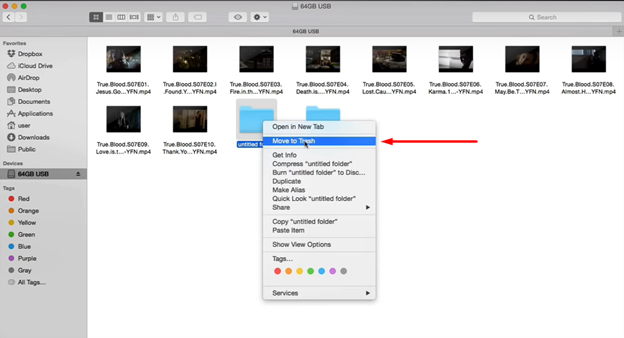
- Now move the mouse pointer on the file that you wanted to delete.
- Click the file by the right button of the mouse.
- Now select the ‘Move to Trash’ option from the list to delete the file temporarily.

b). Moving the files to the trash by Drag and Drop
- At first, select the file or files from the Finder application.
- After that, click and hold the files.
- Then move the mouse pointer to the Trash icon on the recent navigation bar located at the bottom of the screen and release the hold to drop the files into the trash.
c). Moving the files to the trash by the keyboard shortcut:
- First of all, click and select the file or files of the external Flash Drive.
- Now press the ‘Command + Delete’ button on the keyboard to move the file/ files into the trash.
4). The files of your external Flash Drive is now temporarily deleted from your Flash Drive because all the files you moved to trash will not show in the external Flash Drive but the memory occupied by that file will be still occupied by that file and you can not use that memory until you empty the trash.
a). Empty the trash, system 1:
- Move the mouse pointer to the Trash icon on the recent panel located on the bottom of the screen.
- Click the right button of the mouse now.
- Finally, press the ‘Empty Trash’ option to delete the files permanently.
b). Empty the trash, system 2:
- Open the Trash folder first.
- Click on the ‘Empty’ option from the top right corner.

- Confirm deleting the files permanently by clicking on the ‘Empty Trash’ option in the pop-up window.
Formatting the Flash Drive
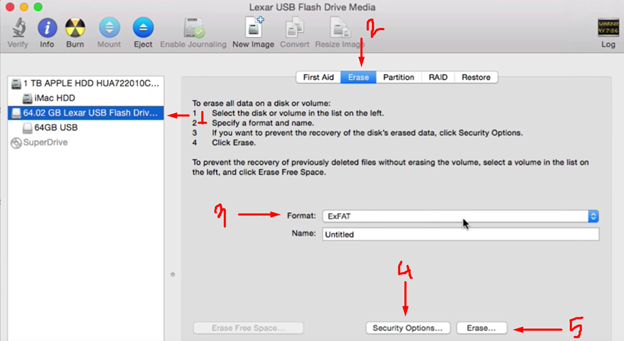
- At first, open the Application folder.
- Then Go to the Utility option and open it.
- After that open the ‘Disk Utility’ application.
- From the left navigation bar select your external Flash Drive.
- Now select the erase option from the top of the window.
- There are many formats in there; select the ‘ExFAT’ option from there.
- Now go to ‘Security Option’ and set the pointer to the ‘Most secure’ and press ‘OK’.
- Finally, click on the ‘Erase . . .’ button to delete all files in the Flash Drive.

Deleting the Flash Drive files by third-party apps
- At first, open the ‘Safari’ web browser on your computer.
- Now type the ‘https://www.imobie.com/macclean/’ address on your search bar and click enter to go to the website.
- On the webpage click on the ‘Free Download’ to download the Mac Clean’s application.
- After completion of download; install the application.
- Now open the application.

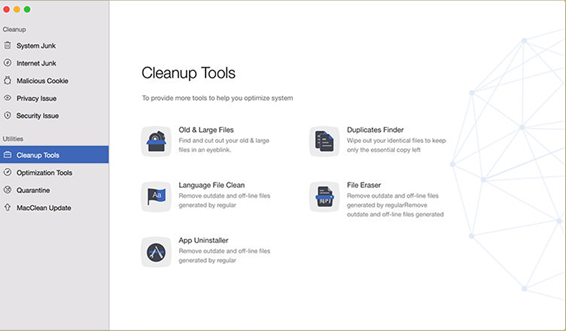
- After that select the ‘Cleanup Tool’ from the Utility list.
- Now click the ’File Eraser’ from it.
- Choose the file and click erase.
Now your file has been deleted permanently.
Summary: Delete files of a Flash Drive on a Mac
- Insert the flash drive.
- Open the finder window.
- Select the files to delete.Instructable
- Right-click on selected files.
- Click on "move to trash".
- Click on "Finder" in the menu bar at the top of the screen, and then click on "empty trash".