Bonjour ormaintained by Apple, is a way for devices to discover each other and communicate on a network without knowing explicitly the address of the others. When you setup a printer for example, the program that talks to the printer over the internet will ask your machine for the printer's local IP address. It then sends that address to the printer which in turn replies back with its unique identifier (which could be its name). Now that your computer and printer have communicated together and agreed upon each other’s names they can work together in harmony. Other services such as iTunes use Bonjour as well.
Bonjour is Apple’s version of the Zeroconf (Zero configuration network) standard. It allows certain communication between applications, services, and network-connected devices. Bonjour is mostly used in home networks to allow Apple devices to share printers and other devices.
When you install macOS on your computer bonjour will be installed and activated automatically. As I have said, it is mostly used for printers, so you will have to enable Bonjour on your printer so that your device can find it. You will have to enable Bonjour for any applications or devices that require Bonjour to be connected.
In this article, I will show you how to enable Bonjour on Mac for a printer. You can use this method to enable Bonjour on Mac for other devices and applications as well. So let’s start.
Enabling Bonjour on Mac for a Printer
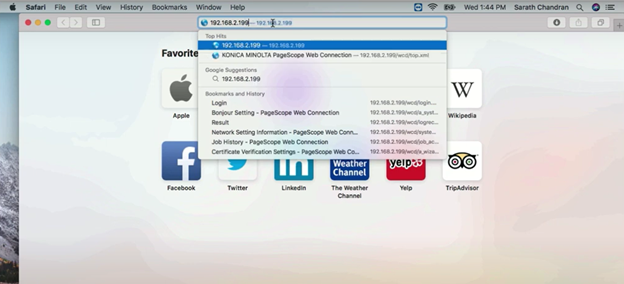
- Open the browser (I have opened “Safari”) and enter the printer IP address. Here I am using a “KONICA MINOLTA” printer. You have to enter the IP for your printer.
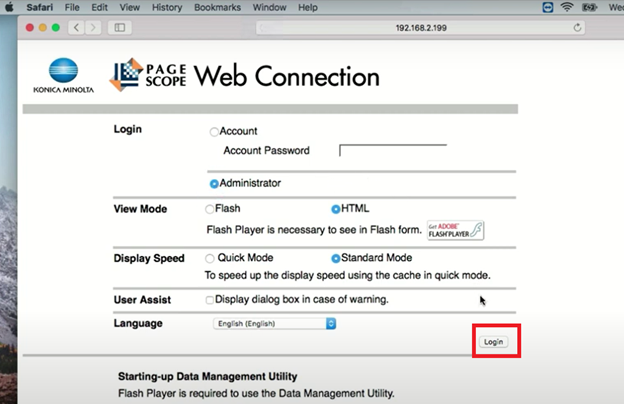
- You will see the “Admin Log-in Panel” when you enter the IP. Log into the admin menu from the panel. If you have a password, use that. The default password for KONICA MINOLTA printers is “1234567812345678”.
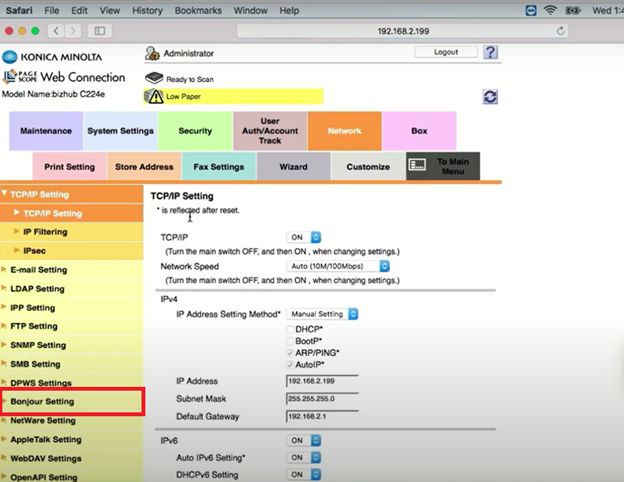
- After logging in, you will find an option called “Network”. Different printers will have different positions for that option. Look around the tab to find it and then hit the “Network” button.

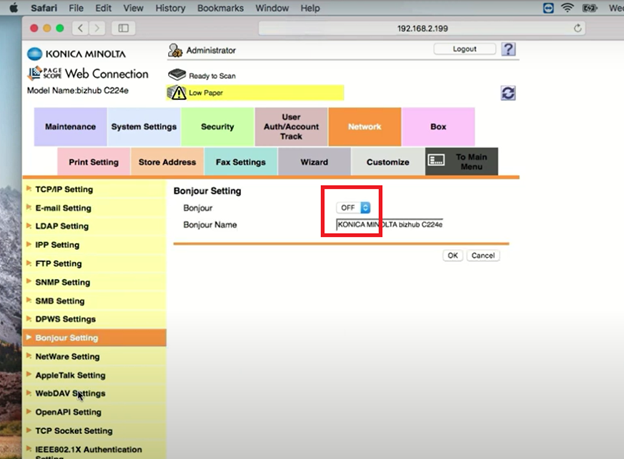
- In the “Network” menu, you will see “Bonjour Setting” on the sidebar. Click there to enter the Bonjour settings.
- When you enter Bonjour Settings, you will see that Bonjour is off. Just click the button to enable Bonjour for the printer.
- After that, log out from the admin panel and close the browser.
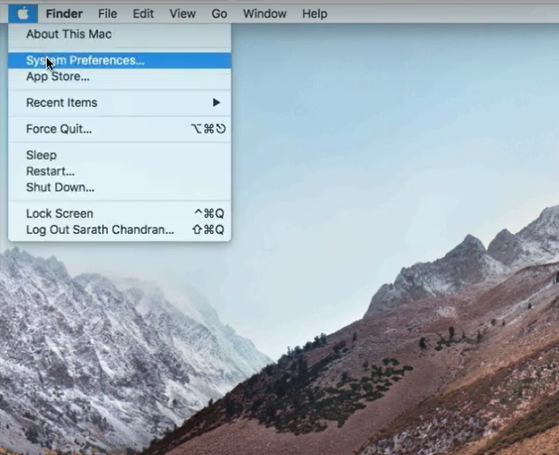
- Now, click on the “Apple Icon” on the top bar and go to “System Preferences”.
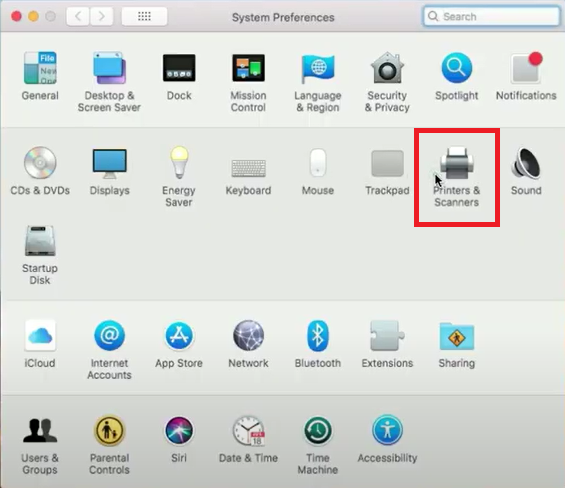
- In this menu, you will find an icon for “Printers & Scanners”. Click on that icon to open the menu of printers and scanners. You will add your new printer from there.
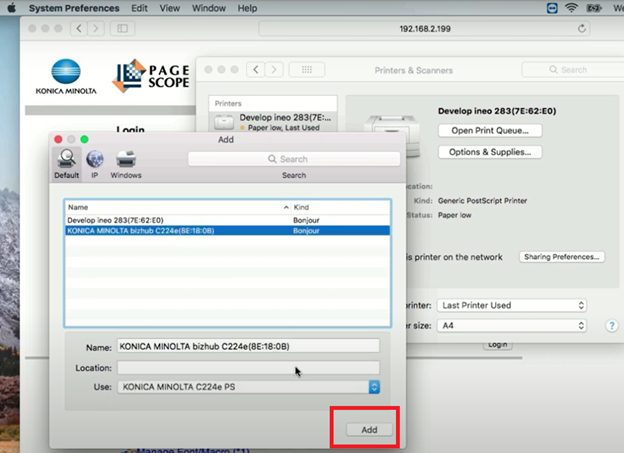
- When the pop-up menu opens, click on the “+” icon as shown in the picture below.
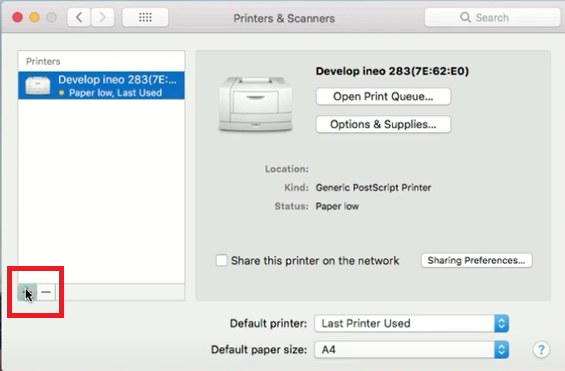
- You will find your newly installed and Bonjour-enabled printer in the list. Select it and hit the "Add" button below.
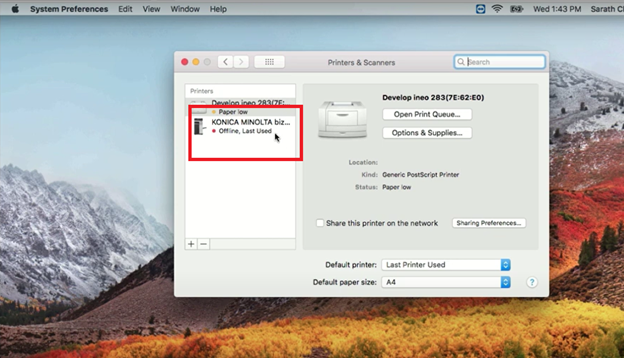
- Now will see your printer added to the list of “Printers & Scanners”.
You can use this process to enable Bonjour for any devices and then find it on the “Settings and Preferences” menu.
Sharing Files & Devices When Bonjour is Enabled
When Bonjour is enabled in a workstation, you can share files, or install printers, scanners, and other devices on other computers that are attached to that workstation. To do so, follow the steps below:
- Go to system preferences from the “Apple Menu”.
- In the “Internet and Wireless” section you will find an option named “Sharing”. Click there.

- Select the "Printer Sharing" option to share printers, "File Sharing" option to share files, and so on.
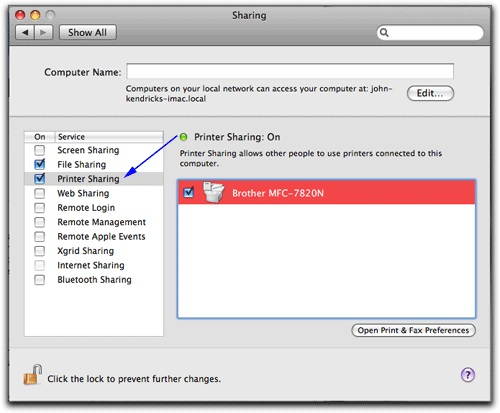
- Here you will find any installed devices/applications that have Bonjour enabled.
Summary: Enable Bonjour on Mac
- Open Terminal.
- Run this command to list all available Bonjour services. networksetup -listallnetworkservices
- To enable Bonjour, use this command, making sure to replace Wi-Fi with your service name from the previous step if necessary.sudo networksetup -setdnssd on Wi-Fi
- Enter your administrator password when prompted.
