How To Fix Windows 10 Running Slow After Latest Update Or Patches?
586 Views
Windows 10 has a lot of new features but many of these features comes at a cost. As it introduced Universal Windows Platform (UWP) apps for example. It comes with advanced security protection and added productivity technologies, viruses is the top reason for people to lose data from their computer, so when you introduce advanced security protection and added productivity technologies, your computer is going to slow down, that is why today we are going to share you some methods on "how to fix windows 10 running slow after latest update or patches".
Windows updates are important as they ensure updated security, a latest interface and a better performance overall. Unfortunately, these windows updates may cause other issues like slowing down the computer’s performance. Truth be told, there is nothing frustrating like a sluggish PC.
In this article, we will look at some easy steps to fix this issue and boost your computer’s performance after an update.
Method 1: Disable Additional Features
Usually, new updates come with additional features like better visual appearance that are aimed to increase the performance of your computer. However, these new features might need advanced hardware, and lack of it may slow down your computer’s performance.
One way to fix this issue is by disabling the additional features. Here is how to do it:
- Open Settings by pressing the Windows + U keys.
- Under the Vision section, click on Display to open its tab on the right-hand side.
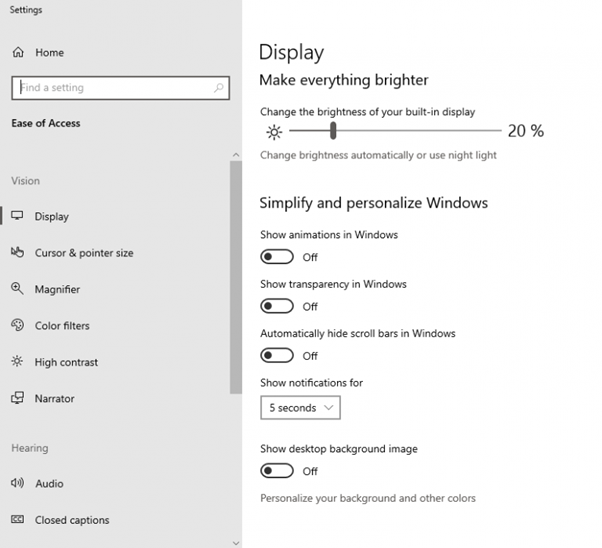
- Navigate to the section that lets you Simplify and personalize. Here, you will see visual features that utilize a lot of RAM, causing your Windows 10 to perform slowly. Disable the first three visual features provided under this section, as shown below.
Method 2: Disable Startup & Background Applications
Oftentimes, we have third-party applications that we rarely use and can automatically start each time the computer boots. This results to increased startup time. There may also be native apps that run the background and restricting them can help to free up important system resources and boost your computer’s performance.
Follow these methods to disable startup and background applications:
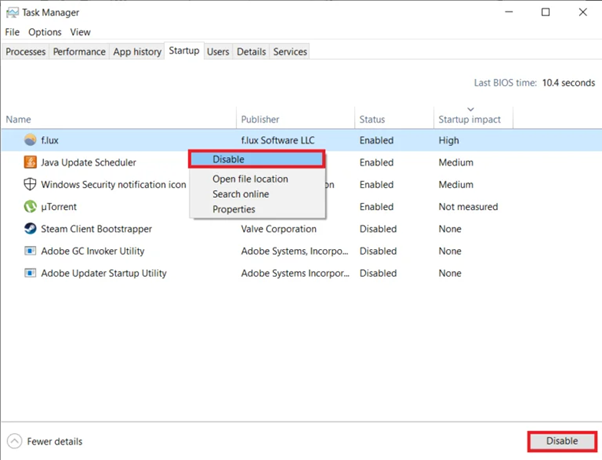
- To open the Task Manager, press the Ctrl+ Shift+ Esc keys. You can also right-click on the taskbar that is below your screen and choose Task Manager from the options provided.
- Next, go the Startup tab in the Task Manager window.
- Go to the Startup impact column, where you will see the programs that use the most resources.
- If you don’t see a program that you don’t use regularly, disable it by right clicking on the application and choose Disable from the context menu. Alternatively, you can select the application and click Disable at the bottom right of the page.
To remove a background application, follow these steps:
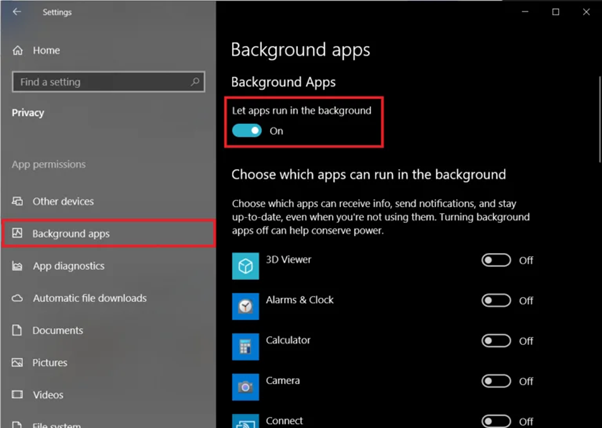
- Open the Windows Settings and go to Privacy. Click on it.
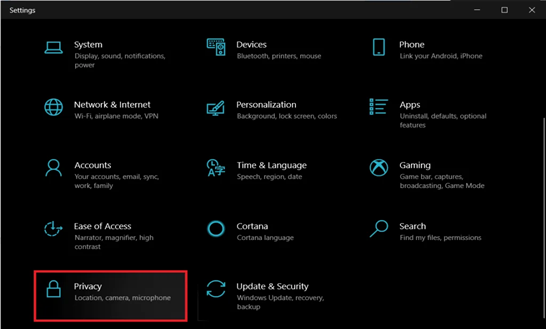
- Click on Background apps on the left panel.
- Disable the button that lets apps run in the background. This will disable all background applications. Alternatively, you can choose each app individually and select which ones you want to continue running in the background.
- Once done, restart your PC to see if the issue of slow performance is fixed.
Method 3: Perform a System Restore
Doing a system restore is a good option for bring back your operating system to its functioning state after an update. However, doing a system restore will remove these updates. If you still want to go ahead, here are the steps to follow:
- Press the Windows + S keys on your keyboard to open the Search bar.
- Next, type System Restore on the search bar.
- From the options provided, click on Create a Restore Point.
- A new window will appear. Click on System Restore and choose the Show more restore points option.
- Now, select the issue did not exist and click Next.
- To complete the system restore process, follow through the on-screen instructions provided. After the process is done, check to see whether your PC is performing better.
Method 4: Remove Malware or Unwanted Applications
Sometimes, slow performance of a Windows 10 computer can be caused by a malware infection. Hence, it is important to check for malware through regular scans to keep them at bay. Here is how:
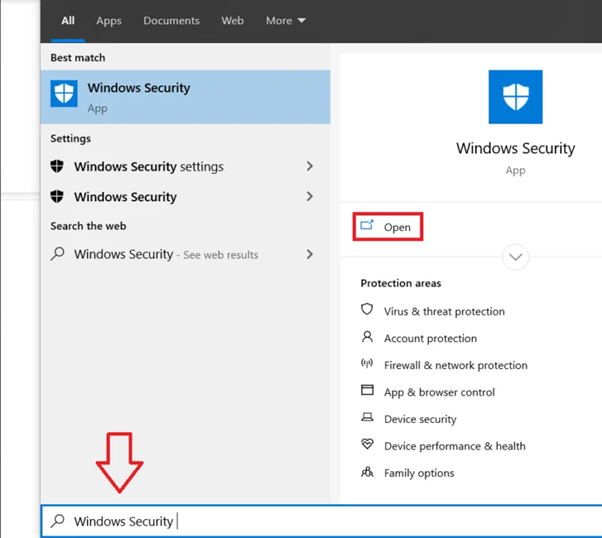
- Press Windows + S keys to open the search bar and type Windows Settings.
- In the left panel, click on Virus & threat protection option.
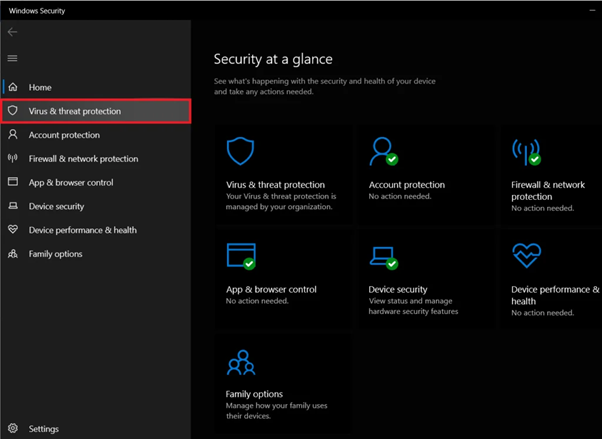
- Now, choose whether to do a Quick Scan or Full Scan. You can also use free third-party antivirus tools to check and remove malware or unwanted applications.
Summary: Fix Windows 10 running slow after latest Update or Patches
- Firstly you will to check your PC.
- In settings go to Update & Security.
- Open the Task Manager on your PC.
- Find and double-click on Windows Update service.
- Reboot your PC and Try again after the reboot.
- Go to Control Panel\System and Security\Administrative Tools and run the Services tool.
- Click on your antivirus program and select Disable (or similar). Now restart your PC and see if that fixes it?
Conclusion
There are numerous methods that you can use to revive the performance of your Windows 10 computer. Above are just some of the methods that can help you fix the issue of slow performance after an update. If none of them works, consider increasing the amount of RAM in your computer or upgrade from HDD to SSD.
