In this article, we will learn how to format memory card on Playstation 2 emulator PCSX2. This can be really useful for users who have problems in running games or upgrading the Pcsx2 emulator. We don't want to lose our important saves, so it is a good practice to know how to reformat the memory card of PS2 emulator on PCSX2 PC software.

PCSX2 is PlayStation 2 (PS2) emulation software released under the GNU General Public License for Windows 7, 8, and 10 operating systems. In short, PCSX2 is a free and open-source emulator that lets you play a huge number of PS2 games on your PC.
However, even if you can run the game successfully, you cannot save your game progress without a formatted virtual memory card. In this article, you will find out how to configure a virtual memory card via PCSX2 and how to format the newly created memory card so you can save your PS2 games easily.
How to Create a Virtual PS2 Memory Card?
- Open PCSX2.
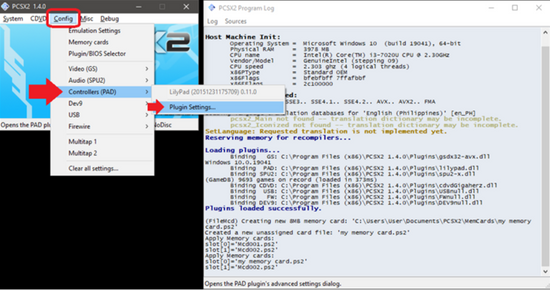
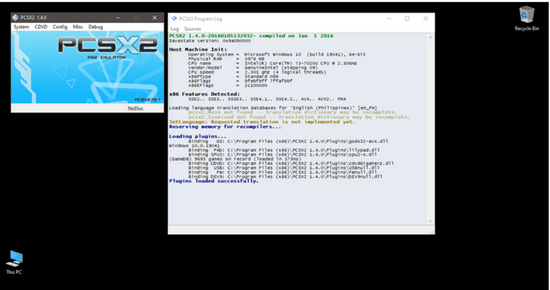 The PCSX2 Program Log window - as seen on the above screenshot - should not generate any errors upon booting the emulation software.
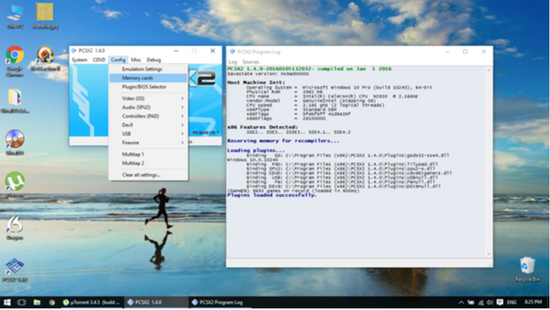
 - Click on the Config option at the top menu and then click on Memory cards.
 The emulator's Memory Card Manager window must show up afterward as shown below.
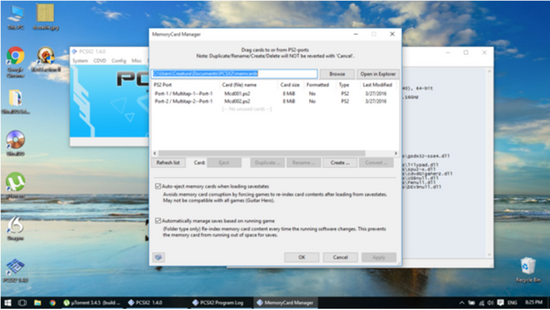
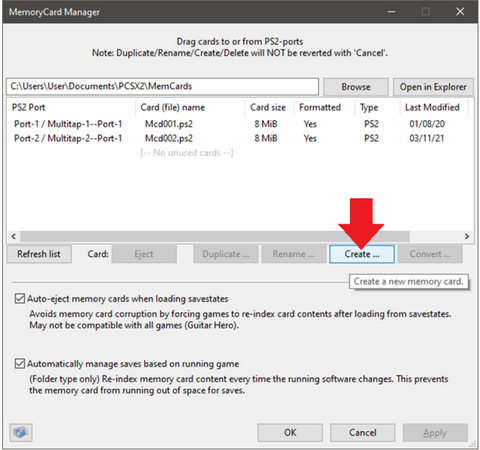
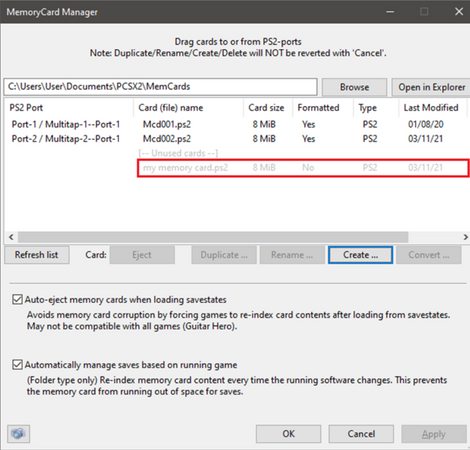
- On the MemoryCard Manager window, make sure to click on the empty area or space below the two detected memory cards to unlock the "Create ..." button.
- Click on the "Create ..." button to proceed with the PS2 memory card creation.
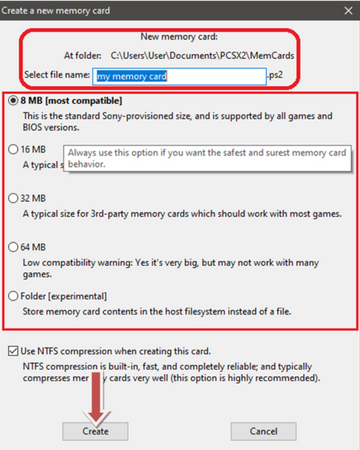
 A small dialog window named "Create a new memory card" will show up.
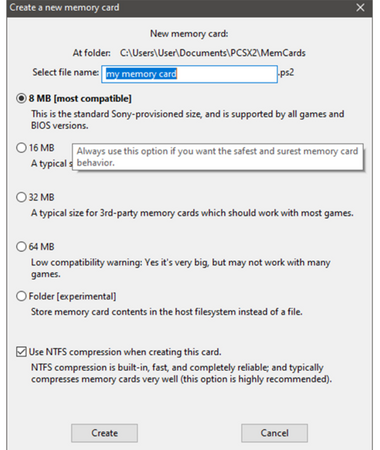
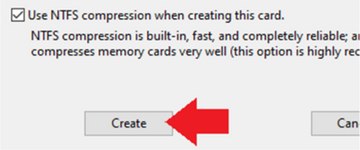
- Next, give your new memory card a name. Click on the radio option beside your memory card size option of choice, and then click Create.
- Make sure that the newly created memory card shows up below the two detected memory cards and is grayed out for now.
- Click on the newly created and grayed out memory card, and then click on the "Insert ..." button.
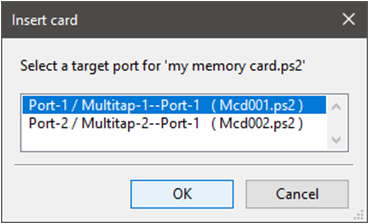
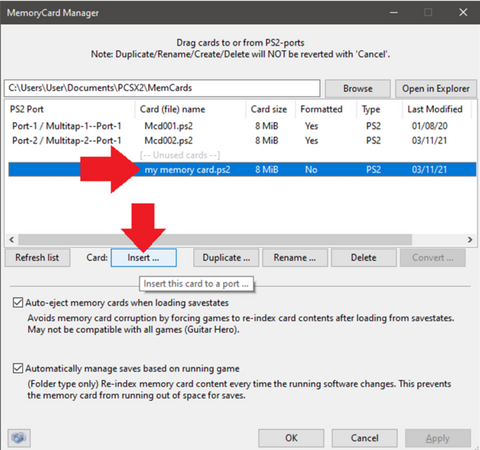 Another smaller dialog window titled "Insert card" will pop up.
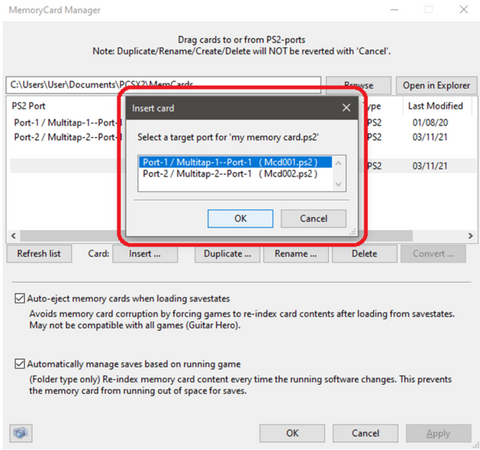
- Click on the port where you want to insert the new memory card, and then click OK.
- The new memory card should appear in the port that you have selected during Step 8 of Creating a Virtual PS2 Memory Card. Additionally, keep in mind that the formatted status of the inserted new card should say No for this entire walkthrough.
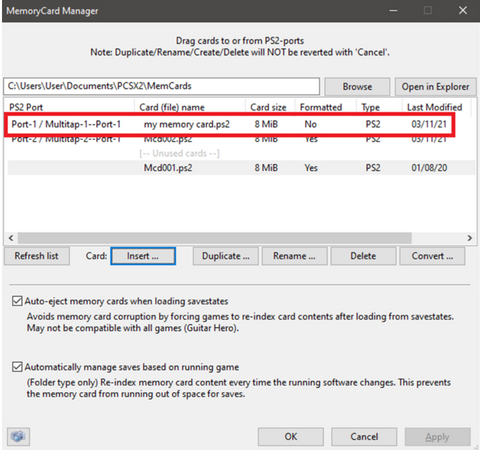
Once you're done with the entire memory card creation procedure, click OK to apply the changes and close the Memory Card Manager window.
Checking the Controller Configuration
Follow these steps to check the controller configuration:
- From the main PCSX2 window, go to Config > Controllers (PAD) > Plugin Settings...
 A window for the default controller plugin will pop up.
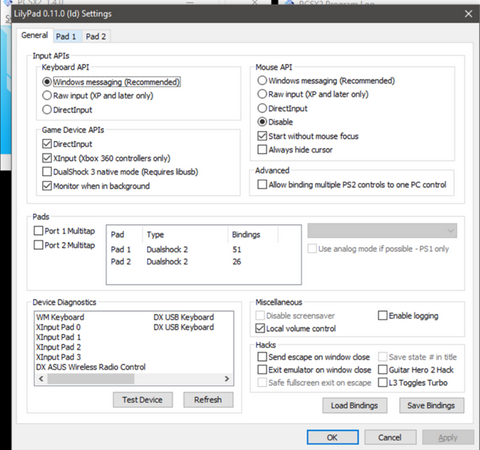
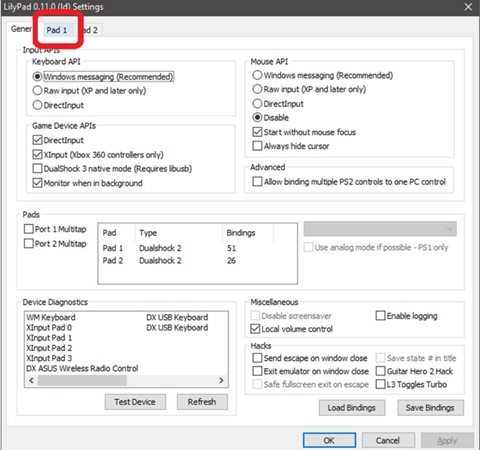
- On the controller plugin window, click on the Pad 1 tab.
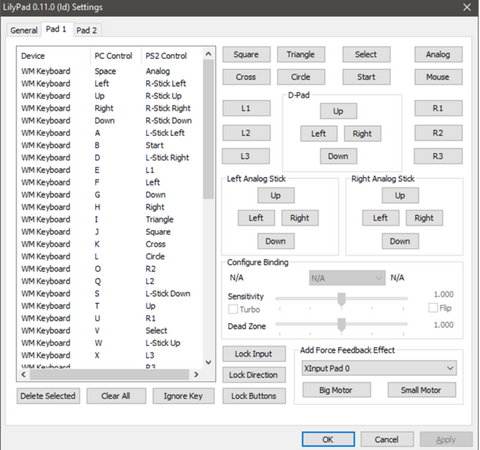
- Before you proceed to access the PS2 BIOS screen, take note of the following important PS2 Control buttons:
- Cross (the blue X)
- Circle
- D-Pad Up
- D-Pad Down
- D-Pad Left
- D-Pad Right
- L-Stick Up
- L-Stick Down
- L-Stick Left
- L-Stick Right
Take your time to determine and familiarize or manually assign the PC keys associated with the above PS2 buttons.
Although the next screenshot does not show the default controller settings, you may also refer to it for specific details on which PC keys are assigned to the corresponding PS2 Control buttons listed above.
Once you've completed the controller configuration, click OK to quickly apply the changes.
Formatting a Memory Card via the PS2 BIOS Screen
If you want to format the memory card through PS2 BIOS screen, follow these screens below:
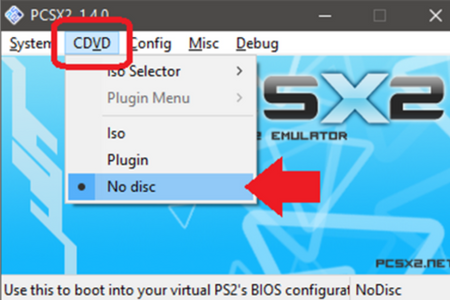
- From the main PCSX2 window, access the CDVD menu and then click on the No disc option.
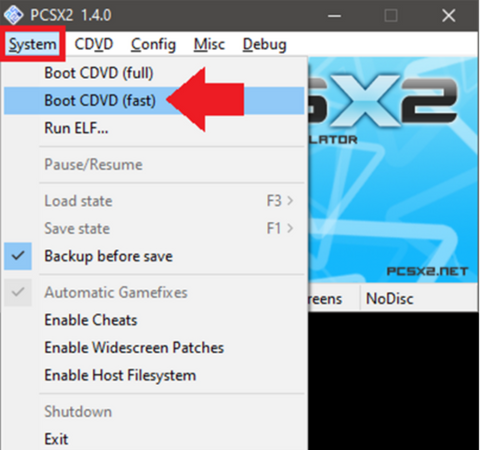
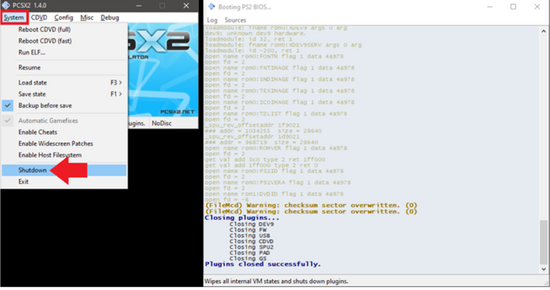
- Access the PS2 BIOS screen via System > Boot CDVD (fast)
 If you did not encounter any errors upon booting the console BIOS screen, you should see the main PS2 BIOS menu.
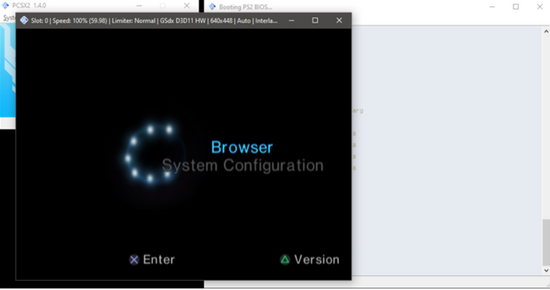
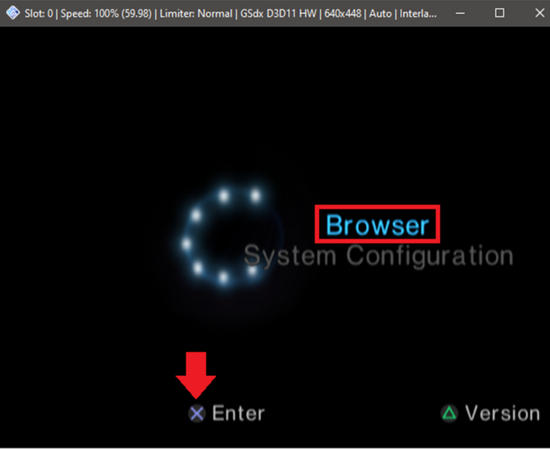
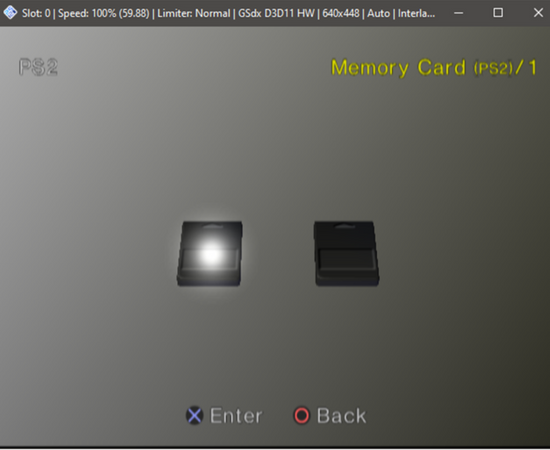
- Select the Browser option and press the PC key that's bound to the PS2 Cross (the blue X) button to enter the PS2 Memory Card menu.
- Select the memory card slot - in this case, the PCSX2 memory card port - that needs to be formatted.
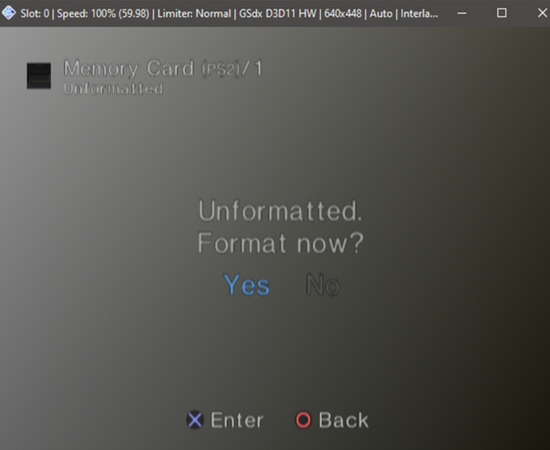
- You'll then see a message that says "Unformatted. Format now?" Select Yes and hit the key associated with the PS2 Cross (the blue X) button to start formatting.
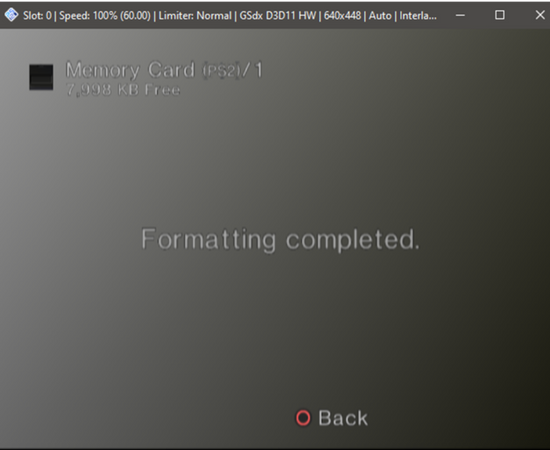
- If the memory card formatting is successful, you should see the message saying "Formatting completed." From there, press the key that is bound to the red Circle PS2 button to go back.
 Instead of "Unformatted. Format now?" the PS2 system message this time should instead say "There is no data."
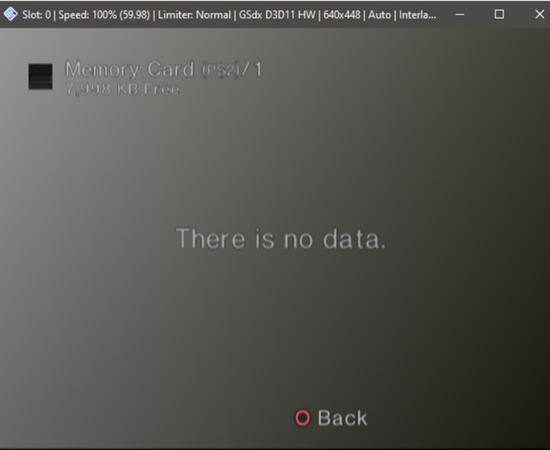
- Going back to the main PCSX2 window, click on the System menu > Shutdown to end the emulation completely.
- Restart PCSX2 to fully apply the changes.
Summary: Format a Memory Card on PCSX2
- Go to the 'Config' menu, and then click on 'Memory Cards'.
- Create a new PS2 memory card by clicking the 'Create New' button under the memcard image (see image).
- Name your memory card, then click OK!
- You will be warned about losing all data on the card, so confirm you want to continue.
- Click OK in the box that appears to format your memory card as a PS2 save file.
Conclusion
Follow the above steps to format the memory card on PCSX2. By doing this, you will have an easy time saving your PS2 games.
