If your Chromebook keeps getting virus warning, you need to remove virus on Chromebook immediately.
Chromebook is one of the safest devices that has a comparatively fewer virus and malware attacks. However, if your Chromebook has a virus or got your browser hijacked, follow the process below to get rid of it.
Power wash Chromebook to Remove Virus
Power wash is an effective solution to remove viruses from your Chromebook. It will remove all the files, reset everything to factory settings and make your device just like a new one. However, make sure you back up all important files before doing this process. Power wash will delete all the existing files from your Chromebook. Here is the procedure below.
- Turn on the “Chromebook” and log in by entering the “Password.” If you don’t have the password go with the “Add a Person” option from down.
- The “Settings” interface will pop up on your computer screen. Navigate to the bottom right corner and click on the “Menu” bar if it doesn’t. Launch “Settings” from there.
- When the “Settings” tab opens, scroll down and click on the “Advanced” option from down.
- Now, from “Advanced Settings,” keep scrolling down and find the “Powerwash” option right under the “Reset Settings” header. Click on the “Reset” button.
- A pop-up notification will ask for your permission to continue the process. Click on “Restart” from there. Your computer will restart in a couple of minutes. It might take a little longer than usual.
- A notification tab will appear again to take your permission. Go with the “Power wash” option from down.
- Click on the “Confirm” button next. The Power wash will start immediately. It might take 2-3 minutes or more. Wait for the process to end correctly.
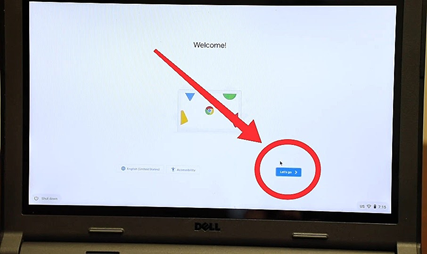
- When done, a “Welcome” interface will appear. Go with the “Let’s Start” button. Now, your Chromebook is all set to work again.
Alternative Way to Power wash the Chromebook
Though the first one is pretty easy to follow, we still have another easier one for you. Well, this may not work on every device. Follow the steps below to check if it works on your device correctly. Here is the entire process down.
- First, turn on your Chromebook and go to the “Sign in” interface.
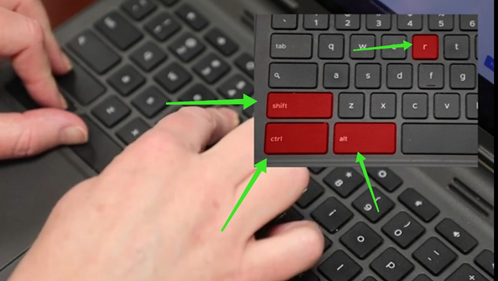
- From there, press the “ctrl, shift, alt, and R” key from your keyboard for once.
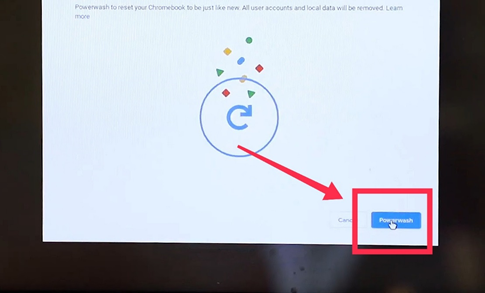
- The “Chromebook Window” will come up on your screen. On the bottom right side, you will see the “Power wash” button. Click on it.
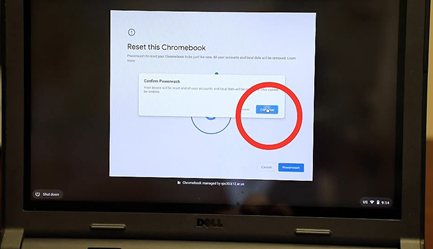
- A pop-up notification will ask for your confirmation to continue the process. Go with the “Continue” button from there.
- The Power wash process will begin, and the Chromebook will restart immediately.
- The “Welcome” interface will appear next. Go with the “Let’s Start” option from down.
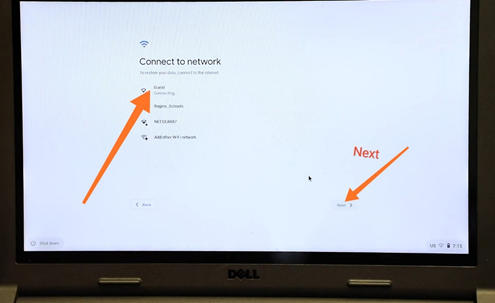
- Now, select and connect to a WiFi network by entering the password. Hit “Next” to continue.
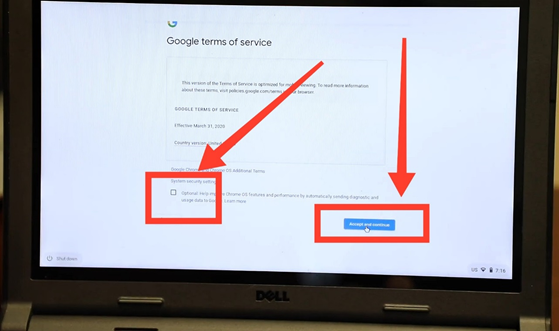
- A new interface will come up with “Google services and terms.” Uncheck the box visible on the bottom left side and select the “Agree and continue” option.
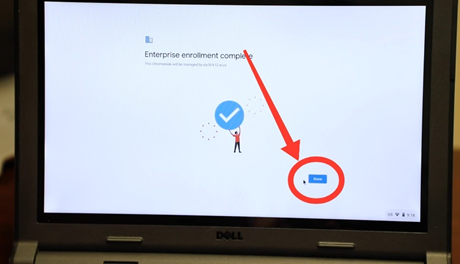
- The “Enterprise Enrollment” process will start. When done, hit the blue “Done” button from down.
- The Chromebook sign in Windows will appear. Sign in and enjoy your virus-free Chromebook.
Summary: Get Rid of Virus on Chromebook
- Restart the Chromebook.
- Check your Chrome extensions.
- Check your list of programs in Windows.
- Run a scan using Chrome Cleanup tool.
- Clean up the registry with Cleaner.