Imagine that you need to give your PS4 a Static IP Address. And you can't remember how to do it. What would you do? You tried googling for the answer and found dozens of tutorials. None of them worked!
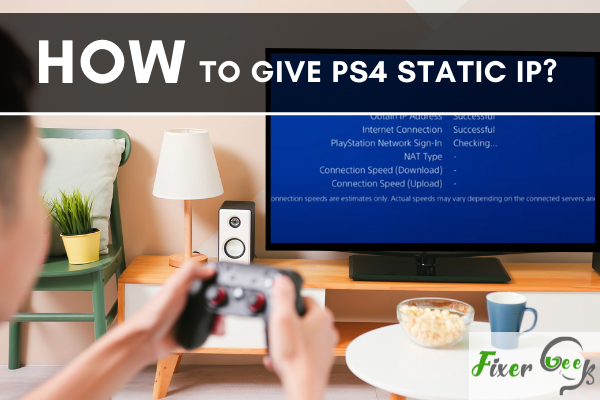
Your PS4 IP address can either be static or dynamic. The static IP address won’t change where the dynamic one will alter every time you start your PS4. Getting a static IP on your PS4 will ensure a smooth connection giving you a better gaming experience. It also helps to port forward in your router and experience a NAT Type 2 connection.
To assist you in setting up a static IP address on any PS4, I’ll describe some simple procedures.
Setting Up a Static IP Address on PS4
In some way, giving your PS4 a static IP is kind of similar to other devices. To set up a static IP address on your PS4, follow the directions below –
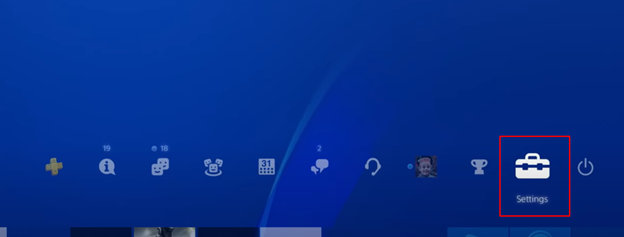
- Open the PS4 settings.
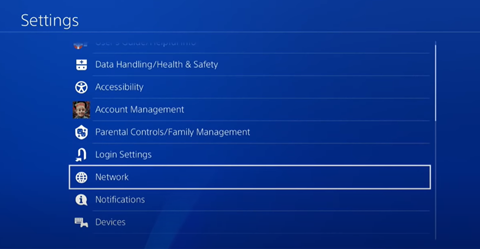
- Go to the “Network” section.
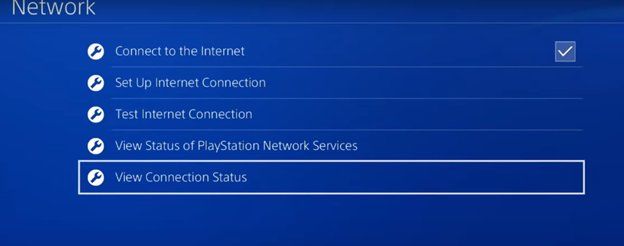
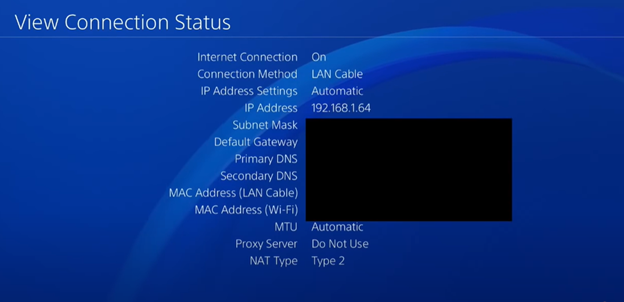
- Go to “View Connection Status.”
- Note down the connection information (Default Gateway, Subnet Mask, Primary and Secondary DNS, IP address) or picture the screen.
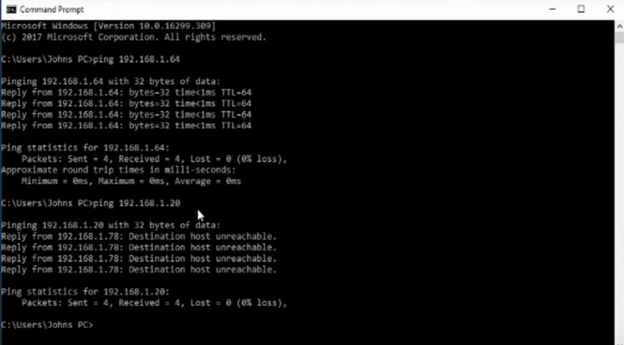
- Now, open your PC and launch the “Command Prompt” program.
- To assign a static IP address, you have to change the last numerical value from the IP address you’ve got from the connection status information earlier (if the IP address you’ve noted down was 192.168.1.64, change it to something like 192.168.1.20).
- Ping random IP address to check if that can be assigned to your PS4 as a static IP address. If the ping command says “Destination host unreachable,” it can be used on your PS4.
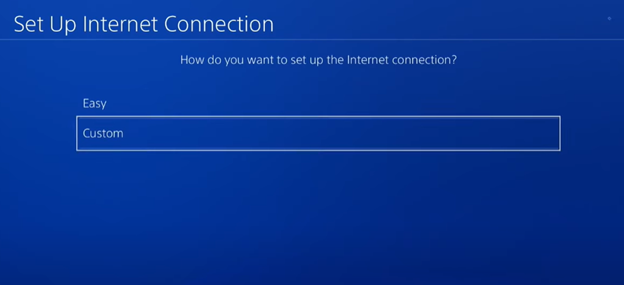
- Go to your PS4 network settings again and open “Set Up Internet Connection.”
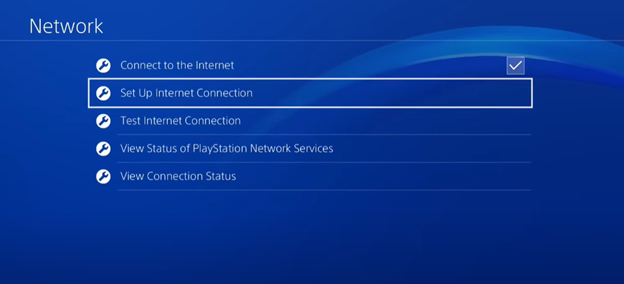
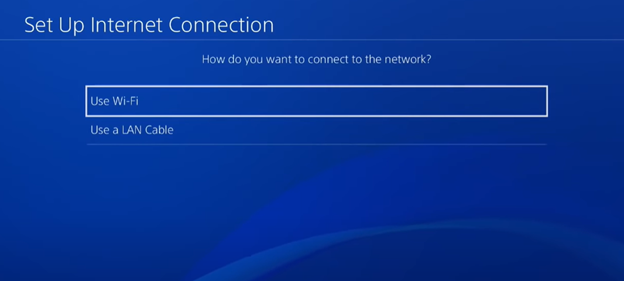
- Choose your internet source type.
- Select “Custom.”
- Go to the “Manual” option.

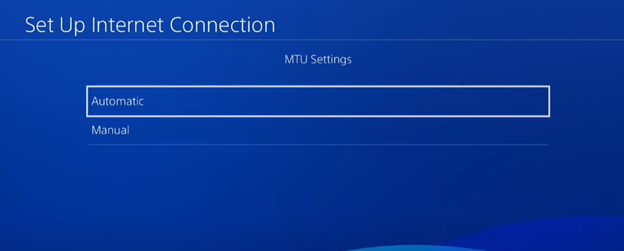
- Set the IP address you want to assign permanently to your PS4. Provide the other information for Default Gateway, Subnet Mask, Primary DNS, and secondary DNS, same as the one you’ve noted down from the network connection status. Click on “Next.”

- Set the “MTU Settings” automatic.
- If you don’t use a proxy server, skip the next step. Now, click on “Test Internet Connection.”
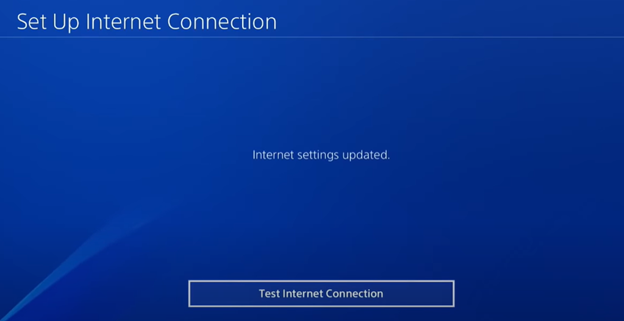
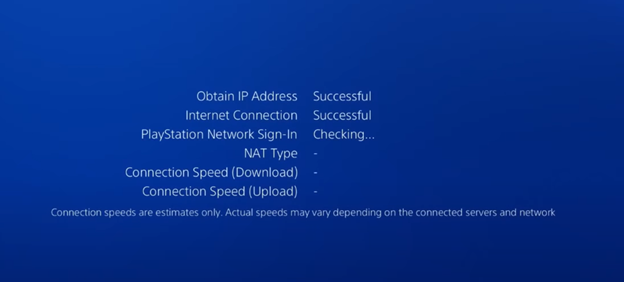
- Your PS4 will start the connection test. The statuses should indicate positively. Finally, the static IP will be assigned.
Is Static IP Needed for Gaming?
Static IP addresses are essential for games, website publishing, or Voice over Internet Protocol (VoIP) operations. Time and speed are significant benefits. Static IP addresses are invariable. Hence static IP VPNs are a must to safeguard systems with static IP addresses against potential security threats. In addition to this, you can build a local game server with your buddies and not have to waste any time hunting for your IP if you provide a static IP to your computer.
Is Static IP Illegal?
Despite the legality of concealing your IP address, it is illegal to fabricate it and make misleading claims about it online. Furthermore, this is also covered by the Computer Fraud and Abuse Act. Having a phony Facebook profile is a crime, like IP address spoofing, so we could still be arrested even if many of us do it to protect our identity.
Summary: Give PS4 Static IP
- Go to settings.
- Go to Network using a directional pad.
- Select Set Up Internet Connection.
- Select either Wi-Fi or LAN cable as appropriate.
- Select Custom.
- Select IP Address Settings.
- Select Manual.
- Enter IP address and other settings correctly.
