Whether the company that you work for works with Windows 7 or Windows 10, installing Active Directory on either of these platforms is pretty much the same. Here's a step-by-step guide to help you out:

Active Directory (AD) is a catalog service constructed by Microsoft. It is used in various Windows domain networks. It accommodates functioning with interdependent, complicated, various types of network asses in a cooperative approach. You can set up it in Windows 7, Windows 8, Windows 8.1, and Windows 10 without too much hassle. However, it is offered as a segment of the Microsoft Server Tools, so you have to install the Server Tools to enable the Active Directory. Ao, here, we will give you proper knowledge about how to install Active Directory on Windows 7.
Before You Get Started
Active Directory Users and Computers tool is comprised in nearly all Windows Server operating systems as a series of methods and works. It saves various records about an element on the network and helps the administrators and users to locate the records quickly and conveniently. However, for Windows 7, it is not accessible by default in the system. So, you have to set up it by externally downloading the installer package from the website. You will find the updated version on the official Microsoft website. However, during installation, some problems may appear like this:
- The Active Directory Users and Computers version is not the up to date version.
- The window shows a dialog box notifying that installation is not completed properly.
- The installation process can not find the required installation files.
Do not worry if these problems appear. Follow our given procedure and it will install properly. So, without wasting any more time, let us move on to how to install Active Directory on Windows 7.
Installing Active Directory on Windows 7
- First, you have to go to the Microsoft website and download the Active Directory Users and Computers. You may also download it from here – Download ADUC for Windows 7. See your Windows is a 32-bit or 64-bit system and choose appropriately.
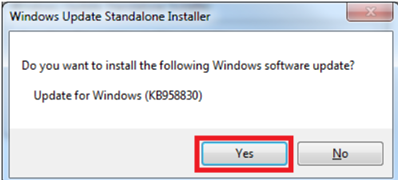
- Initiate the installation of the package. It will ask if you wish to update the Windows. Select “Yes” to confirm.
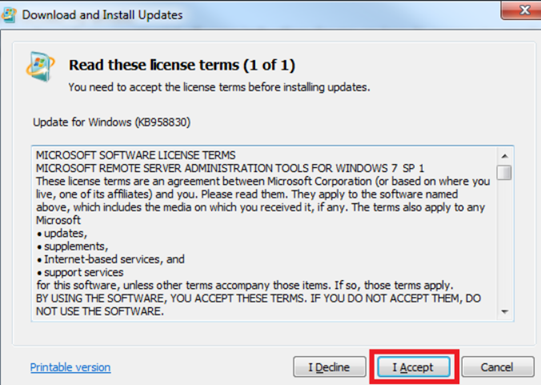
- Then, the terms and agreements window will appear. Read the rules and regulations, then comply with the terms by selecting “I Accept”.
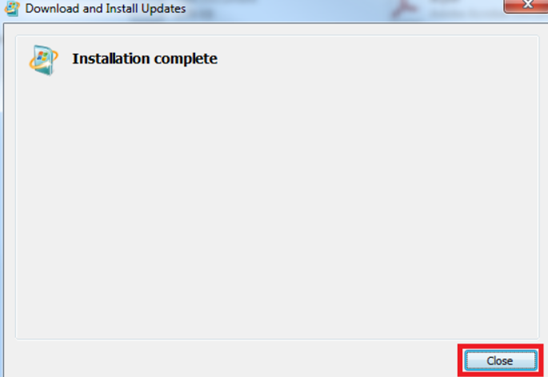
- It will need a little bit of time for the installation to complete. When finished, select “Close”.
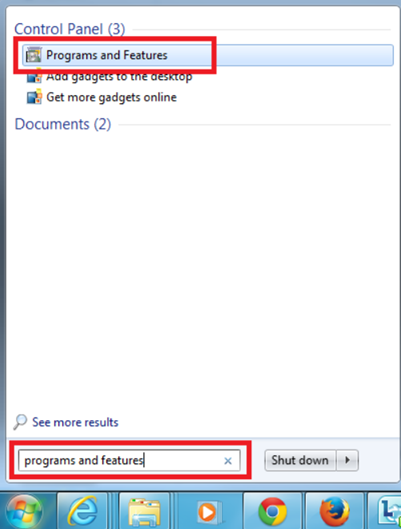
- Now, to start up the “feature” option, navigate to the Windows Start Menu. Locate the search option and write down “Programs and Features”. Then, the “Program and Features” option will emerge at the top. Select it.
- You will get the “Turn Windows features on or off” option at the left of the screen. Select it.
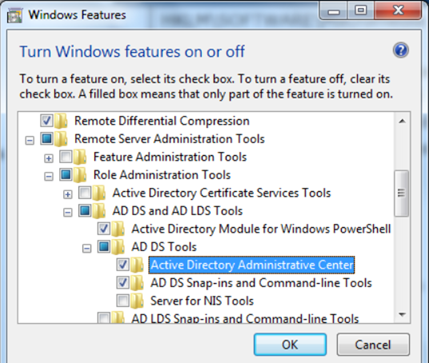
- Locate the “Remote Server Administration Tools” file and enhance it. Then, click on the “Role Administration Tools” option and enhance the “AD DS and AD LDS Tools”.
- The “AD DS Tools” option will be located beneath the “Active Directory Module for Windows PowerShell”. Click on it. You will see a small box beside the “Active Directory Administrative Center” option. Click on it and preserve the alteration by selecting the option “OK”.
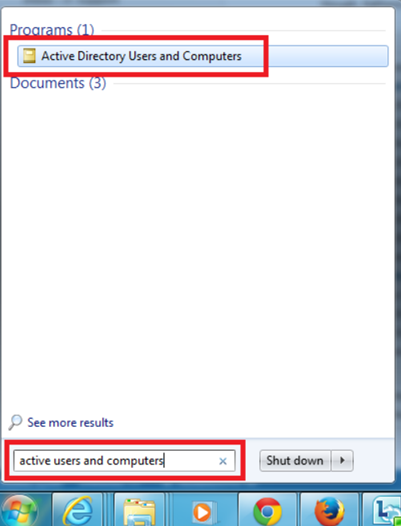
- After the installation is complete, relaunch your Windows. Then, you can use the “Active Directory Users and Computers” anytime you need. You may locate it from the Windows Start menu.
So, following these steps, you can install Active Directory on Windows 7 effortlessly.
Summary: Install Active Directory on Windows 7
- Install the Active Directory Domain Services role.
- Complete the configuration wizard and promote the server to domain controller.
- Add a domain user account to the local admin group.
