EdrawMax is a tremendously useful diagramming tool for many industries. It is used to draw flowcharts, mind maps, cross functional processes, timetables and much more.In this article, I will discuss how to make genogram on EdrawMax.
What is a Genogram? It is a graphic representation of an individual's blood connections and health study. It permits the individual to envision and analyze the sequence and mental aspects that intersect connections. It means a Genogram tries far toward disclosing family facts. Following this article, you can create professional Genograms easily using the software. Here, we will give you a general idea about how to make Genogram on E draw Max.
Before You Get Started
E draw Max is a 2D organization technological designing program. It helps to make flow charts, departmental graphs, base designs, communication graphs, workflow graphs, and constructional designs. E draw Max is the ideal choice for creating a Genogram. It has built-in vector symbols and free templates that help you to make a Genogram without too much hassle. Before you start making a Genogram on a family, ensure these things:
- First, set the number of generations you want to illustrate on the Genogram.
- Choose a family that meets your required generations.
- Gather approximately accurate facts that you can find concerning the family.
- Collect all the names, birthdates, and fundamental relations.
- Consult with a few family representatives to know about more family tales to insert the absent facts.
After collecting enough information you are now ready to make a Genogram about the family. You can create Genogram in two ways: Hand drawing and using easy and quick Genogram software. We will advise using the software. A computerized Genogram is greatly efficient for collecting and eventual altering. Let us show you how to make it in E draw Max. So, follow us along.
Making Genogram on E draw Max
- First, open the E draw Max. Then see the options at the toolbar on left. Click on “New”. A collapsing lineup will come out. Choose “Science and Education”. Then select “Genogram” from the options.
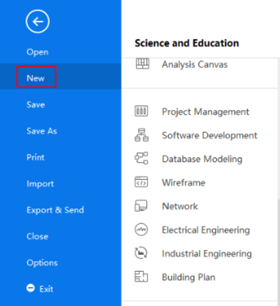
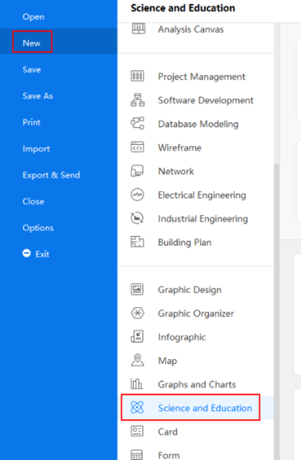
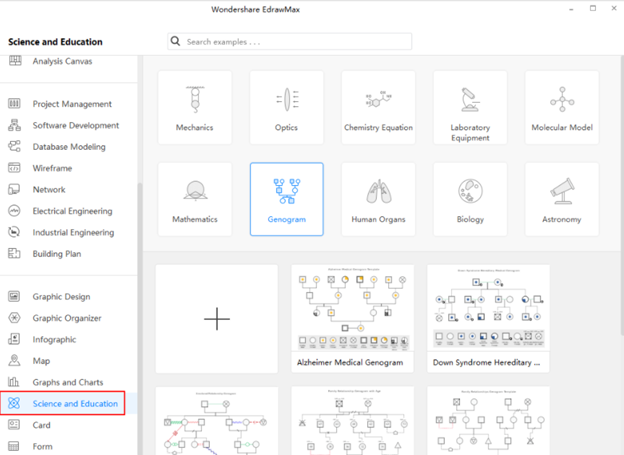
- Decide the layout of your Genogram. Go to the “Page Layout” tab. Adjust your page background and set up the accurate placements of texts and images.

- You can also use the “View” option to choose the limits of the sheet. Tick the “Gridlines” and “Rulers” option.

- Now add content to your Genogram. Select the “Home” tab. Then, make a text box by clicking on “Text”. Input your text in the box. Modify the features of content in the “Font” panel beneath the “Home” option.

- E draw Max has a well supply of regular Genogram symbols. Access the symbol list of Genogram on the left side. The different symbol means different relationships and people. Select a symbol and drop them at Genogram by dragging them.
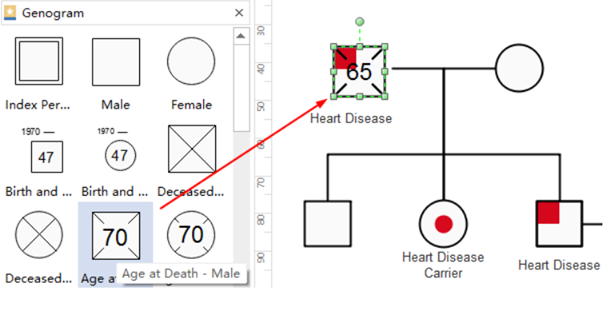
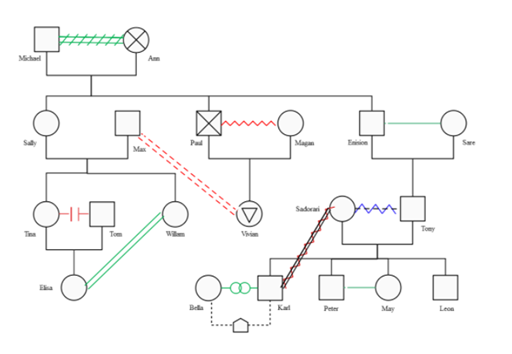
- Using these features, complete your Genogram. After finishing, you can save, export, share, and print your Genogram.
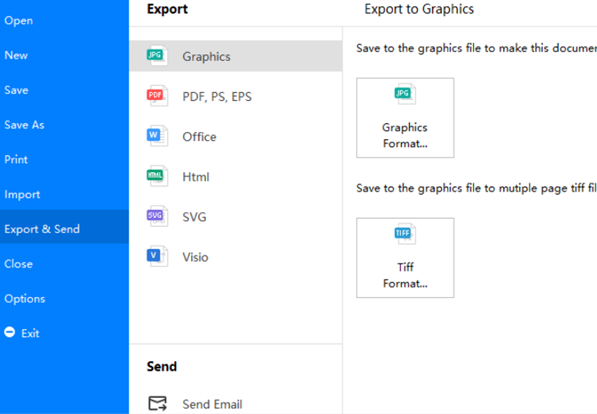
- Click on the “Export & Send” option to export your Genogram in different forms such as MS Office files, JPG, Visio, PDF, SVG, etc.
- Go to the “File” tab. Click the “Print” button or Choose the “Print” option to print your Genogram. Click on the print setup interface to observe the preview of the file. Select “More Print Setup”. Then choose “Fit to 1 Sheet” to analyze the complete result in one sheet.
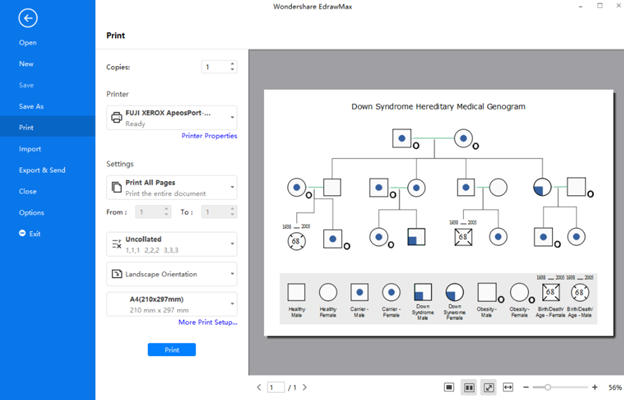
So, following these procedures above, you can make a quick and complete professional Genogram on E draw Max.
Summary: Make Genogram on EdrawMax
- Drag Genogram Shapes to Your Document.
- Edit Relationship Lines.
- Create Family Members, Relationships and Add Checkboxes.
- Add Customized Photos for Family Members.
- Add Text Boxes for Family Members' Information.