Can you use an encrypted external drive with a Chromebook? The answer is yes and it's easier than you think. Here are the steps to encrypt, use, and back up your external hard drive using Google's Chrome operating system.

Regular external hard drives, jump drives, or SD cards are compatible with Chromebooks but not with encrypted ones as stated in the Chrome OS issues. You won’t have issues dealing with regular drives since they are all supported by the Chrome OS. Just stick it to your Chromebook SD card slot or USB port and you are good to go.
There are several reasons why you would need to encrypt your drives, whether you will be visiting another country or just making sure that your files will be secured from any potential threats. Since Chromebook does not support encrypted drives, you could do well with some alternatives though.
Encrypted Email
Depending on the disk space needed for the files you want to encrypt, you might want to use an encrypted email instead. Unfortunately with this alternative, you won’t be able to encrypt a large file since most email platforms will only let you upload a certain size. This certainly is a wonderful trick since you won’t need to spend any cash at all since most email platforms are free.
All you have to do is simply upload the files you want to encrypt and download the file when you need to access it. Since you will need to download the encrypted file, make sure that you have strong internet access when you want to access the file.
This is the easiest solution without having to spend money. The only downside of this is that you will only be able to encrypt a certain sized file and that you need to have access to the Internet.
Encrypted Server
An encrypted server works just as well as encrypted emails but performs a whole lot better when dealing with larger files. This alternative certainly works when you have to deal with bigger files since cloud-based servers will let you upload larger files. However, you should take note that most cloud-based servers require you to purchase their services.
The steps of using an encrypted server to secure your files are almost identical to using encrypted emails. Just find a good server that is secured and upload the files that you want to encrypt. Once done, you can easily access the file anywhere you want as long as you have an access to the Internet.
How to Encrypting the Files Instead?
Chromebook may not support encrypted drives but it will definitely support encrypted files. All you need is a regular drive, a thumb drive, external hard drive or SD card will do. This is certainly more secure since the files you will be encrypting will only be on the physical drive and not on the Internet.
Besides, cloud-based servers or encrypted emails can be accessed by hackers.
Here are the steps to encrypt the files
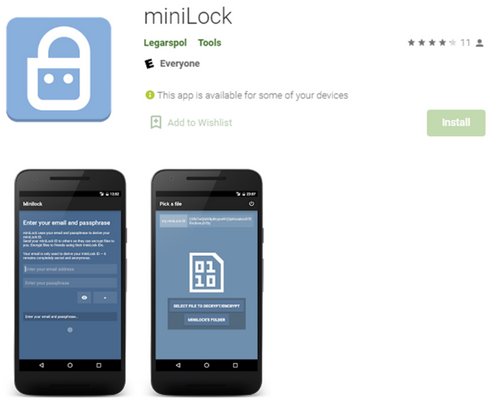
- If your Chromebook has access to the Playstore, then it will be a whole lot easier since you just have to find an app that will let you encrypt the files on your computer. If not, you can search for miniLock on your Chromebook’s Google Chrome. Another trusted app for encrypting files is folder lock.
- When you have miniLock installed, launch it and it will let you enter a passphrase and email address. Once done, a 44-character code will be generated and this will serve as your encryption key.
- When you have your encryption key, you can now begin encrypting your files. Simply drag the files you want to encrypt to the miniLock window.
- Once the encryption is finished, click on the down arrow to save your file
- To decrypt a file, all you have to do is drag the encrypted files to the miniLock window.

Summary: How to Use an Encrypted External Drive with a Chromebook?
- First, you need to find a USB 3.0 flash drive with a high read and write speed like the Samsung Bar Plus.
- Next, you'll want to download VeraCrypt from It's available for Windows, Mac and Linux.
- After installing VeraCrypt, plug in your flash drive and launch the program.
- Click Create Volume?—?the first option in VeraCrypt.
- Then, choose one of the three options from the blue window that pops up: Create an encrypted file container, Encrypt a partition or Encrypt a non-system partition on the hard disk (these options are for encrypting an internal drive).
- Select the first option (Create an encrypted file container) and hit Next.
- Choose Standard VeraCrypt volume and hit Next.
- Select the USB drive as your preferred destination and click Next again.
- In the next window, create a volume password (with at least 20 characters) that you can remember easily; don't use common words or phrases because they're easy to hack. Hit Next and move on to creating.
Conclusion
It is not possible to encrypt external drives that are linked to a Chromebook. However, you can use the above methods to encrypt your files and emails. Besides, be sure to check out Folder Lock for all your file encrypting needs. This program lets you encrypt your files on the on-the fly and you can rest easy knowing that they are secured.