Setting up your Easystore drive
Having a nice tool like Easystore on Mac to solve all your image upload issues should make your life easier. But, before setting off to use it you may want to know how to start using it on your computer. There are a few things that you should understand if you aren't quite familiar with Mac and the way it functions. So, if you are looking for a little help or guidance on this, this article will cover some of the basics of installation and functions.
After getting your new Easystore device, follow the procedure to install and view it in your Mac OS:
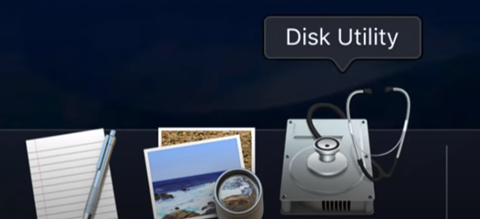
- Connect the cable of your WD Easystore to your device port. After connecting, click on the “Search” option and search for “Disk Utility” and select the application. It is a built-in application in your Mac OS.
- If the drive is connected successfully, you will see a new drive under the “External drive” option. The external drive will be blank if you are using the Easystore drive for the first time and you will need to install the drivers to make it work. Remember to not make any changes to your internal drives as they are already installed and running on your device.
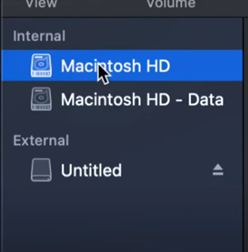
- Click on the “Device” icon on the top-left of the page and select the “Show All Devices” option.
- Now go to the “External Drive” option and you will see that there is a new option available to choose from. Click on the option. Erase the entire device before you start working on your drive as sometimes the program that comes with your external drive may cause some problems later so it is better to erase the contents and make it empty.
- Click on the “Erase” option at the top of the page. Select the drop-down option of “Format” and set it to “ExFat” if you want to use the drive as a USB storage. If you want the external drive just to work it with your Mac then set it to the “Mac OS Extended” option. Click on the “Scheme” option and set the “GUID Partition Map” option. This will enable you the option to partition your drive. If you select the Master boot option, you won’t be able to make partitions of your device.
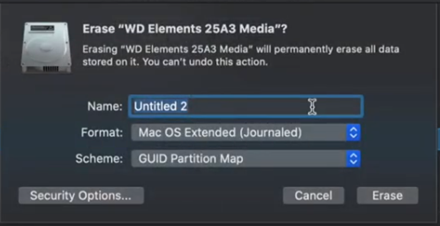
- Click on the “Erase” option after applying your changes. The system will take some time to erase and apply your given settings.
- After formatting the drive, go to the drive path and see the description of the drive. You will see that the drive is empty and you can copy or drag and drop your files to store them in your Easystore drive.
Creating partitions for the Easystore drive
Partition is a way of making several hard drives from a single external or internal drive. To set up partitions for your Easystore drive, follow the steps:
- Go back to the “Disk Utility” page and select the Easystore drive which you need to partition. After selecting the drive, click on the “Partition” icon on the top-middle section of the disk utility page.

- Click on the “Format” drop-down options and select the “Mac OS extended” option.
- Now click on the “+” icon which is below the Blue colored pie chart external drive which is shown as a single partition. This action will divide your drive into two parts which will make two partitions in your drive. If you want to add more parts, tap on the “+” option to create more.
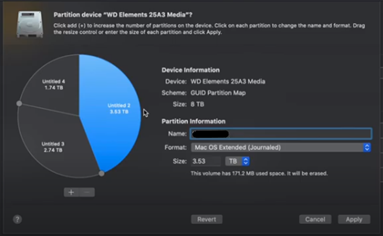
- If you want to change the size of the partitions, drag the pie chart boundary and increase or decrease the sizes of the partitions as you wish. You can also type the size on the “Size” option.
- After making your changes, click on the “Apply” option to create the partitions.
Summary: How to use Easystore on Mac?
- Insert your Easystore in the USB port.
- Wait for the pop up window to show you all the options you can use.
- Select "Open Easystore" or "Manage Easystore". If you're using Easystore for the first time, select "Open Easystore". If not, select "Manage Easystore".
- If you selected "Open Easystore", it's time to format your external drive. Formatting your drive will erase all data on it, so please make sure that you've already backed up any important files. After formatting, click done. Your Easystore is now ready to use!
- If you selected "Manage Easystore", it will open a new window where you can see your files. To move a file from your device to your external harddrive, just drag and drop it from one window to the other, and vice versa.
- When you're done managing your files, close the pop-up windows by clicking on the red X button at the top left of each window. Once all windows are closed, go ahead and pull out your external hard drive safely by right-clicking on its icon in Finder and selecting "E.
