This article is a walk-through on how to use WP Content Copy Protection & No Right Click, which has been developed by Synthesis.
Content theft is becoming pretty common nowadays. Dishonest people copy other’s creative work and post it elsewhere using their name. So, it is necessary to protect your content from stealing and prevent this kind of corrupt work. For that, the WordPress website has a safety plugin named “WP Content Copy Protection & No Right Click” that can shield your content. So, read this article to know about how to use WP Content Copy Protection & No Right Click.
Before You Get Started
WP Content Copy Protection applies some assertive methods to secure online content. You may use the free version of the plugin or use the premium version for a more advanced option. In some events, copy protection can create problems for your work. So, configure the settings in the best way it benefits you.
Applying WP Content Copy Protection & No Right Click
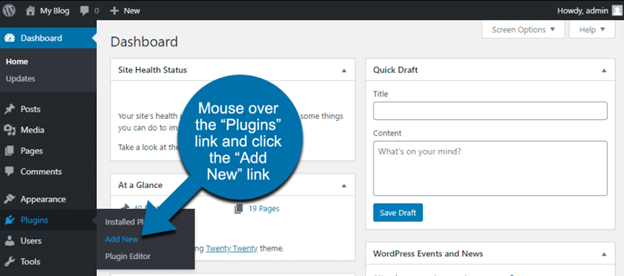
- Go to WordPress. Sign in to the admin panel window. Locate the “Plugins” option from the left toolbar. Select it. Then, choose “Add New” for attaching a new plugin.
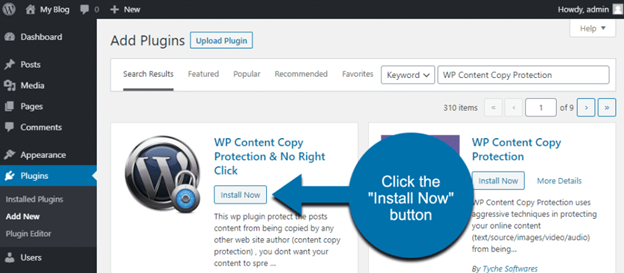
- Write down “WP Content Copy Protection” on the search bar situated at the top right corner.

- After discovering the plugin, select the “Install Now” option. It will be automatically installed.
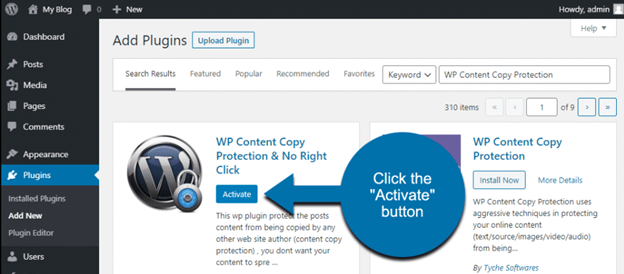
- You also have to activate the plugin. So, select the “Activate” option after the installation is complete. Now the plugin is running and protecting your content from stealing.
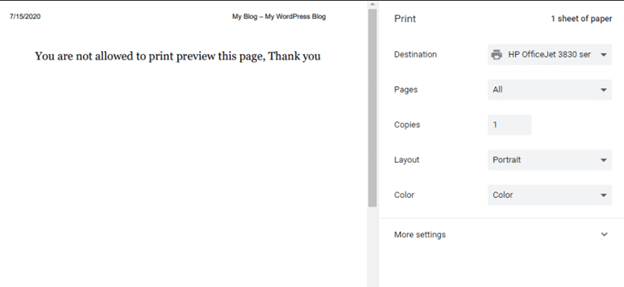
- Now whenever anyone tries to copy or right-click your content, will get a warning message on their screen. Also, if anyone attempts to print the content, will produce a preview warning. If the user disregards the warning and still attempt to print it, only the preview warning will be printed.

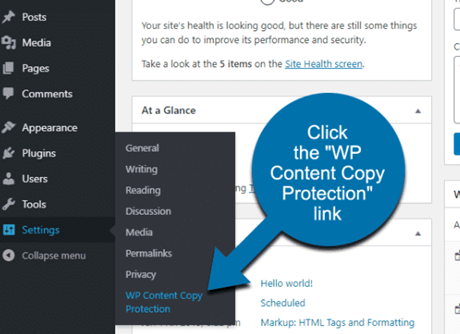
- You may configure some more settings to further secure your content. From the WordPress administrator panel at left, select the “Settings” option. There you will locate the “WP Content Copy Protection” plugin. Select it.
- There, on the “Main Settings” tab, you will see various options to protect your content. You may disable or enable the different options to discover the best option for you. You may also modify the warning text that will come out when anybody attempts to copy your secured content.
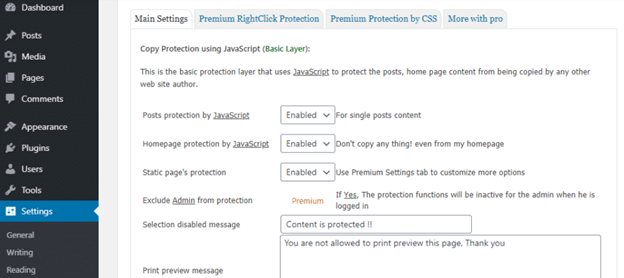
- However, if you disable any setting here, it will halt the right-click warning from coming out. But, the safeguarding will not pause. So if you wish to use the “No right-click” feature, enable all the settings.
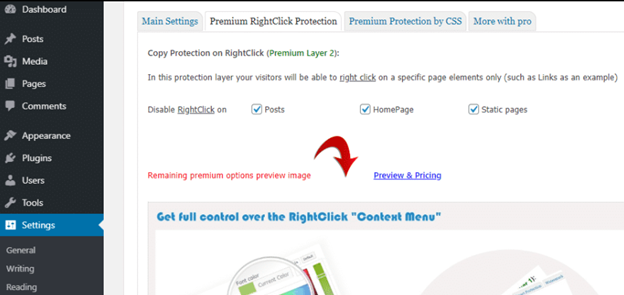
- The next option window is the “Premium Right Click Protection”. For adjusting this, you have to a premium user of WordPress. You may pause or launch the right-click and printing safety from this window. There are also options to run security to your “Home Page”, “Posts” and “Static pages” separately. If any individual got JavaScript immobilized, this option will not function.
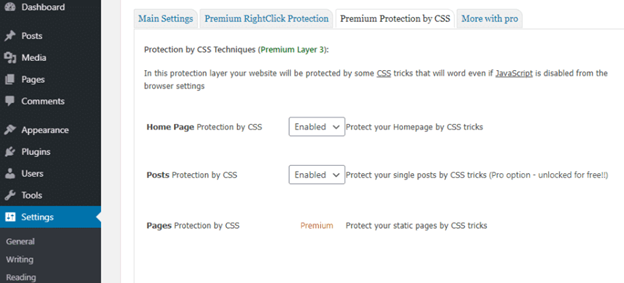
- Advance to the next “Premium Protection by CSS” window. Here, you can only stop the printing of content. It will not pause the right-click feature. You need to have the premium version to configure the “Pages Protection by CSS” option.
- If you wish, you can uninstall or shut off the plugin. The right-click feature will stop. And, your current content will not be troubled.
So, following these instructions given above, you can use WP Content Copy Protection & No Right Click effectively.
Summary: How to Use WP Content Copy Protection & No Right Click?
- Install & activate the WP Content Copy Protection & No Right Click plugin/
- Go to the settings page and enable the WP Content Copy Protection.
- If you want to disable right click, tick the box Disable right click.
- If you want to protect images, tick the box Protect Images From Copy & Dragging.
- If you want to disable text selection, tick the box Disable Text Selection.
- You can also add custom CSS if you want to add any styling effects on your content.
