Paint.NET is a free image and photo manipulation program for Windows and Mac OS X that allows you to draw or paint on images, portraits or pictures. Although the program already comes with several preset fonts which can be used, it is not possible to add your own fonts which is why this short guide was created. I will show you how to add fonts to Paint.NET so you can freely configure the font that will be used while editing the text on an image file.

Have you ever wondered how you can add fonts to the computer, so you can then use them in Paint.NET? Paint.Net is a photo and image editing software that features a wide range of tools for PCs. It features a wide variety of font selection that you can use in your graphics for your Windows PC.
However, the font selections in Paint.Net may be limit and may not be as exciting as you want. Luckily, it is possible to download and install new fonts on Paint.NET. Here are some steps to follow when downloading new fonts to Paint.NET for windows 10.
Step 1: Download New Font
The first step is to download the new font that you would like to add to Paint.NET. Luckily, there are a number of free sites like 1001free.fonts.com where you can download fonts for free without having to pay a penny. You can as well do a Google search for “Free fonts’ to get a selection of free fonts.
Step 2: Save Zip File
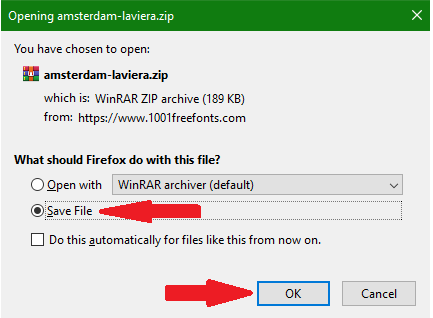
After picking the font of your choice, a download box will appear giving you the option either to open the file with the font or save it. Select “Save File” and then click Ok.
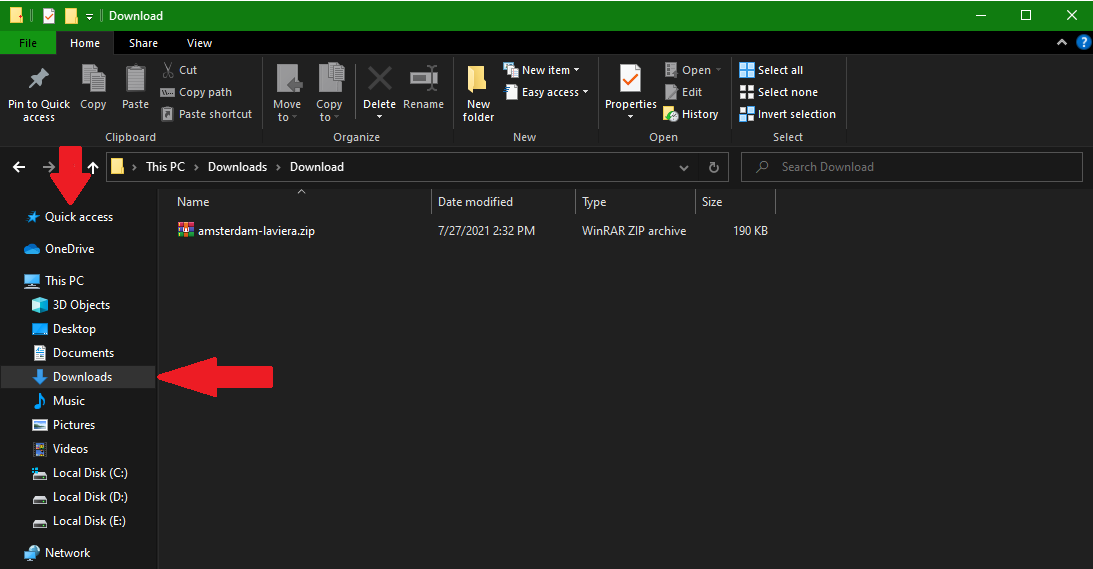
However, those that use Microsoft Edge will have their zip files automatically downloaded to the Downloads folder. If this is the case, open file explorer, then locate the Download folder in the Quick Access category.
Step 3: Extract the File
At this point, you will need to unzip or extract the folder that contains the new font. You can either use an unzipped or compressed (zipped) program to help you extract the font zip file. If you are using Windows 10 Compressed (zipped) program, follow these steps below:
- Right-click on the font zip file.
- Once there, hover the mouse over Open With before clicking on Windows Explorer.
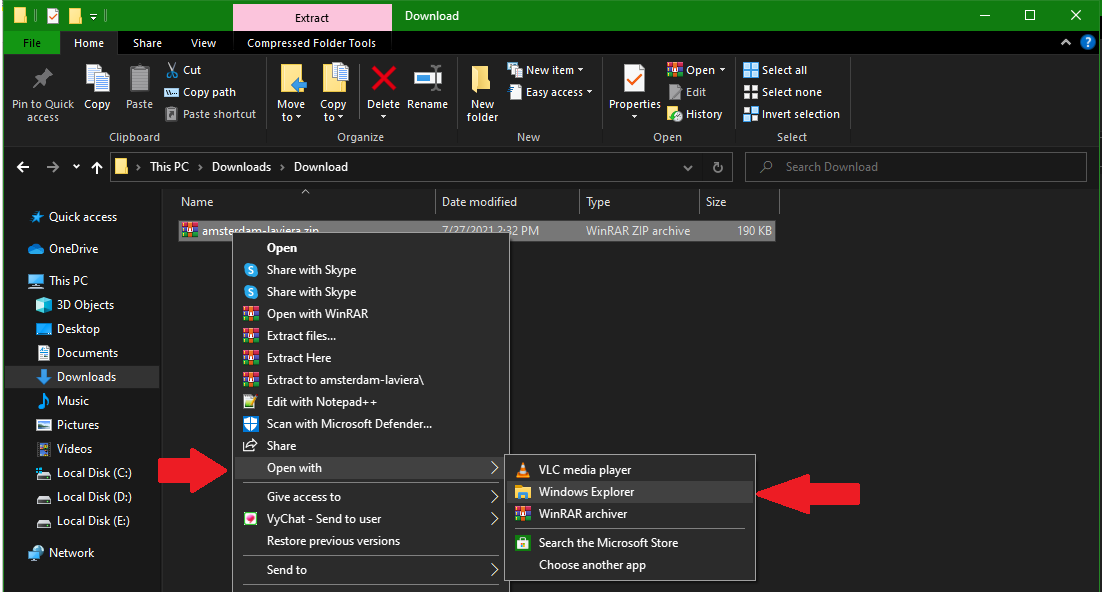
- This will open a file dialogue box and a Compressed Folder Tools tab at the top.
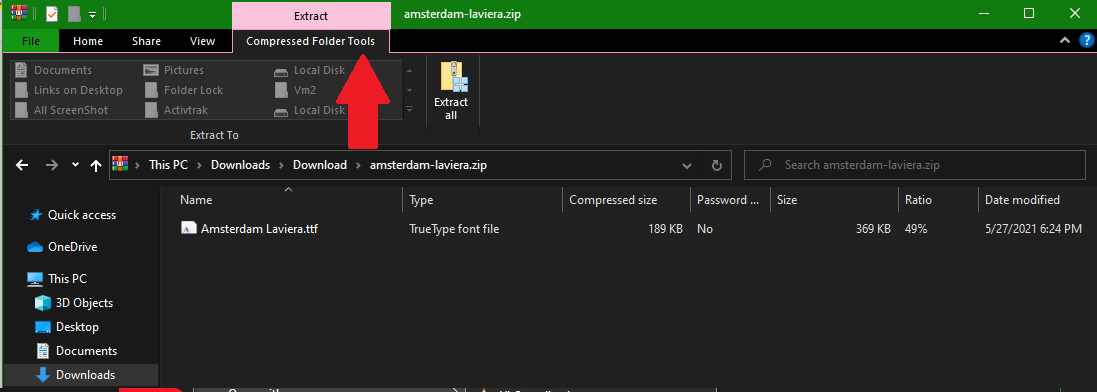
- Below this tab is the folder name Extract. Click on it and then select Extract All.

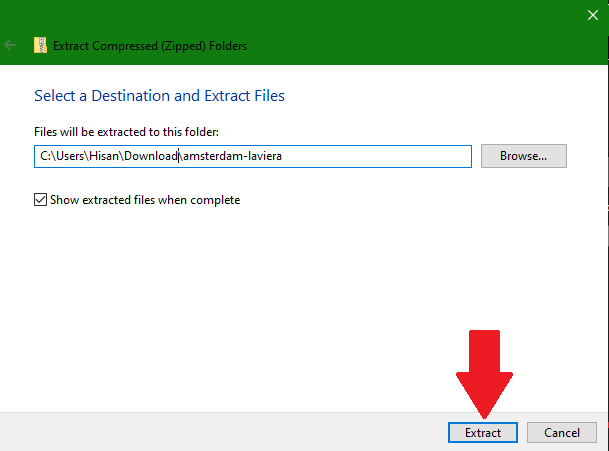
- A dialogue box will appear on the screen asking you to select a destination where you would like the files to be extracted to.
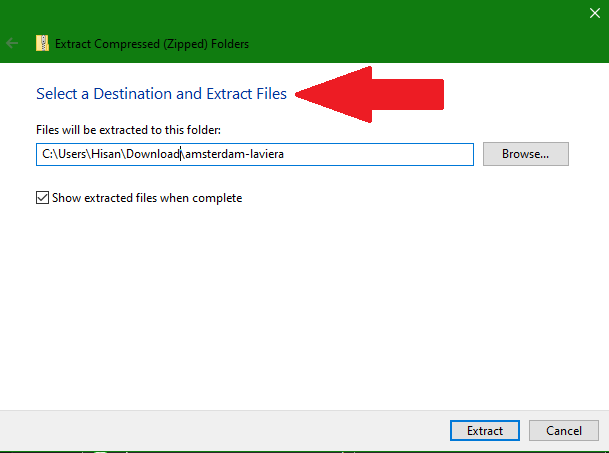
- When done, click extract and open the folder where the files are extracted too.
Step 4: Preview Font
Before you install the font, it is important to have a peek at it first in order to ensure that they really work properly. To do this, follow these steps below:
- Go to the font file and right-click on it.
- You should see a drop-down menu. Now go to preview and click on it.
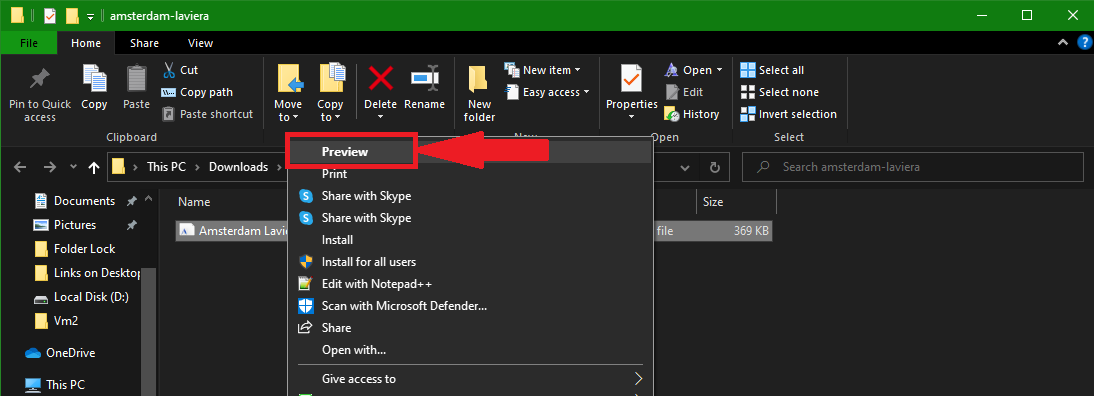
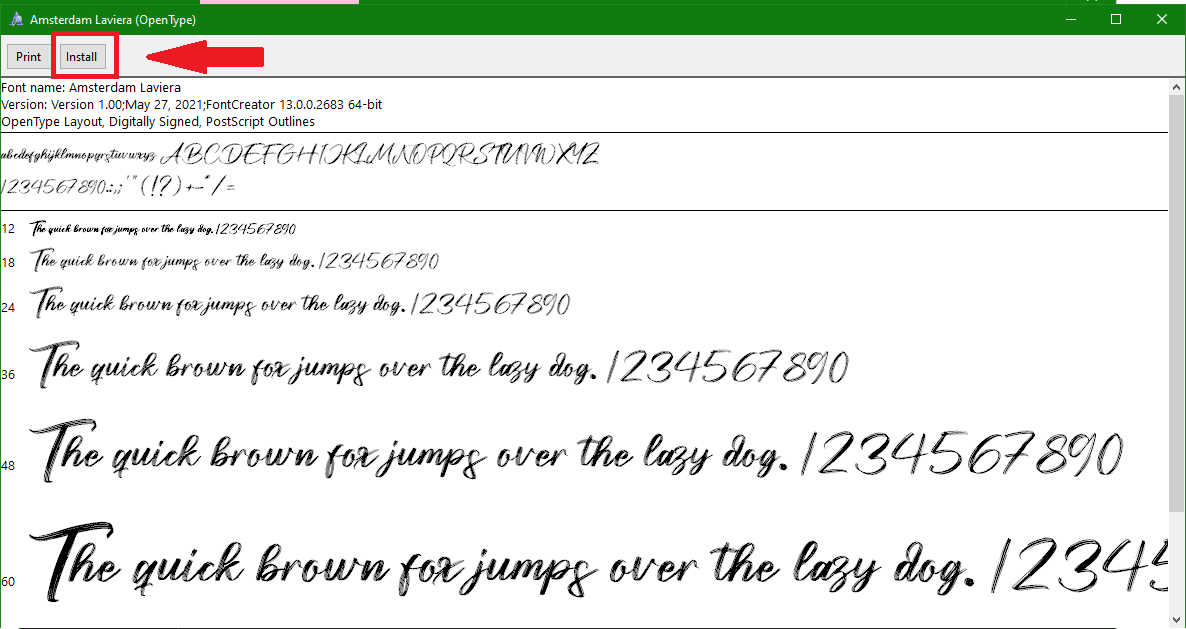
- This will open a dialogue box named after the font you are previewing.
- Once you see and like the font that has opened on the preview window, click Install.
Step 5: Add the Font to Paint.NET
Now that you have installed the font, it’s now time to add to the Paint.NET program. Here is what you need to do;
- Close the Paint.NET program on your computer and open it again. This helps to load the new font into the program.
- When Paint.NET reopens, go to the Toolbar Menu and select the Text tool. Then, place it on the canvas.
- In the Paint.NET drop-down box, search for your newly installed font and use it to type.
If you intend to install several fonts to the Paint.NET program, it is best to install them one at a time. This way, you will know which font files are corrupted and which ones work well.
How to Uninstall or Delete the Font from Paint.NET
Do you want to delete or uninstall a font that you just added? Follow these steps below:
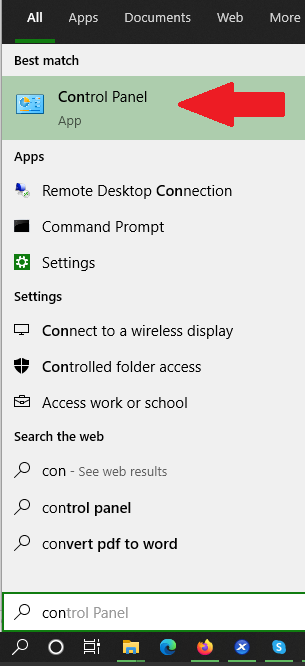
- Click on the Start button on your windows computer. On the drop-down menu, look for Control Panel and click on it.
- On the top left of the screen, you should see a “View by” tab. Ensure that you set it on ‘Large Icons.’

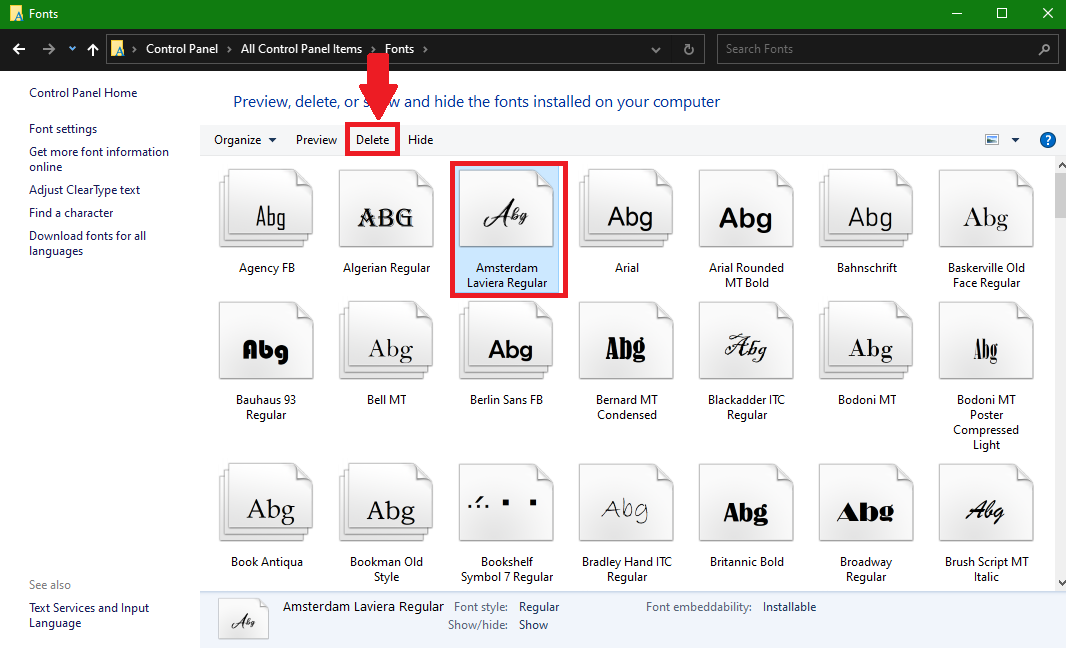
- Once you do this, you will be provided with several options including the Fonts folder.
- Click on the Font folder and choose the font that you would like to delete. Then click Delete from the font panel options provided.
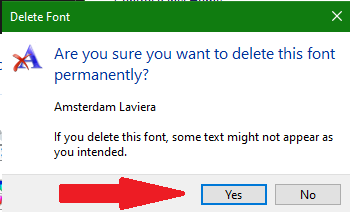
- You will now get a dialogue box asking if you want to delete the font file permanently. Click Yes and the font file will be deleted.
Summary: Add fonts to Paint.NET
- Download a font to your computer.
- Open your computer's control panel and select "Appearance and Personalization".
- Select "Fonts".
- Drag and drop the TTF file into the font window.
- Paint.NET should now list the fonts in its font selection window.
Conclusion
With these simple steps, you should be able to install new fonts to your Paint.NET program. This way, you can create brilliant graphics and be the envy of your friends and competitors.
