If your ATT home Internet service has a Wi-Fi password, did you know that you can change it? It's true. You can even update the name of your network too. In this post, I'll show how to change both, plus how to reset your router and modem if you've forgotten the Wi-Fi password or haven't set it yet.
Modifying your modem’s original Wi-Fi password and the name is the first thing you have to do after joining a network service. It’s not just an ATT issue. You should change the password every time you have a fresh internet service provider.
Changing ATT Wi-Fi Name and Password
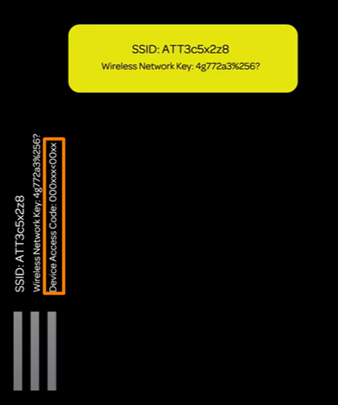
- First, you need to know the default Wi-Fi network name and the default Wi-Fi password of your modem.
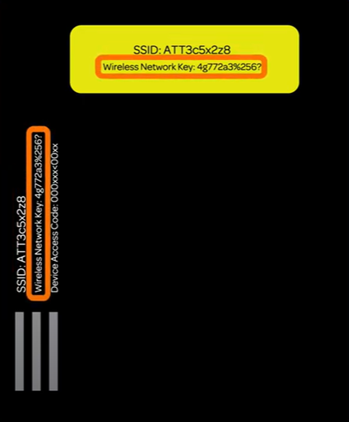
- The side or back of the modem has that information. So, find and copy the data. The Wi-Fi name is recorded here as SSID, and the Wi-Fi password is labeled here as Wireless Network Key.
- If someone modified the default Wi-Fi name and password before, you might find them using a PC joining your home network. You can also do it with Smartphone or Tablet.
- Access the web browser and put “http://192.168.1.254” on the address bar. Then, tap “Enter”.

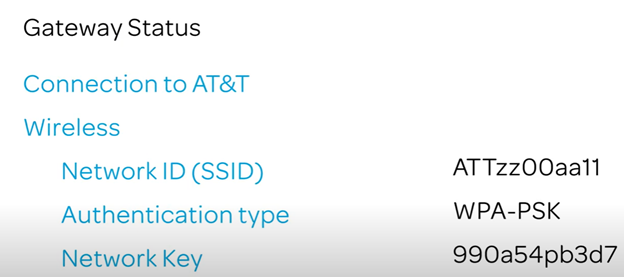
- Your ATT Wi-Fi information will show up on the screen. There, beneath the “Gateway Status” section, you will see your current Wi-Fi name and password labeled as “Network ID” and “Network Key”.
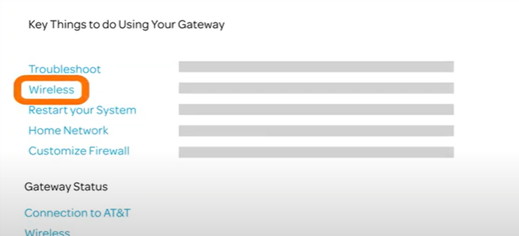
- After knowing your Wi-Fi name and password, click on the “Wireless” option for making adjustments.
- The “Wireless” window will show up and display every data you can change about your Wi-Fi.
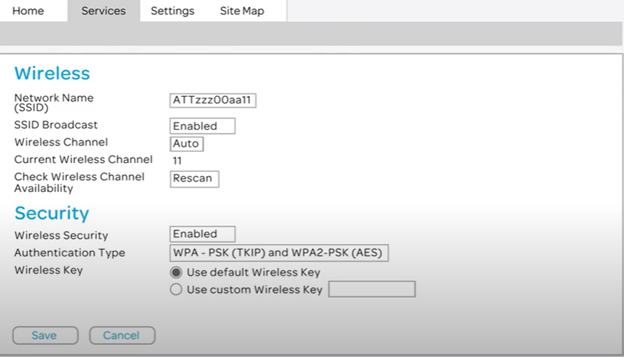
- In the “Network Name” field, erase the current Wi-Fi name and put the title as your liking.
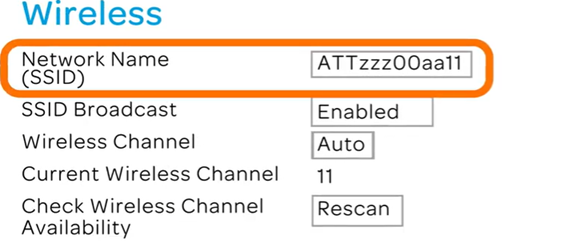
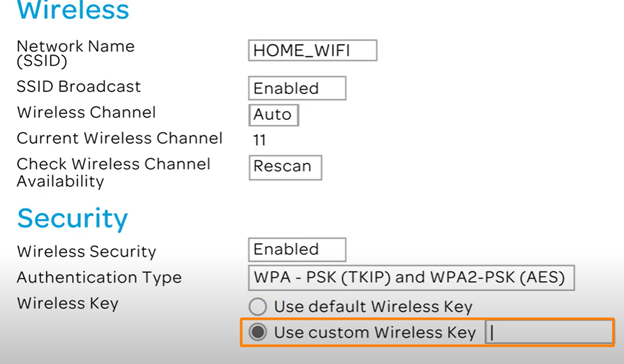
- Then, in the “Security” section, check the “Authentication Type.” If it is anything other than “WPA-PSK (TKIP) and WPA2-PSK (AES)”, then click on it and change it to WPA.

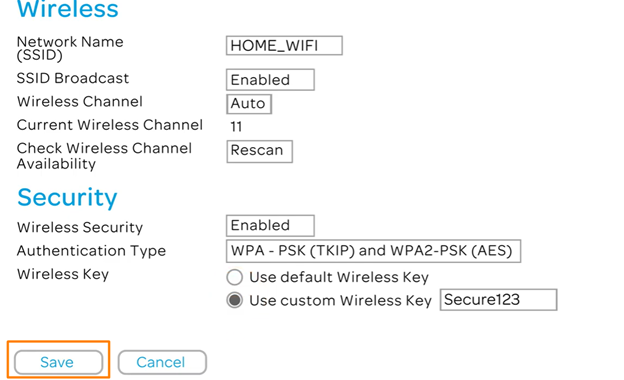
- For changing the Wi-Fi password, select “Use custom Wireless Key” from the “Wireless Key” section. Put down your password.
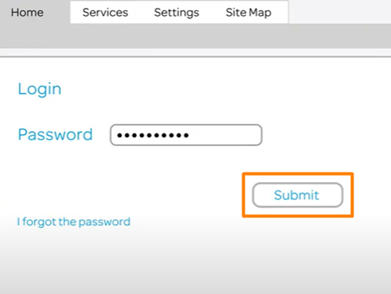
- After completing the changes, select “Save.” Another window asking “Password” will show up.
- As you are modifying for safety reasons, you will also need the “Device Access Code.” It is also recorded here at the side of the modem.
- Put it down on the “Password” field and click on “Submit”.
- After making the changes, you have to reconnect all of your Wi-Fi devices, applying the new Wi-Fi data.
Changing ATT Wi-Fi Name and Password on 2 Wire Gateway
- The Wi-Fi name and password modification on the two-wire gateway is relatively similar to the usual method except for some fundamental changes.
- First, access your web browser and put “http://192.168.1.254” in the address bar to access your two-wire gateway information.
- Then, choose “LAN and Wi-Fi.” Select the “Network Name” and “Network Key” to change the Wi-Fi name and password, respectively. Go for the “Save” option to complete the process.
Changing ATT Wi-Fi Name and Password applying Smart Home Manager
- You can also apply the “Smart Home Manager” to adjust your Wi-Fi name and password. First, access the Smart Home Manager.
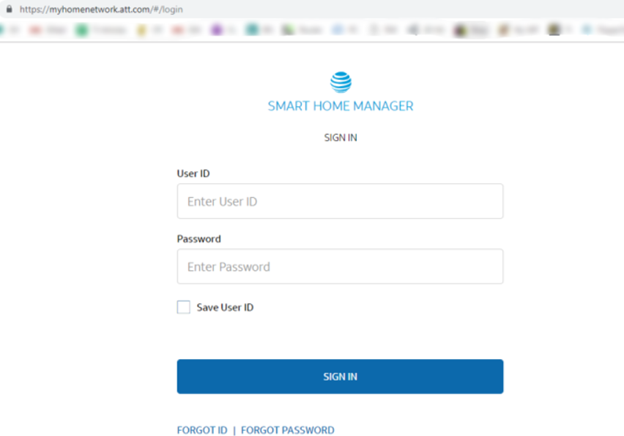
- Then select “More Smartphone Users” from the home menu. Locate the “network” option and click on it.
- Choose the Wi-Fi name and password for modifying. Click on the “X” from the right side and erase the current data.
- Then, put the new Wi-Fi name and password that you wish. Select “Save” to finish.
Summary: Change ATT Wi-Fi Name and Password
- Open the Wi-Fi menu on your mobile device, or click the Wi-Fi icon in the system tray on your PC.
- Select your network name (SSID) from the list of networks displayed.
- Enter your network password (WPA2 key).
- Tap Join.
- A confirmation message displays when your device connects. Your PC may take a few moments to connect.
- Ensure that you are connected to your AT&T Wi-Fi Gateway.
- Open a web browser and go to 10.0.0.1 .
- When prompted, enter your administrator username and password and click Log In . Default credentials are "admin" for the username and "password" for the password (both without quotes).
- Click Wireless . The current SSID name displayeds in the Network Name (SSID) field at the top of the page.