There is a time when you need to change your user name on our PC. Maybe, you want to change it because of security reasons. Or, your PC is used by more than one user, and you don't like to share your personal data with them.
If you don't know how to change your user name in windows 11, you will learn it here. There are two types of accounts in windows where you have your user name included, an Offline local account and a Microsoft user account. You can change your user name in both of these accounts.
Changing the name in the local account in windows 11 is possible in multiple ways, while if you want to change the user name in the Microsoft user account, only one method can be applied.
Change the user's local account name in windows 11
Through a local user account, you log into the windows operating system and get access to all the resources of the windows. If you log into the local user account in windows, you can change the settings and delete or install applications.
Here are the required methods and steps to change the local account user name in Windows 11.
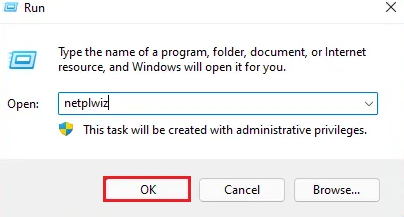
Open the Run Dialogue box and type netplwiz
- Open the Run dialogue box by pressing Win + R and type netplwiz. Click on yes in the popup window.
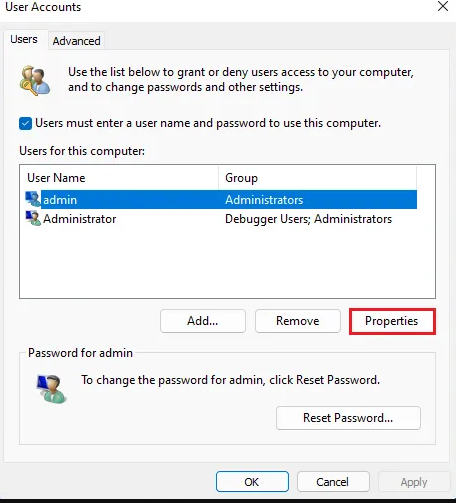
- It will open up the User account window—select properties.
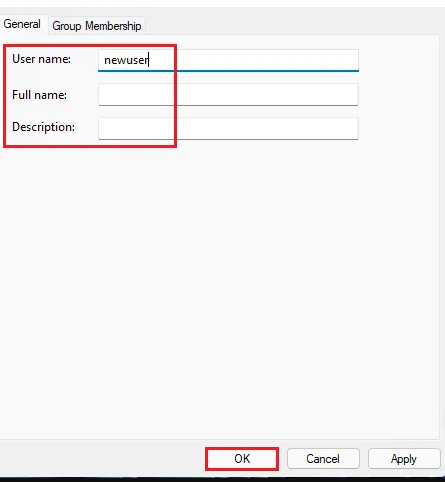
- Here, change your user name. You can also write a full name or give a description in this properties section. Apply the changes and click ok.
- Now, sign out from your previous user name account, and when you are going to sign in again, you will see that the user name has been changed successfully.
Open the Run Dialogue box and type lusrmgr.msc
- Another way to change the user name is to open the run dialogue box by pressing the win key + R. Write lusrmgr.msc, and click ok.
- Click on yes when the User Account Control pops up.
- The local users and group window will open up. Under the Local Users and Groups (local) option on the left side, click on users, and your username will be visible in the middle section.
- Right-click on your user name and select Rename from the drop-down menu.
- Now, right down the new user name and hit enter.
- Now, cross this window, sign out of your previous user account, and sign in again. By doing this, your user name will be changed.
Control panel
The third option is to use the control panel for changing your user name in windows 11.
- Click on the search bar icon and type the control panel. Then click on the control panel app.
- In the control panel, search for User Accounts and click on it.
- Again click on User Accounts. You will see the option of Make changes to your User Account.
- Select Change your account name and write the new name in New Account Name. After that, click on change name, and the user name will be changed automatically.
Using Windows Terminal
This method is a bit complex, but you can learn it if you read the steps carefully.
- Write-click on the windows icon and select Windows Terminal (Admin). Open to run it as administrator.
- Write Get-LocalUser and hit enter.
- Again write the following command. Note that, instead of the old user name and new user name in the quotation mark, write the actual user name you have and the name you want to put in. Rename-LocalUser –Name “old user name” –NewName “new user name”
- Close the window, sign out of your account, and sign in again.
You can see that the user name has been changed.
Change the user name of the Windows 11 Microsoft account.
The email address associated with your user account can also act as your user name. If you use your Microsoft account to sign in to Windows 11, you can change your Microsoft account name after signing in to your system.
- Press the win key + I to open settings.
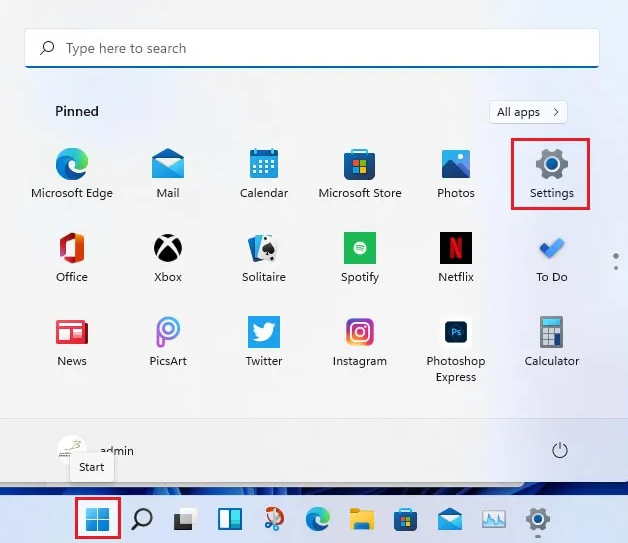
- Locate the Accounts option in the left sidebar and select it.
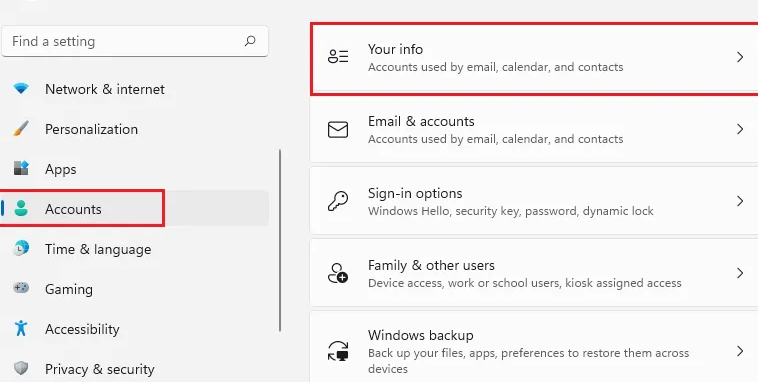
- Now, from the right side pane, choose Your info.
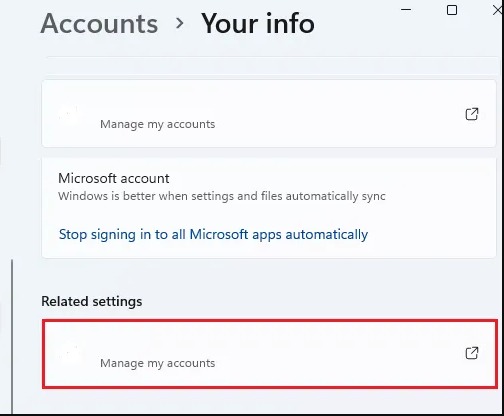
- Click on manage my accounts under Related Settings.
- From the top bar, click on the Your info tab.
- Search for the arrow right next to the Account name and click on it.
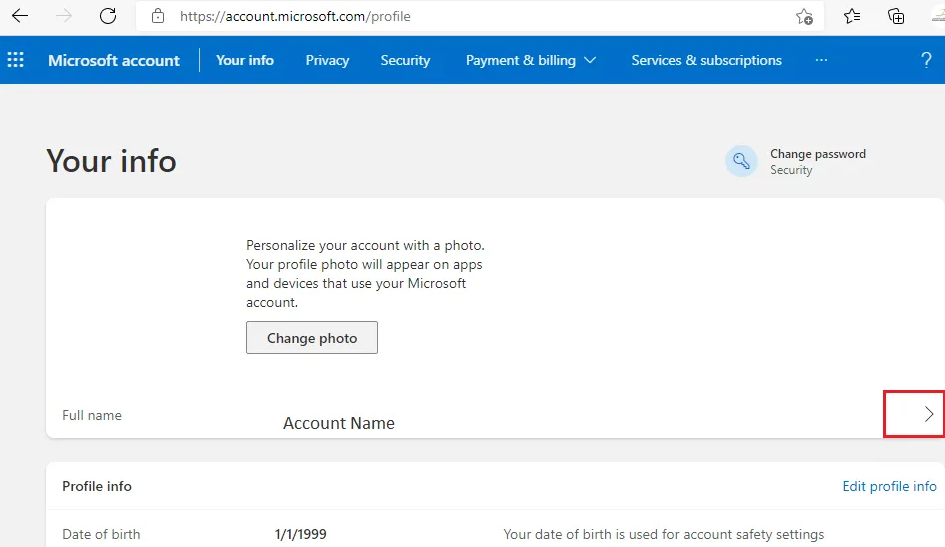
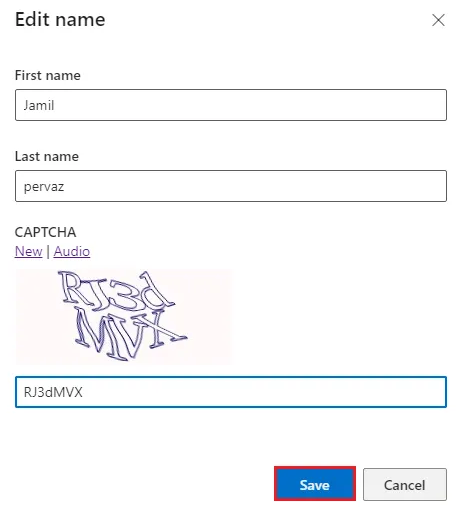
- It will popup the edit name window. Write your new name in the box and fill in the Captcha. Then click on Save.
Restart your PC, and the changes to your user name will be made successfully.
Conclusion
These are the different ways to change the user name in windows 11. These methods can also be used to change the user name in windows 10. You can use any of these methods to change your user name.
