How to Change Graphics Card From Intel to NVIDIA?Graphics Cards are an important system for computers. Graphics Cards can improve the overall performance of a computer. Graphics cards allow your computer to read and display certain elements in a video game or movie. It is better to use NVIDIA gaming graphic card if you want to play online games over the internet because it does not cause any distractions in your eyes. Most of the computers come with the integrated VGA graphics by Intel. The key question is how to change graphics card from Intel to NVIDIA easily?

When you have a dedicated GPU like NVIDIA in your PC, It will usually work with the GPU for every graphics operation. Also, it continuously changes from integrated Intel GPU to dedicated NVIDIA GPU based on the actual work. Typically, Windows handles the alteration between these graphics cards, but sometimes it tends not to work. The problem is very accurate for applications that are incorrectly coded and have poor optimization. In such cases, you may make all the Windows graphics operations use the NVIDIA GPU by changing the default settings of the graphics card.
Changing Graphics Card from Intel to NVIDIA
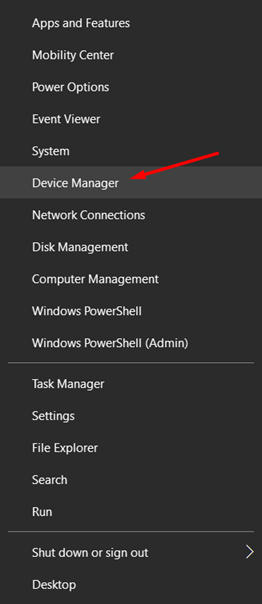
- First, check what graphics card you have on your PC and what you are using. Tap the “Windows” and “X” buttons together and select “Device Manager” from the options.
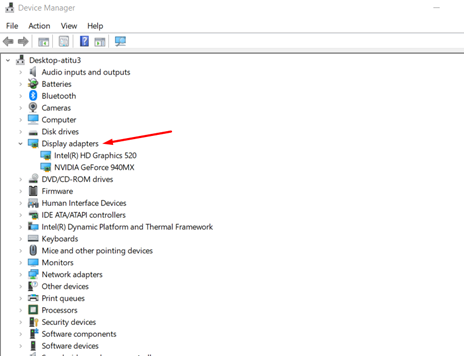
- Extend the “Display adapters” option. There you can see the existing graphics card of the PC. If you have both Intel and NVIDIA graphics cards there, then proceed to change it.
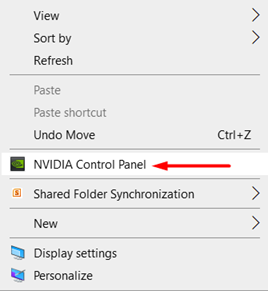
- Open the context menu by right-clicking on your PC screen and select “NVIDIA Control Panel.”
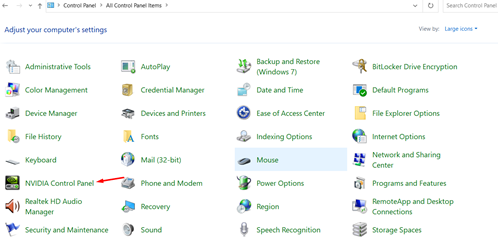
- If you don’t find the NVIDIA control panel here, tap the “Windows” button and put “Control Panel.” The Control Panel window of the PC will show up. Locate the “Nvidia Control Panel” from there and access it.
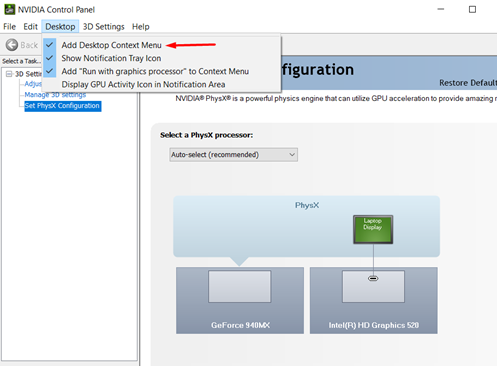
- Pick the “Desktop” tab from the top bar in the NVIDIA control panel screen. Tick in the option “Add Desktop Context Menu” to access it from the desktop.
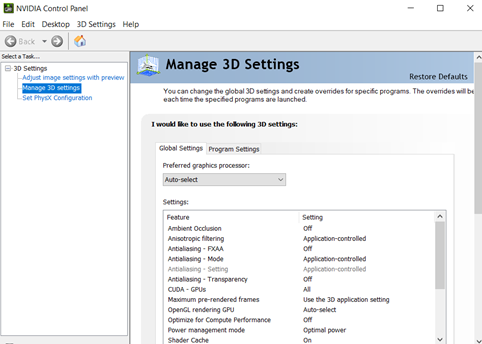
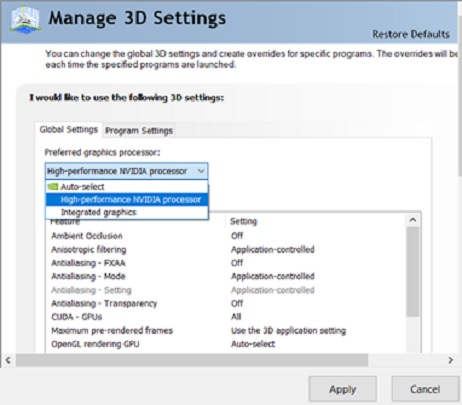
- Now, select the “Manage 3D settings” option. On the “Global Settings” tab, click the “Preferred graphics processor” option.
- Typically “Auto select” option is set. Change it to the “High-performance NVIDIA processor.” Select “Apply” to save the adjustment.
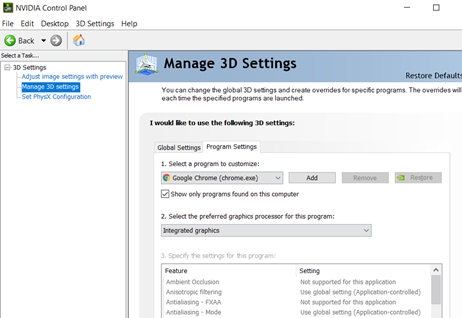
- Then, move on to the “Program Settings” option. Here you can add programs to the specific graphics card that it requires. Some software requires an integrated graphics card to perform. OBS Broadcasting software is such an example. In that case, you need to add that software here to the Intel graphics card.
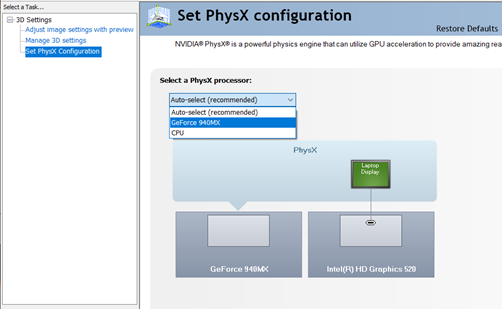
- After that, open “Set PhysX configuration” and change the PhysX processor from “Auto-select” to “GeForce Version” of your PC. Then, select “Apply” to finish the process.
- If you still have problems with the graphics, you may update the NVIDIA drivers to resolve the situation. For that, first, check the NVIDIA graphics card version you have and remember it.
- Then, access the NVIDIA website to download the driver. Here at the “Product” option, pick the same version you have on the PC. In the “Download Type” section, put “Game Ready Drivers.” Then, select “Search.”
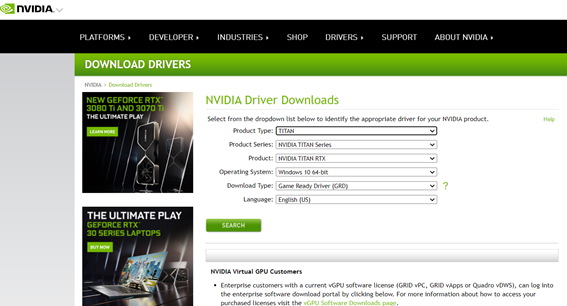
- The download page will show up. Pick the “Download” option. Store it on your PC.
- Then, launch the downloaded file. It will extract the file and then start the installation process. Pick “NVIDIA Graphics Drivers. And advance to the next screen by clicking “Next.”
- Select “Customised” and click “Next.” Tick the “Clean Installation” option, which will erase any different settings or complications that happened before. The installation process will be complete after some time.
Summary: Change Graphics Card From Intel to NVIDIA
- Go to the "Control Panel".
- Open the "Display" menu.
- Select the "Change Display Settings" tab.
- Go to the "Advanced Settings" menu.
- Click on the "Intel HD Graphics Control Panel".
- Choose 3D graphics.
- Click on the Global Settings tab.
- Change graphics card from intel to NVIDIA.
