SVN, or Subversion, is a version control system. Version control systems track changes to code over time and are commonly used in software development. A repository is a collection of all the files for a given project and its history of revisions. SVN is hosted by hosting providers like Dreamhost, which provides svnserve to their customers through the Subversion RPM package. You need some access to the server to modify your dev server’s settings as we are going to presume you are doing this on your own independent server on your own domain and there is no way around it. Our tutorial will guide you through how to check out from SVN if you are currently using Dreamhost’s svnserve tool.

For starters, subversion (SVN) utilizes the central server to store all files, allowing team collaboration. Its primary purpose is to maintain current and historical versions of projects.
While it used to be one of the most popular systems out there, it has been losing traction for the past years. Nonetheless, it is still a powerful tool, especially for developers who want to make changes to specific files from the central server using their computers.
SVN has two elements: the server and a local copy of the files. When certain modifications are made, it automatically creates a new version. However, you can still revert to the previous version when necessary.
Once you already have an SVN server and files in the repository, proceed by checking out the files from the central location where the data are stored.
Checking out from SVN
Here’s everything you need to know about checking out from SVN:
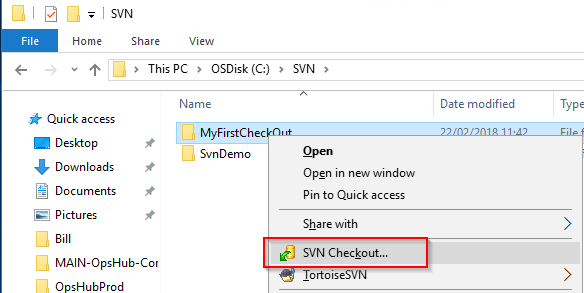
Step #1:
Make a new folder where you can see the repository contents. Right-click this folder and proceed by picking “SVN Checkout.”
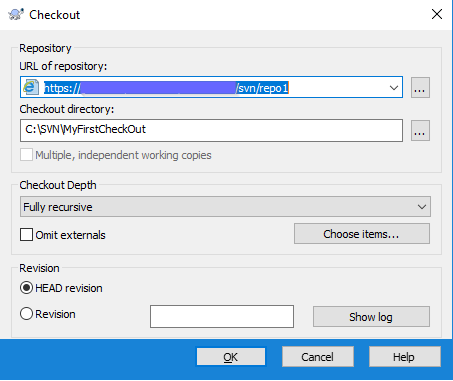
Step #2:
Indicate the location of the repository. An example is shown below.

Step #3:
In the “URL of repository” field, enter the value. The “Checkout directory,” as well as the “Checkout Depth” and “Revision,” has already been defined, as shown in the image. Hit the “OK” button.
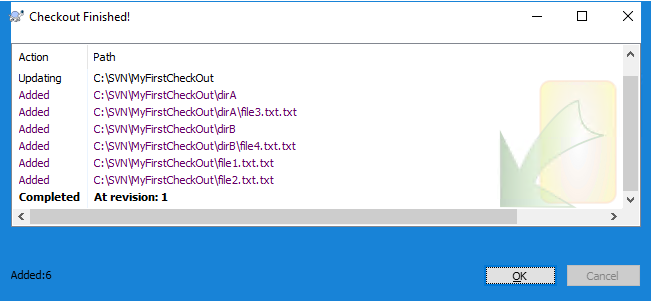
Step #4:
A dialogue box will appear, confirming that such files have been checked out to the directory.
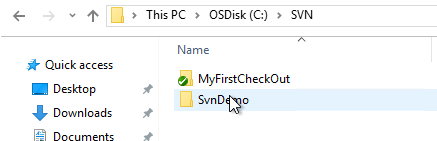
You’ll then see a green checkmark on the folder, which means that its contents are already in sync with the repository.
Step #5:
When you click the folder, you’ll see the individual sub-folders and files with a similar green checkmark.
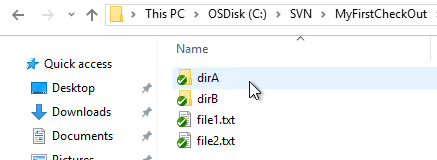
At this point, you already have the contents of the repository copied to your local device. Inspect the changes into the repository, so that it will contain the most recent versions of the files.
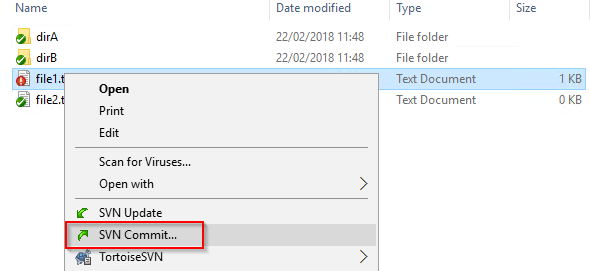
Step #6:
Edit your text files and then save the changes made. You’ll then notice that the green checkmark will turn into an exclamation mark, showing you that changes have been made and no longer similar to the repository.

Step #7:
To update the repository, right-click on the file and choose “SVN Commit…”
You’ll then be asked to type a brief message explaining the changes you have made. For the other users, this is a helpful feature to quickly understand the reason for such modifications.
On the other hand, the “Changes made” section will show you the file you are updating, as well as what kind of alterations you have made.
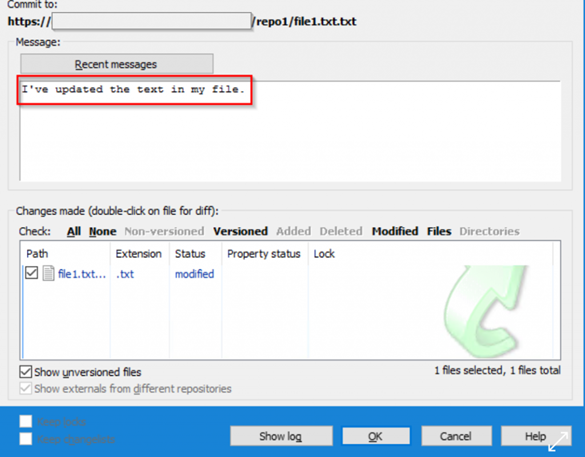
A confirmation message will then appear after clicking “OK.”
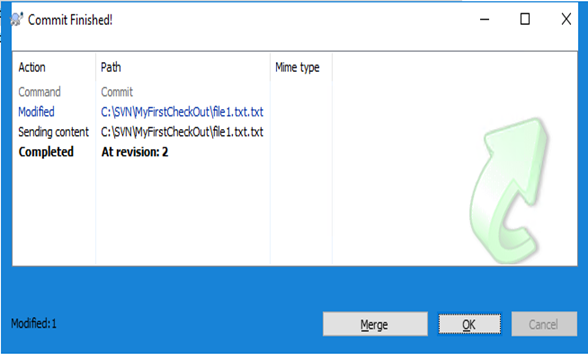
Note that the SVN has altered the file version and not the repository.
Step #8:
Review what happened to your files by choosing the parent folder. Choose the “Show log” option from the Visual SVN.
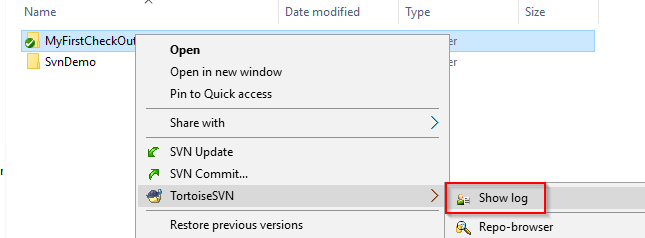
A dialogue box will pop into your screen, which will show the list of the changes you have made to the local files.
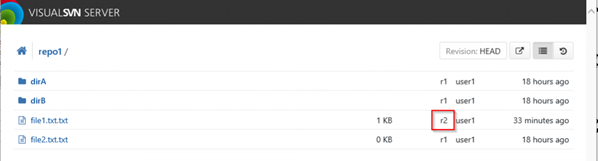
Remember that you’ll see the same information once you switch back to your SVN server or the repository. When you view the individual files, you’ll be presented with the revised version of the files.
Summary: Check Out From SVN
- Start Eclipse.
- Select the menu option Window > Show View > Other… to open the Show View window.
- Expand SVN and select SVN Repositories. Click OK to open the SVN Repositories view.
- Click the New icon to create a new repository location.
- Click the Finish button to check out the contents of your working set into your Eclipse workspace.
Conclusion
If you are looking for a free SVN tool, TortoiseSVN is a perfect choice. It is a Windows shell extension that’s easy to use and does not require the Subversion command-line client to run.
Indeed, checking your SVN out is relatively easy, allowing collaboration with other users. Plus, it’s cost-effective, unlike other tools, making it a go-to option for many people.
