SVN stands for Subversion, a version control system. It allows you to maintain a history log of all changes made to documents or files over time. In other words, it allows you to keep a backup copy of your work, and revert to an older version if you need to.

SVN is short for Subversion, a version control option that’s normally used in the version of a controlled system that is both open and centralized. SVN command tools are applied in managing both current and past versions of files such as source codes, documentation, and files.
Developers use SVN tools to give them a chance to search for particular project history. Today, many other common version control tools, such as GIT, have been invented. However, most developers are still embracing Subversion.
SVN is an open command tool under the Apache License category. CollabNet Inc. was the main SVN developer twenty years ago, having similar operations like Concurrent versions system (CVS). Nine years later, Apache Incubator included it among the top-notch command tools.
Application of Subversion (SVN) Through TortoiseSVN
TortoiseSVN is the principal GUI command version that helps a developer contact SVN. To start, you should first download the remote copy of TortoiseSVN and set it up on your device. Then, ensure every group is allocated space (also known as a repository) on the SOC SVN server.
The SVN directory is the approved structure when creating the repository on your device. There are three directories that you should create: 'trunk,' 'branches,' and 'tags.' The 'trunk' directory is designed for storing the files connected to the principal development.
Meanwhile, the 'branch' directory is set up to commence a new development branch where the central line of development is not interfered with. Lastly, saving exceptional snapshots in your device is possible through setting up the 'tags' directory.
How to Use SVN?
Step 1: Setting Up the One Member Repository Directory
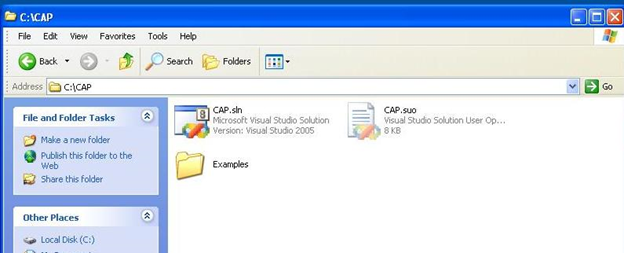
To start, you need to assign one group member to the task of initializing the empty repository directory with some basic info. Here, the member needs to build a new solution, such as to act as the project name. Other recent projects will then be added to the newly created solution to correspond with the CAP system.
Since modifying the directory is tough when it is uploaded to the SVN, the solution needs to be organized properly. Choose your desired location to have the solution saved.
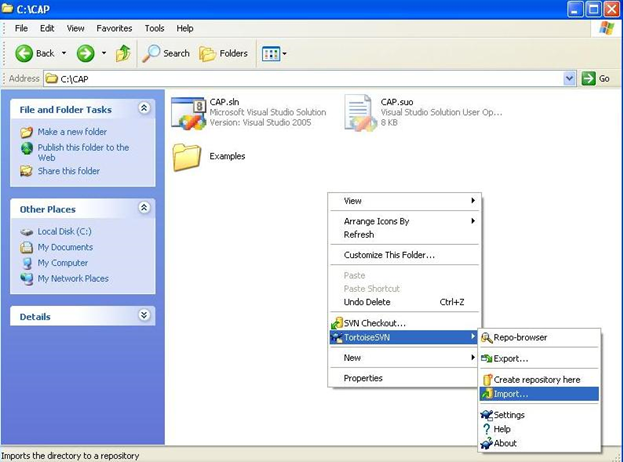
Get rid of unwanted files to create CAP from the main project directory and the links reserving the solution and project files. For imports to the repository, click the file explorer button then the project directory (C:/CAP). Afterward, select the `TortoiseSVN>Import' option.
Step 2: Generating a Working Copy
A 'working copy' is meant to be performed by each group member. It includes a copy of the remote device's repository. It is the top directory that gives developers a chance to view, modify, and update recent source files for the project.
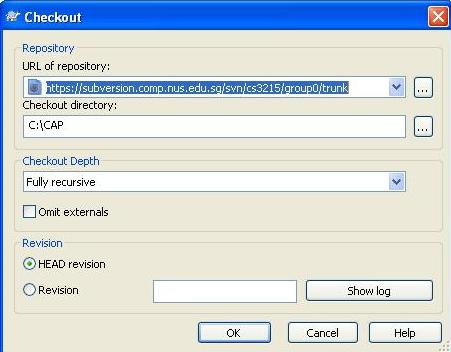
SVN clients have the task of ensuring that the files kept in the working copy are preserved. When installing a working copy, click on the project directory (C:CAP), then right-click to select the ‘SVN Checkout.’
Step 3: Amending the Working Copy
In case you want to make changes to the source files, you need to edit Form1.cs of the working copy. During the process, the statement “int x=0;” is added to the Form1 class constructor file and saved. We have now modified the Form1.cs image where the icon is noted with a red exclamation mark symbolizing the amended files.
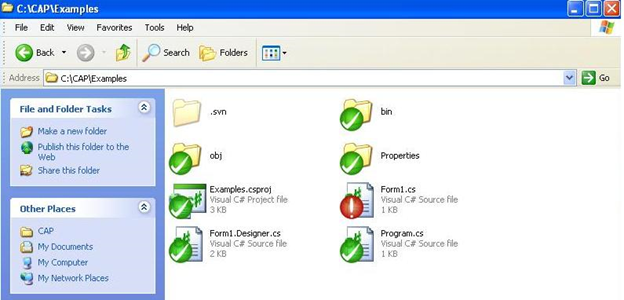
An easier way of viewing the amendments is possible by right-clicking Form1.cs and selecting 'Diff icon'.
![]()
After you are done with the changes, the working copy needs to be committed. Here, the commit command tools will be applied for making updates on the files present in the working copy. Select the working copy (C:/CAP), then use the right-click button to select 'SVN Commit'.
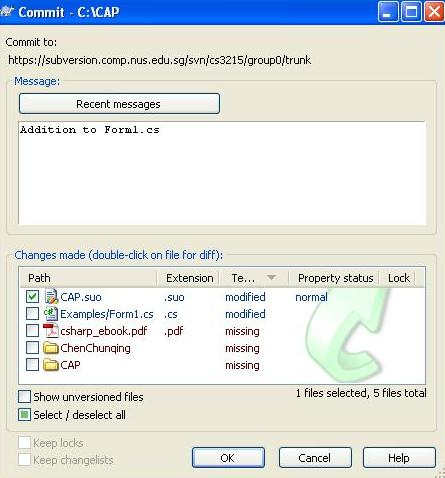
Once you’re done, simply click OK. That’s basically it. Though it can be complicated for first-time users, as long as you follow the steps above, you shouldn’t have any problems using SVN.
Summary: How to use SVN?
- Subversion, or SVN, is a software versioning and revision control system.
- The most common SVN commands are checkout, add, delete, commit.
- You can specify the path to a file or folder to add just that object to the SVN repository.
- To remove an item from the SVN repository, use the delete command.
- When you commit code changes to the SVN repository, use the commit command.
- Use the update command to fetch changes from other developers' commits that may have occurred since your last checkout or update.
- This will give you a basic introduction to using Subversion from the command line.
