You know about your CPU and SDD, but do you have an idea of your graphics card (GPU)? Are you sure its VRAM enough to smoothly run your recent games? Virtual Reality demands a powerful graphics card. The faster the memory, the better the smoothness and image quality. So, if you are having a problem with that, then this tutorial is just right for you. Here’s how to check VRAM windows.
We all know that RAM or random access memory is a computer that stores temporary data in it to ease up computer works. A VRAM or Video RAM does the same thing, but it only stores display or graphic data.
There are two graphic units in a computer, Integrated GPUs (i.e. intel UHD) and Dedicated GPUs (i.e. NVIDIA). Integrated GPUs use the computer RAM as their VRAM, but dedicated GPUs have their VRAM. Here are a few different methods to check both types of VRAM.
Using Display Settings
The display settings will only show the integrated GPU’s VRAM of your computer.
- Open the display settings on your computer.
a). Click on “Display Settings” from the context menu on the desktop.
b). Open “Settings,” go to “System,” and then open the “Display” tab.
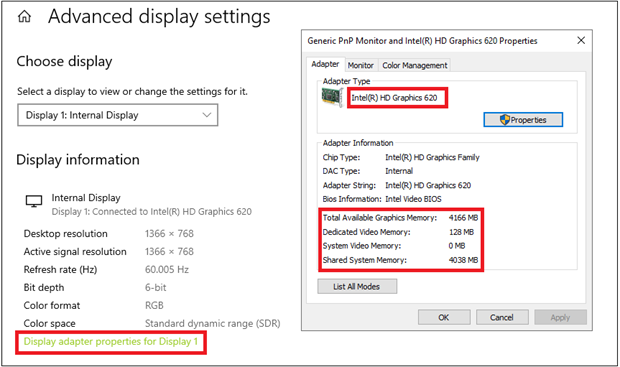
- Scroll to the bottom and open “Advanced display settings.”
- Click on “Display adapter properties for Display 1.”
The following window will show you the VRAM of the integrated GPU. For example, this one is “Intel(R) HD Graphics 620.”
Using Dedicated GPU Settings
This method will show you the VRAM of the computer’s dedicated GPU. Most computers have NVIDIA or AMD as their dedicated GPU. The example below is for NVIDIA. VRAM of AMD can also be checked by following the same steps.
- Open the NVIDIA settings/NVIDIA control panel.
a). Open the desktop context and click on “NVIDIA Control Panel.” Or,
b). Click on the “NVIDIA Settings” icon from the “Task Bar.”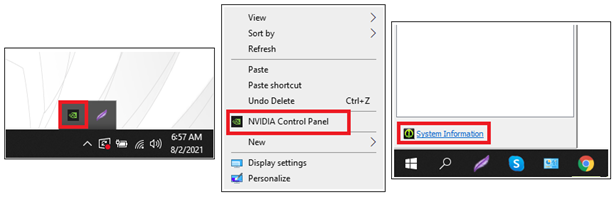
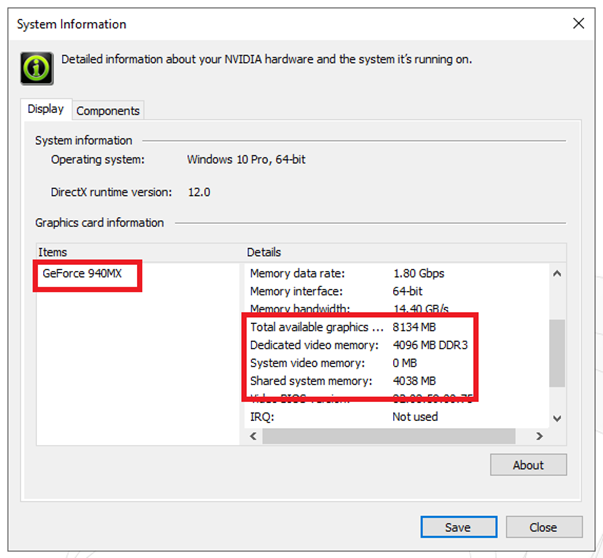
- From the bottom left corner, click on “System Information.”
- The following window will show you the VRAM of the dedicated GPU.
Using Task Manager
The task manager can show you the VRAM of both integrated and dedicated GPUs.
- Open the “Task Manager.”
a). Right-click on the taskbar and click on “Task Manager.” Or
b). Press the “CTRL + ALT + DEL” button altogether and then open the “Task Manager.” - Click on “More Details” from the bottom left corner.
- Now open the “Performance” tab.
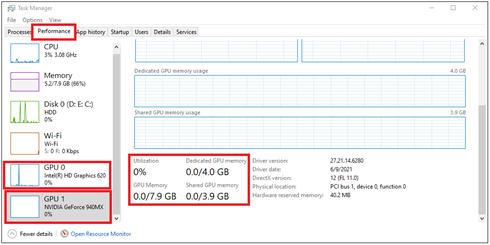
Inside the “GPU 0” and “GPU 1” sections, you will find all the VRAM information you need.
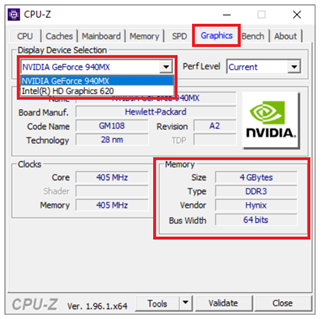
Using a Third-Party App
Many third-party apps are available to download and install to check the VRAM for both dedicated and integrated GPUs. Here is an example:
- Go to this link and download CPU-Z.
- Install it using the normal setup process.
- Launch CPU-Z.
- Click on “Graphics” from the top options.
- Choose either the integrated or dedicated GPU from the dropdown list.
- You will find the VRAM information.
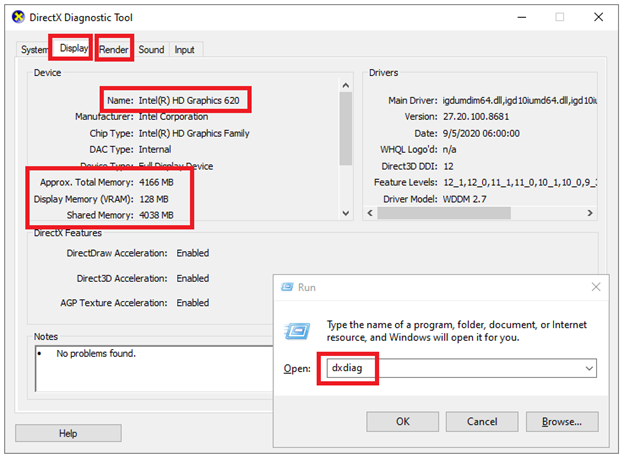
Using DirectX Diagnostic Tool
This tool also shows both dedicated and integrated GPU VRAM information. To use this tool:
- Open the “Run” box.
a). Press “Windows Button + R” together, or
b). Search for “Run” using Windows 10 search tool and open “Run.” - Type “dxdiag” and press enter on the keyboard or click “ok.”
- The DirectX Diagnostic Tool will launch.
- Click on the “Display” option on top to check the VRAM of the integrated GPU in your computer.
- To check the VRAM of the dedicated GPU, click on the “Render” option.
Summary: Check VRAM Windows
- It is not hard to check VRAM on Windows 10.
- Check your VRAM on Windows 10 to make the most of your computer's graphics capabilities.
- You can check your VRAM either through the DirectX diagnostic tool or through your graphics card's control panel.
- Using the DirectX diagnostic tool is faster but comes with less information.
- Using your graphics card's control panel allows you to see the model number and other information.
- First, open the Start menu and click on "Run."
- You can alternatively press the Windows key and R at the same time.
- Then, type in dxdiag in the Open field and press OK or hit Enter.
- Once you're in the DirectX diagnostic tool, you'll see a number of tabs along the top.
- One of them will be titled "Display."
- Click that tab to view details about your graphics card, including your video RAM (VRAM).
- That will take longer but makes it easier to find out more about your graphics card's model number and manufacturer.
