In this tutorial, we will be learning how to create a new Amazon Machine Image (AMI) and launch a new EC2 instance, called an instance in AWS terminology. An AMI is an operating system installation that includes an application server, software and/or middleware components, and everything you need to run applications on your EC2 instances. An instance is a virtual computer that runs inside the Amazon Elastic Compute Cloud (EC2).
Amazon Web Services (AWS) offers cloud computing tools and Application Programming Interfaces as per the requirement of various enterprises and working professionals or businessmen. The Terminal is a powerful, up to date, quick, effective terminal tools. Peoples who use shells like PowerShell, WSL, and Command Prompt and command-line applications use Terminal frequently. So, here, we will give you a general idea about how to create an instance in Amazon AWS using the Terminal.
Before You Get Started
People who do not use Amazon Web Services (AWS) frequently, can use the free tier service of AWS. The free tier service includes an EC2 instance so you can create an instance using that. There are many Amazon Machine Image type is available for using Terminal. Choose one and then let us proceed to create an instance in Amazon AWS using Terminal.
Creating Instance in Amazon AWS
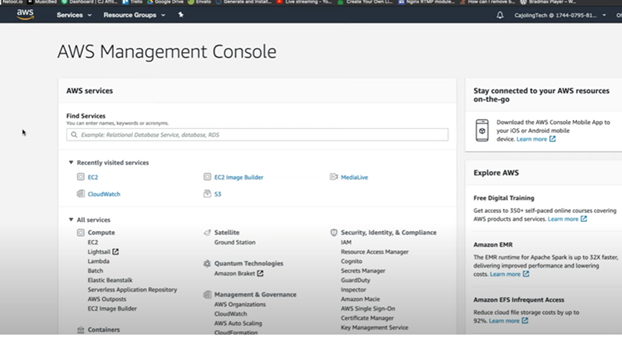
- First, open the AWS Management Console from Amazon Web Services. There you will see the list of all the services AWS provides. Locate the EC2 service which is beneath the “All services” section.
- Click on it. A new window titled “EC2” will emerge on your window. Select “Launch Instance”.
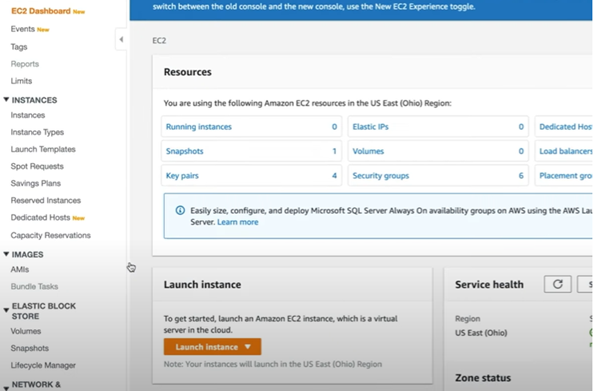
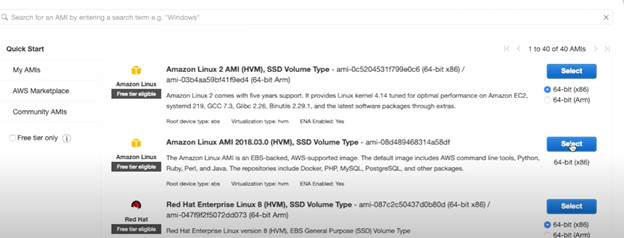
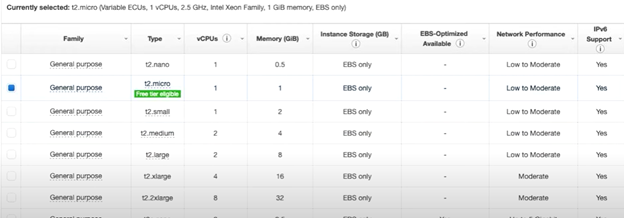
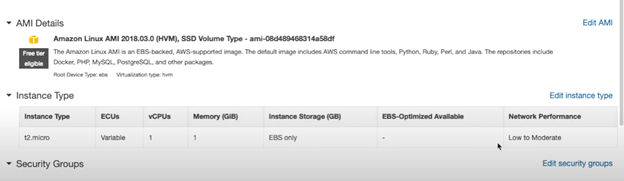
- After that, the Amazon Machine Image (AMI) window will open. Here you will find various AMI for creating the instance. As we will use Terminal for connecting SSH, choose Linux AMI.
- Click on “Next”. Now, choose your “Instance Type”. There are different instance types for premium services. Only one is free tier eligible which is the “t2.micro” type. Select it and proceed to next.
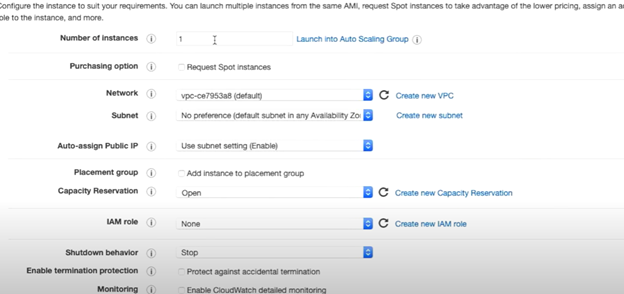
- Then, the “Instance Details” window will open. Add relevant information to the options. For the first time creating an instance, you may leave it as defaults. You can change the information when you are going to do a more advanced operation.
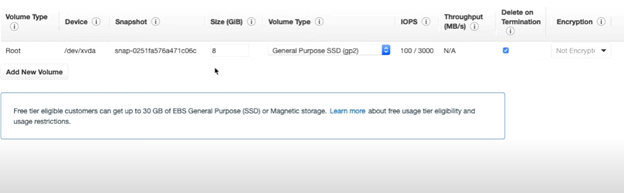
- Choose the storage capacity of your instance. The default is 8 GB at least. You may choose more storage if you need it.
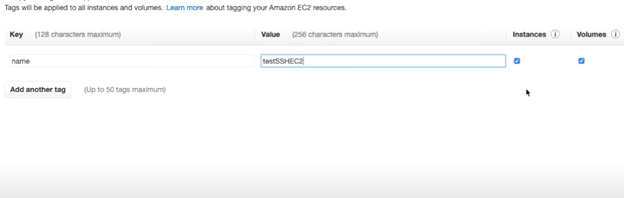
- Proceed to the next window, which is to add Tags. It is better to add a simple tag for your instance to find it later.
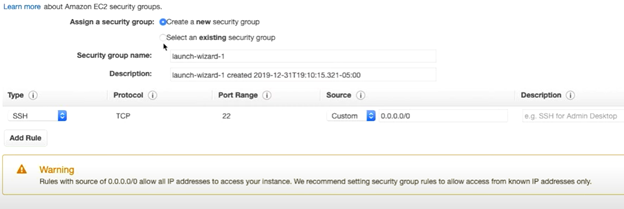
- The next window is to add a security group. There you may create a new security group or choose an existing security group you already added or have. You may create a new security group called “SSH” and give your IP. Or, you may add another rule called “HTTP” and provide your IP.
- After that, click on “Review and Launch”. A preview window consisting of the given information about the instance will open. Review all the options and select “Launch”.
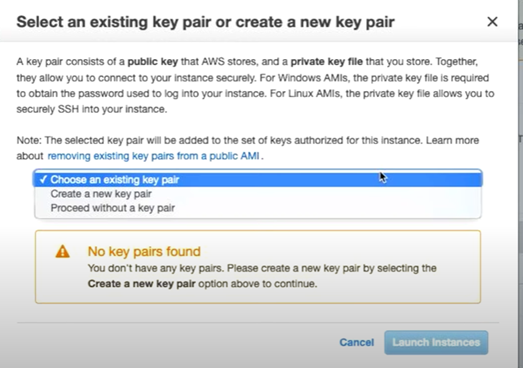
- A new pop up window asking the key pair will appear. You may pick a current key pair or make a new one or proceed without a key pair. Make a new key pair and save it.
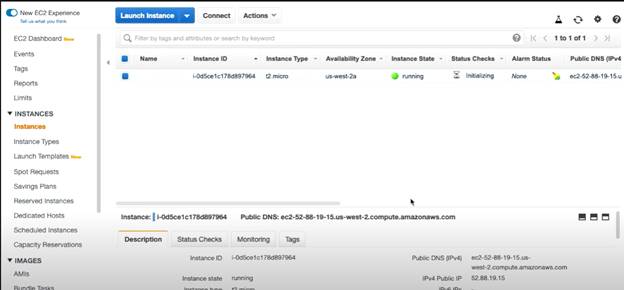
- Then, complete the whole process by clicking “Launch Instances”. And, your instance is created. It may take a little time to launch the instance. Now you can use Terminal to connect SSH into the instance.
So, following these steps, you can create an instance in Amazon AWS using the Terminal.
Summary: Create Instance in Amazon AWS using Terminal
- Login in to Amazon AWS console.
- In your right side corner, you will find a box with Support and My Account options, click on My Account.
- Under My Account, there is another option as Security Credentials. Click on it.
- You will see a dropdown menu with Sign-In and IAM Users. Choose IAM users option to go further.
- You will be redirected to new page with title IAM users, here you can create new users by clicking the button Add User at the top of the page.
- Add Username and check Access for Programmatic access checkbox.
- Now click Next Permissions button after adding username.
- Choose Attach existing policies directly radio button and select AdministratorAccess that you want to assign to this user. Then click NextReview button to proceed further.
- Review all details carefully before clicking CreateUser button at the bottom of the page because while creating a user you cannot modify any data after clicking create user button as there is no update or delete button/option available.
