In this article you will learn how to setup FreePBX and get it connected to the world via Session Border Controller. What is that anyway? Are you still unsure of what is FreePBX? Don't worry. In a few minutes I'll tell you everything you need to know about it.
Amazon Web Services (AWS) offers as required cloud computing software and Application Programming Interfaces to enterprises and professionals. Free PBX is a visualizing interface that handles Asterisk. You can easily setup AWS Free PBX on amazon with an EC2 instance. It will give you more resources and networks to work with. So, here, we will give you a general idea about how to setup AWS Free PBX in amazon.
Before You Get Started
Amazon AWS provides a free tier for the first time using or people who will not use it frequently. It includes an EC2 instance. There are three different Free PBX cloud service providers is available on Amazon Web Services. So using these, you can easily set up Free PBX in Amazon AWS.
Setting up AWS Free PBX in Amazon
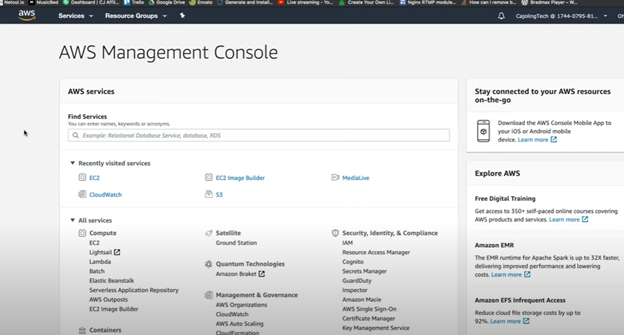
- Open the AWS Management Console. There, locate the EC2 service which is under the “All services” section.
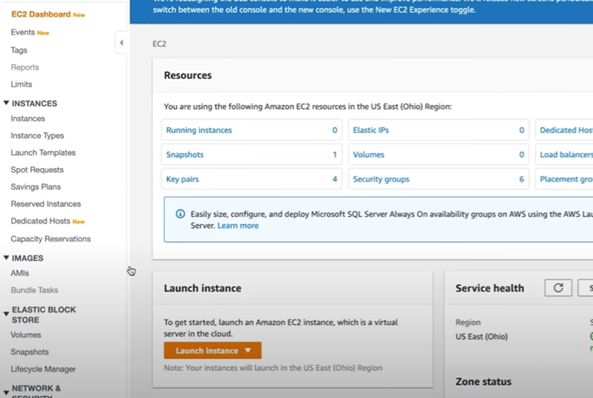
- Click on it. The EC2 window will open. Select “Launch Instance”.
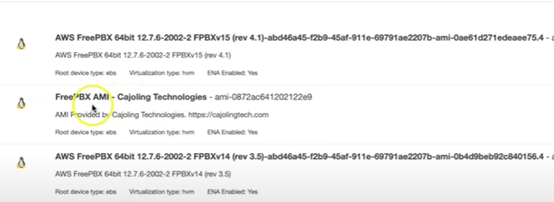
- The Amazon Machine Image(AMI) window will open. Write “Free PBX” on the search bar. Click “Enter”. Then, navigate to “Community AMIs”.
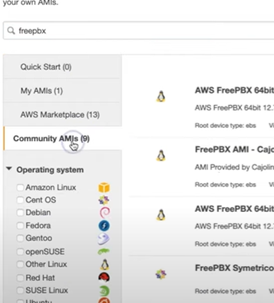
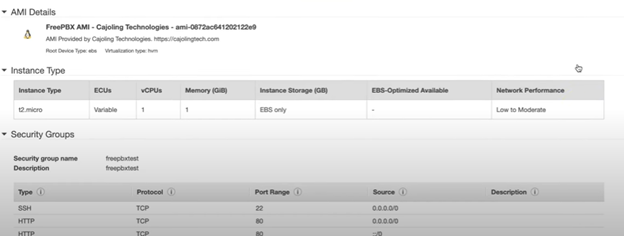
- There you will find the “Free PBX AMI – Cajoling Technologies”. Select it.
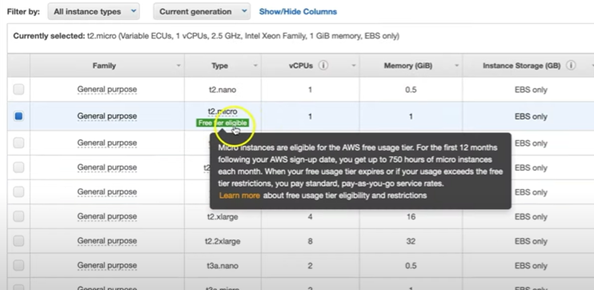
- Choose your “Instance Type”. You may select the “t2.micro”. Then, click on “Next”.
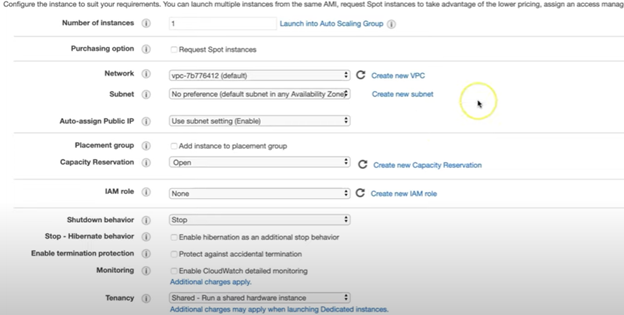
- Add relevant information to the “Configure Instance Details” window.
- Choose storage. The default is 16 GB at least.

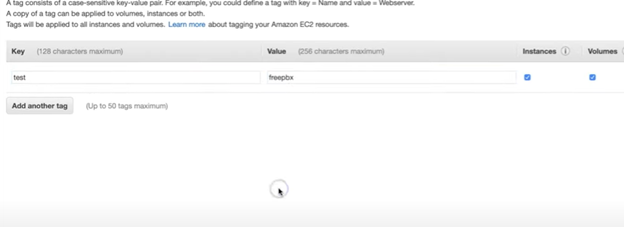
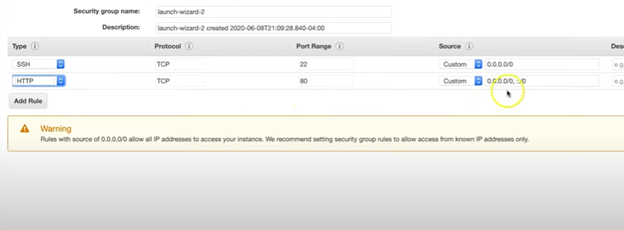
- Click “Next”, which is to add Tags. After adding Tags, go to the “Configure Security Group”.
- Add a rule “HTTP” and give your IP. Then, click on “Review and Launch”. A preview window will appear. Click on “launch”.
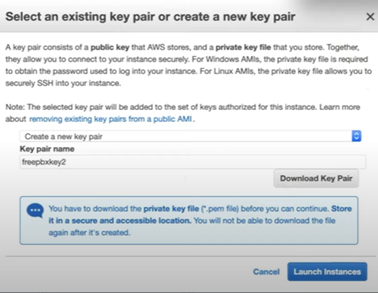
- Then, it will ask you for a key pair. You may pick a current key pair or make a new one. After making a key pair, download and save it. Click “Launch Instances”.
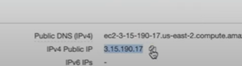
- After launching, copy the IP address given. Seek it on the internet.
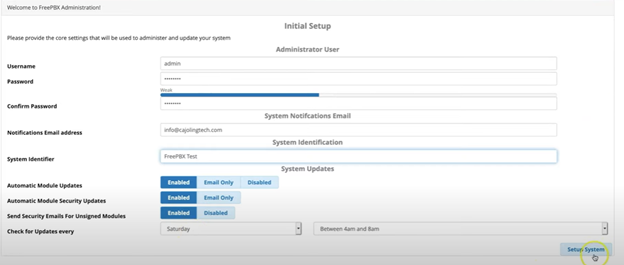
- The Free PBX setup window will surface. Add all the relevant information. Click on “Setup System”.
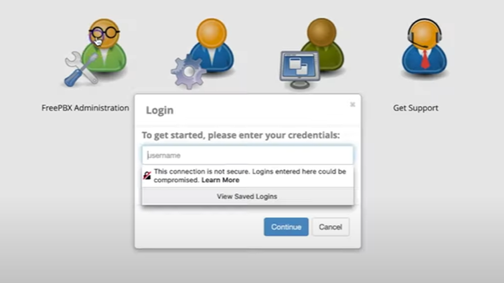
- Click on “Free PBX Administration”. Log in.
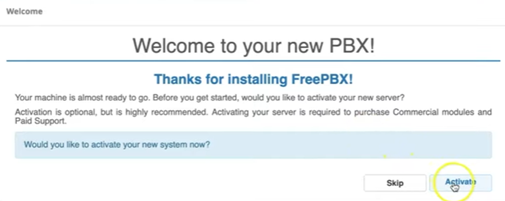
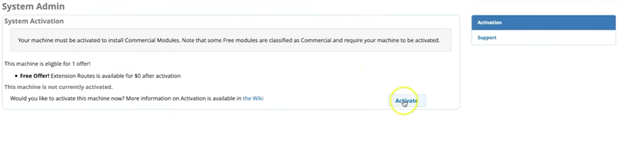
- After login, it will ask you to activate Free PBX. Activation is free. Click on “Activate”.
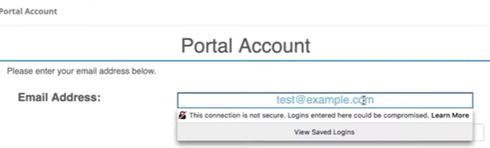
- Put your email address and hit enter. Choose your Time zone. Then, click on “Submit”.
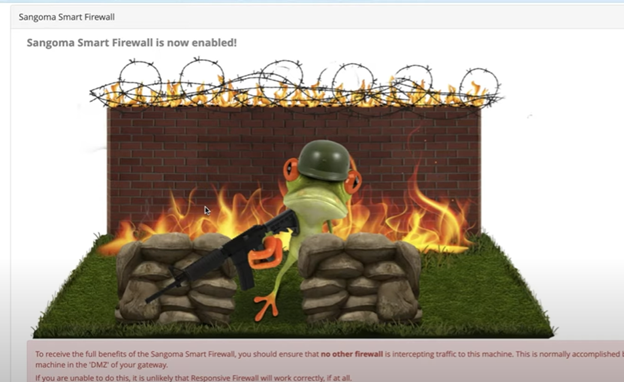
- Next, You may enable the Sangoma Smart Firewall or abort it.
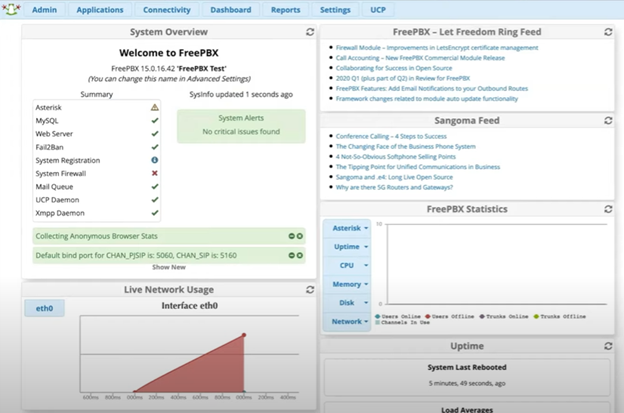
- A confirmation dialog box about installing Free PBX will appear. Then, it will redirect you to the Free PBX dashboard.
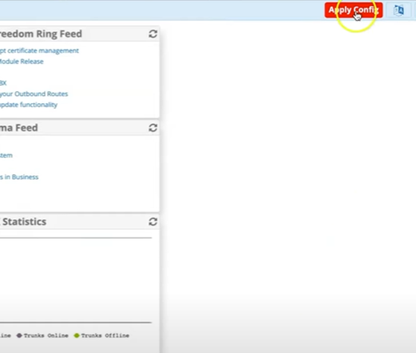
- Click on “Apply Config” to apply all the changes you just made.
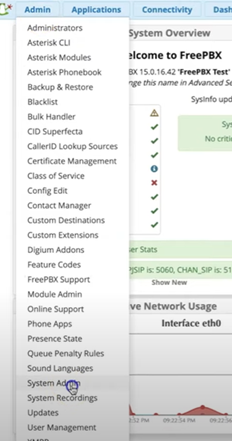
- Then, go to “Admin”. Select “System Admin”.
- Click on “Activation” to activate the system. After activating, set up your FreePBX NAT and network.
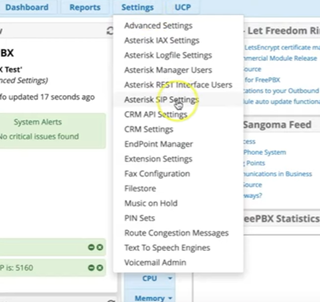
- Click on “Settings”. Select “Asterisk SIP Settings”.
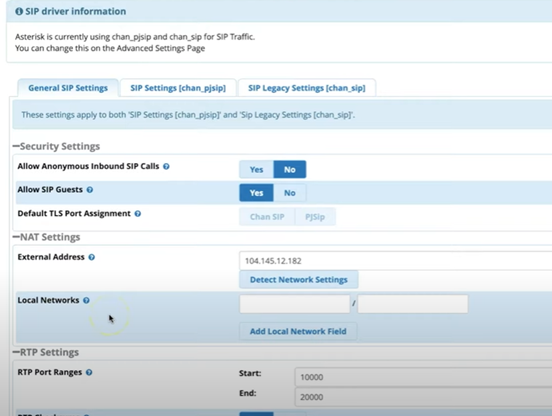
- Click on “Detect Network Settings”. It will find your IP. After adding all the relevant information, go back to the Free PBX dashboard.
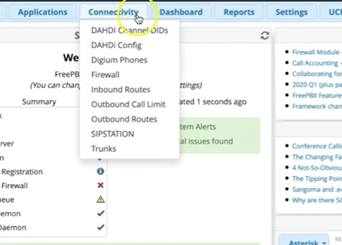
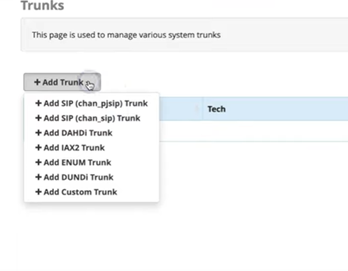
- Then, click on “Connectivity”. Select “Trunks”. Click on “Add Trunk”. Choose “(chan_pjsip)”. After setting it, click on “Reports”. Select “Asterisk Info”. You will see the added Trunks.
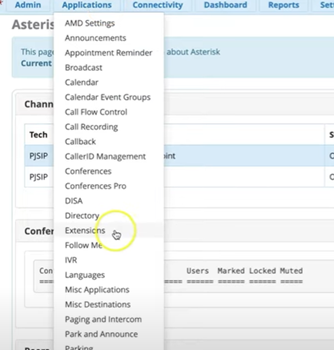
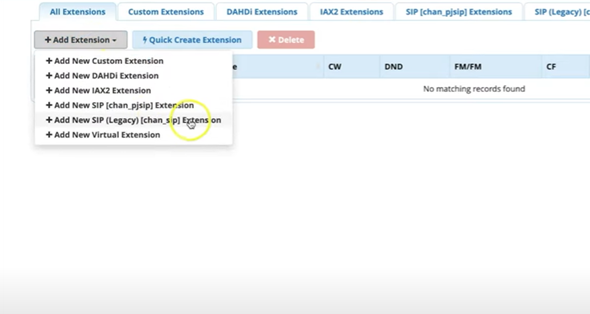
- Click on “Applications”. Select “Extensions”. Click on “Add Extension”. Choose “[chan_pjsip]” again. Put all the relevant information and your setup is complete.
So, following these steps, you can setup AWS Free PBX in amazon.
Summary: Setup AWS FreePBX in Amazon
- Open the Amazon EC2 Console.
- In the navigation pane, click on Instances.
- Select one of your existing instances and make a note of its security groups, subnet, and VPC.
- Click on Launch Instance.
- Select FreePBX 64bit (FreePBX Distro) and click on Select.
- Choose an instance type that meets your needs.
- Expand Advanced Details, enter the following into the User Data field, then click Next.
- Review your instance details and select Create new IAM Role to create a role for Amazon EC2 to use in deploying the instance. Then click Launch to start the launch wizard.
