Most of the users don't know that they can actually create multiple Amazon WorkSpaces on multiple computers. This article will guide you through the steps to create more than one environment on different machines. There is no application needed to do this, so anyone can do it. We are going to go over all the possible ways to accomplish this. For example, if you have two computers for your personal use and you want separate work spaces on each machine, then you should definitely try this tutorial.
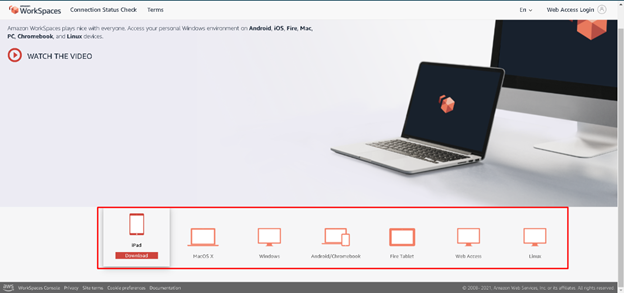
Amazon Work Spaces is the service of Amazon Web Service. This is a virtual computer-managed on an app called client. It can be downloaded to all of the popular operating systems like I Pad, MacOS X, Windows, Android/ Chromebook, Fire Tablet, Web access, and Linux. The workspaces is generally used to maintain the traffic of a server. Besides it also can use other commercial purposes.
Why use Work Spaces on multiple computers?
Many people need many requirements to do their job for those reasons he must need a workspace in multiple computers. If I want to say more specifically there are most important several reasons to connect the workspace to multiple computers. We know server management is the most difficult job from other networking systems.
To manage a medium to big server we need more than one computer and if we use the workspace to control the server, we will need to connect more than one computer to the server that’s why we need to connect multi-computer to the workspace. There is another reason we can discuss; Some office work managed by the virtual computer, then they will also need many computers connected to workspaces.
Condition of Multiple users of Work Spaces.
The same username under the same directory isn’t allowed. If you want to create more than one user id for a person then you need to add a suffix or prefix with his/ her original user id. Again, the same user id can be created under a different directory. Finally, one thing to say one user id can be used in multiple devices but they can’t stay log in at the same time.
Creating multiple Work Spaces under the same directory.
- Go to https://aws.amazon.com/ and log in to your AWS account.
- Search the Workspace option in the search box located at the top of the page then click on the ‘Workspace’ option.
- Now click on the ‘Launch Workspaces’ on the top side and the right side of the navigation bar.
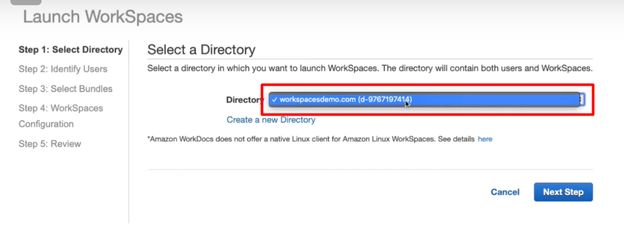
- At first, select the directory where you want to add more workspace. Then click the ‘Next’ button to proceed to the next page.
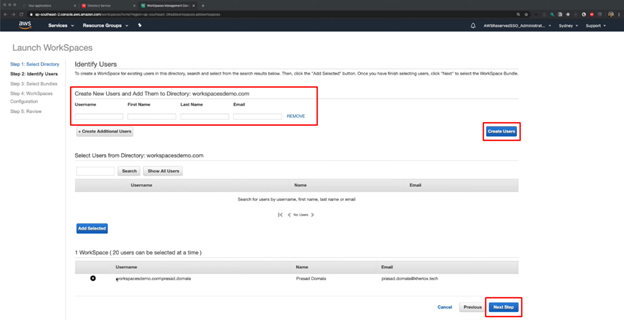
- In this step fill-up the form of the user giving the Username, First Name, Last name, and the Email address and click on the ‘Create Users’ to add the user to the list Add up to 20 persons. Then click the ‘Next Step’ to select bundles for new users.
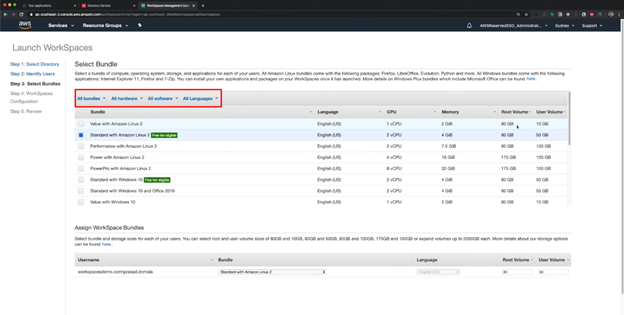
- Now select Bundles, Hardware, Software, and the preferred language from this page as your working requirement.
- Configure your workspace to save money. Choose the Auto Stop option and time if you don’t need the service for a long time. After that set your encryption & tags under the Running Mode option. Click on ‘Next’ and go to the next page of this setup.
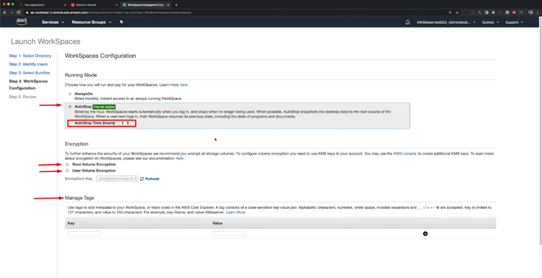
- Finally, preview the workspace and click on the ‘Launch Workspaces’. It will take twenty minutes and the user will receive an email with his password setup link,
registration code, and user id. Click on the password registration link to set a new password indicating by the arrow in the image.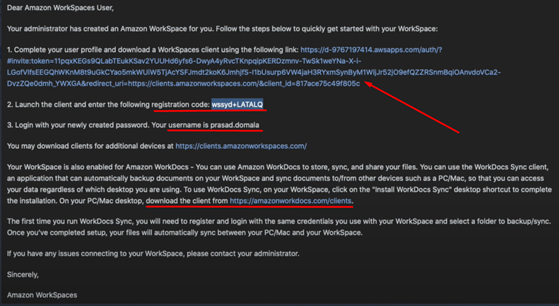
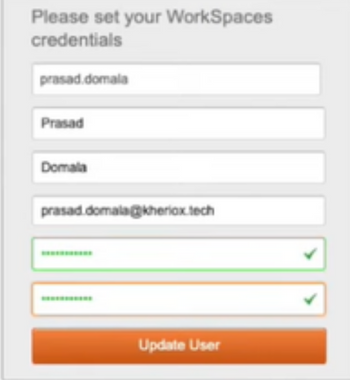
- Now set the password and click on the ‘Update User’. It will take you to the console download page. Or go to https://clients.amazonworkspaces.com/
- Now click on the name of your device to install the console after downloading.
- After the installation process opens the Console and pastes the registration code coping from the email. Then click ‘Register’.
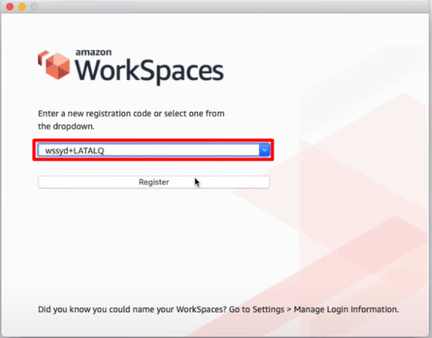
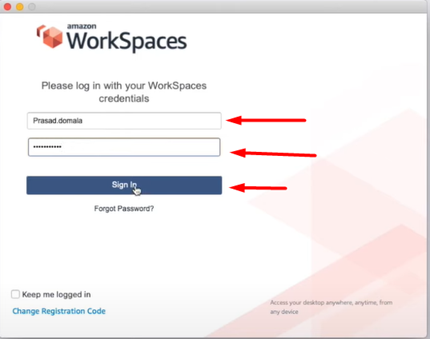
- Log in to your workspace by username & password and your workspace is ready to use.
Summary: Put Amazon WorkSpaces on multiple computers
- Go to the Amazon WorkSpaces console.
- Click the check box next to the WorkSpace you want to connect to multiple computers.
- Choose Actions, and then choose Modify Access Permission.
- Enter a name for the policy.
- In the list of actions, choose Download Connector and then choose Add to policy.
- Review your settings, and then choose Allow Access Permission.