Amazon workspaces is a nice service Amazon is offering to anyone who wants to host their application on it. This article describes how to get a file from your desktop to the Amazon workspace with SFTP protocol.
Amazon workspaces is a new service offered by Amazon that allows you to access raw computing power in the cloud in an efficient way. By having an Amazon Virtual Desktop group, you can set up a central directory for the VDG members to upload their computing resources such as documents, spreadsheets and media. This article will give you a step-by-step guide of how you can get files from my desktop to Amazon workspaces.
Amazon Workspaces gives you a virtual desktop for Hosting, Datacenter, office work, and many more. Depending on the types of work you can now add and remove the files and folder from Amazon Workspaces. To lower the cost some storage may be deleted from your Workspaces. There are two types of the folder in your AWS Workspaces, one is the Template folder named as ‘’ and another is the Root folder named as ‘name’.
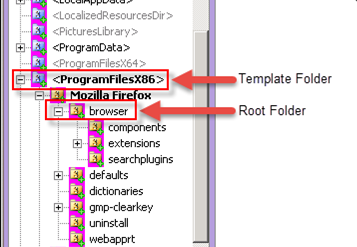
You can’t add or remove the Templates folder manually, it is automatically added to the system but if you want you can add the Root folder with the file you needed in the folder.
Folder and Files adding process in Workspaces
Folder adding process:
- At first Open Amazon Workspaces Application Manager Studio.
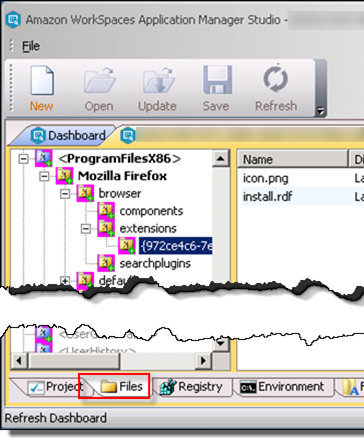
- Move the mouse pointer to the navigation bar on the left and press the right click of the mouse & select ‘Add Root Folder’ from the context menu bar in the files tab.
- Now launch the context menu by clicking the right button of the mouse from the left-hand navigation panel of a folder and press ‘Add Subfolder’ to add one.
- After that click on the ‘Create new root folder with the following name’ and choose a directory for the folder.
- Now if you want to add a root folder sourcing from a pre-existing root folder, click ‘Create from existing source; after that choose the folder through the “Browse” option.
- If you want to create the folder with a sub-folder from the existing one click on the ‘Recursively include subdirectories’ and select the main folder by browsing.
- Finally, to create with all the files and folder from the existing one click on the ‘Override existing folder name with the following name’ and browser the main folder and rename it.
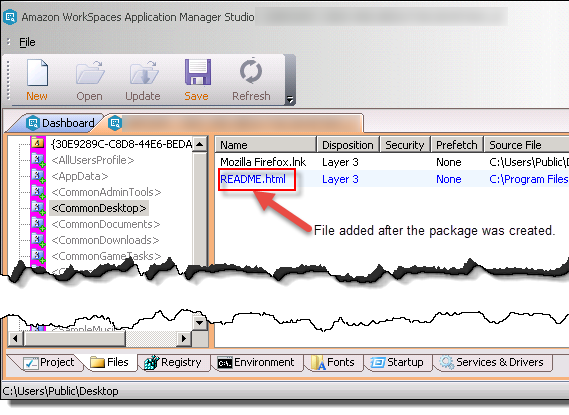
Adding files to the folder: - Open the ‘File’ tab.
- Again, launch the Context menu and click on the ‘Add File’ to select the folder.
- Now click on the ‘Browse’ option from “Add File” prompt and select the file that you on that directory.
- It’s time to rename the file; click on the ‘Override source file name with the following name’ & provide a new name for the folder. Press ‘OK’ to proceed with the action.
 Renaming the folders & files:
 - Click on the ‘Files’ tab first.
- Now launch the Context menu by clicking on the right button of the mouse of the files or folder which you wanted to rename.
- Now choose ‘Rename’ and type your new name. Press enters now.
Activate the folder: - At first, click on the ‘Files’ tab first.
- Then launch the Context menu of that file or folder you wanted to be activated.
- Now choose the option ‘Set As Working Folder’ to activate it.
Removing a file: - Choose the ‘Delete’ option from the Context menu of the file to remove it.
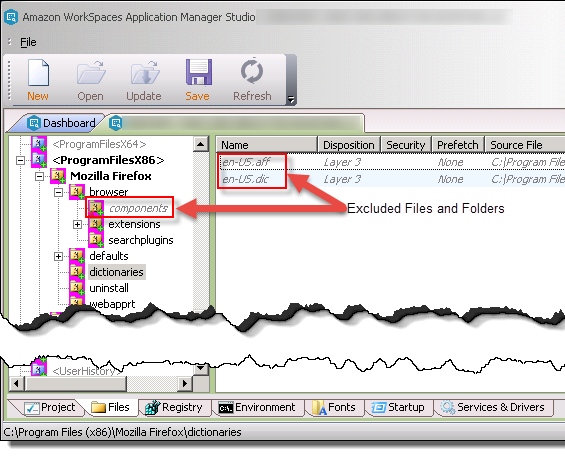
Exclude a file:
After excluding, the files no longer installed with the Amazon Workspaces. Although they do remain in the package. - Again, launch the Context menu and choose and click on the ‘Exclude’ option.
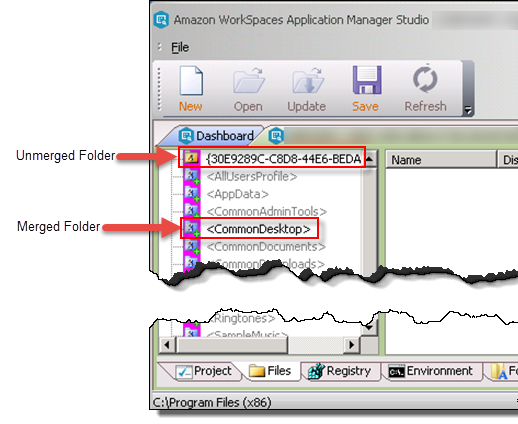
 Merge a folder:
 - First, launch the Context menu of the unmerged folder then click on click on the ‘Merge Folder’ option to merge it.
 Showing the files in Explorer:
 - At last, launch the Context panel for the directory you wanted to show & click to ‘Show in Explorer’.
You are done with adding a file from your local computer to AWS Work Spaces.
Summary: Get a file from my desktop to Amazon workspaces
- First get a browser with new Amazon workspaces.
- Next open an SSH program on the desktop computer.
- Get ftp running on Amazon workspaces, using the SSH program.
- Finally use another browser to get the file from your desktop computer to Amazon workspaces.
