Antivirus for Mac is a choice for Apple users. It’s one of the security tools that you should have in your arsenal when protecting your Mac machine. It’s a software program that’s developed to protect against malicious attacks, especially those coming from the Internet. There are many antivirus programs on the market. The problem is that some of them are bad applications – they don’t do their job as they should; they consume lots of system resources, and can even slow down the computer. This is why I recommend users to read some information about antivirus on Mac and make an educated choice.
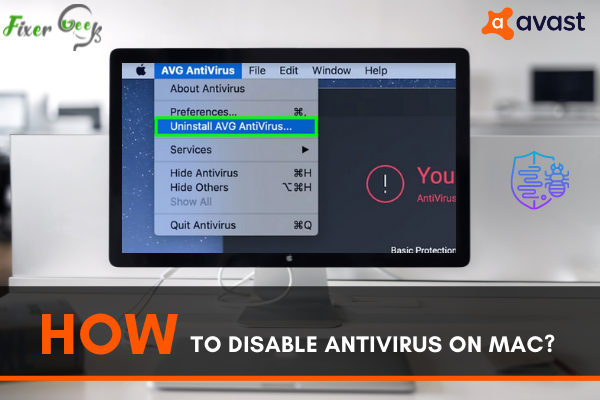
Sometimes when installing an application on the Mac, the antivirus does not allow you to proceed with the installation. For that, you have to disable the antivirus for a short period and install the desired application. So, in this article, we will give you a complete idea about how to disable antivirus on Mac.
Before You Get Started
There are various good and different antivirus software available on the web. However, the disabling option at those antiviruses is pretty much the same. Here, first, we will give you instructions about the basic disabling technic and then show you the disabling technic of the three common antivirus software of Mac. Those are:
- Avast Firewall and Security
- AVG Antivirus
- Avira Real-Time Protection
Disabling Antivirus on Mac
- Open the Mac operating system and go to the “Spotlight” search area.
- Put the application title that you are applying on your Mac as an antivirus. After putting it, the software will emerge on the screen. Select it and access the software.
- On the software interface, you will get an option titled “Stop” or “Disable”. You may have to locate it in some antivirus software.
- Select the option and a dialog box will come out. Select the “OK”, “Confirm” or “Yes” option to confirm the disabling.
- You may also do this by opening the Mac menu section. There you will get the antivirus application. Open the options.
- Choose the appropriate option like “Stop” or “Disable” to turn off the antivirus.
Disabling Avast Antivirus on Mac
- Put “Avast” on the search option or you may locate it from the Mac menu. Access the “Avast Security” software.
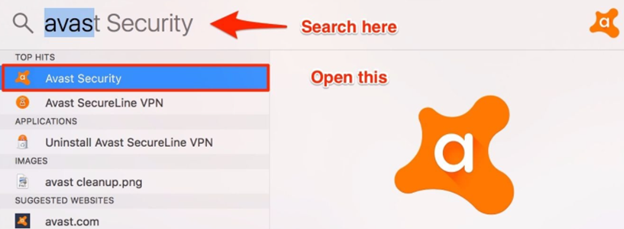
- Locate the “Preferences” option from the lower left side of the window.
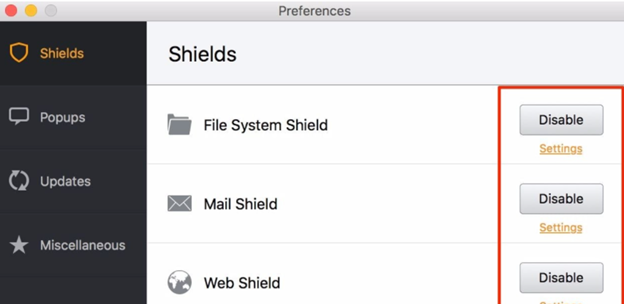
- There you will get every type of security avast is providing your Mac. It features Mail, File System, and Web Shield.
- Choose the “Disable” option beside the required shield. You will need to put the Administrator password to disable the antivirus. Then, the avast will be disabled.
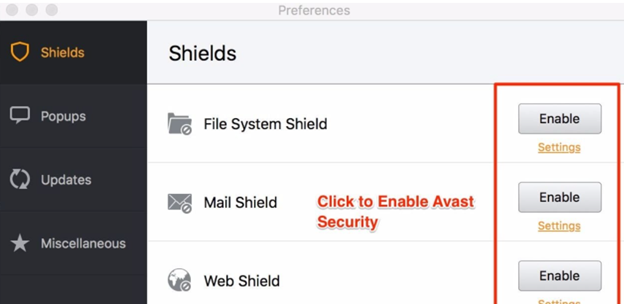
- After your work is done, you can again enable the avast security by choosing the “Enable” option from the “Preferences” section.
Disabling AVG Antivirus on Mac
- Locate the shield from the menu section of your Mac. You will get it on the right side of the window. However, you can not disable the AVG antivirus from your Mac briefly. You need to fully remove it.
- Choose the “Uninstall” option from the “AVG Antivirus” section.
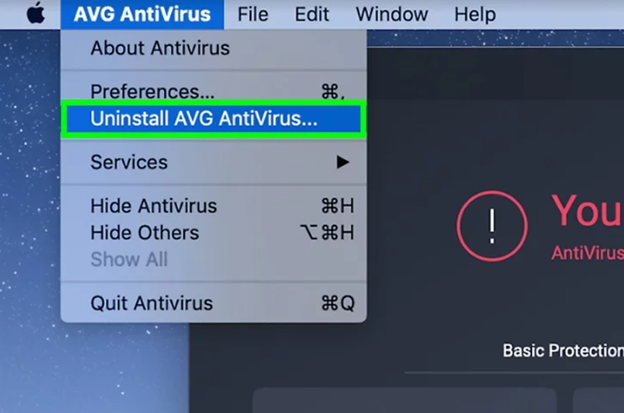
- A dialog box will emerge to confirm the uninstallation. Select “Uninstall”.
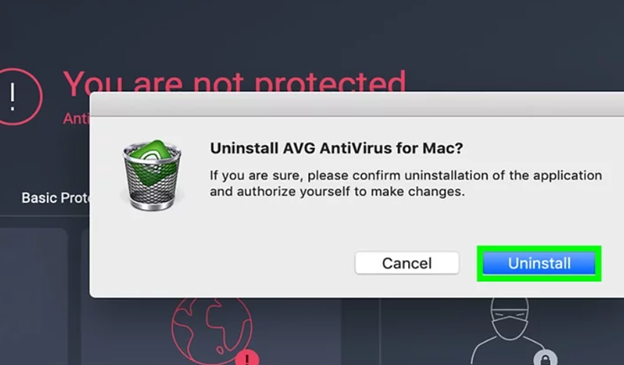
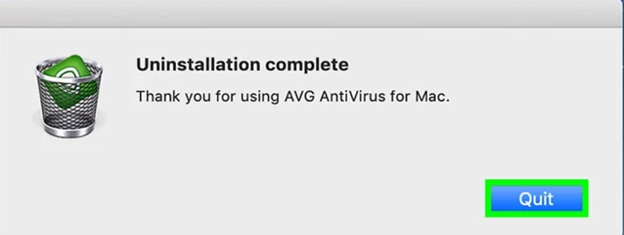
- If it asks for the administrator password, give it and choose “OK”. Select “Quit” to end the uninstallation. And, AVG antivirus will be deleted.
Disabling Avira Antivirus on Mac
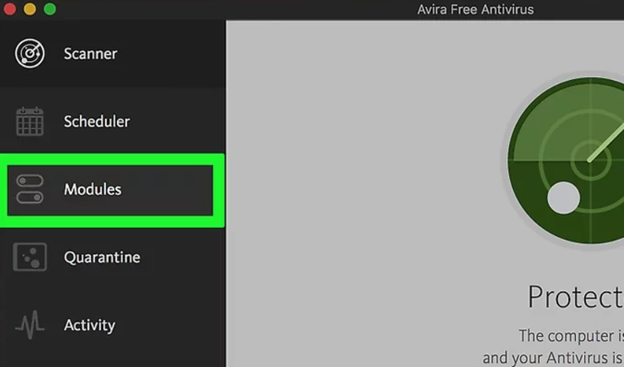
- Locate the Avira application from the menu of your Mac. Choose “Open Avira”.
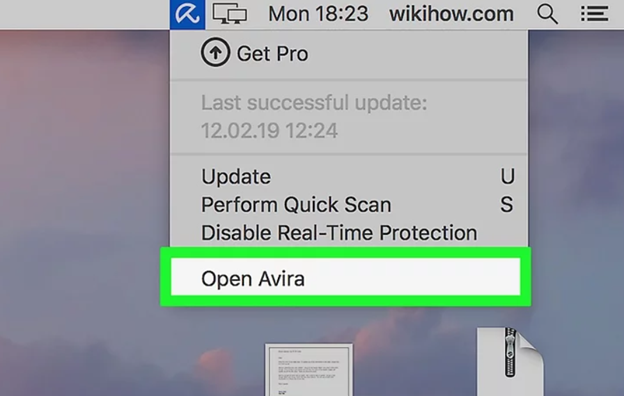
- Click on the “Modules” option from the left side of the window.
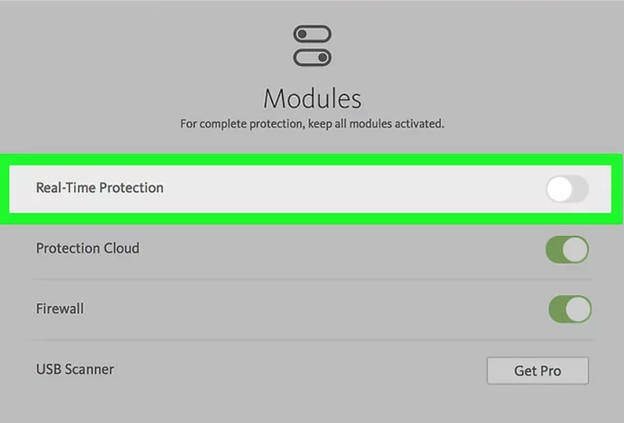
- There you will get the “Real-Time Protection” option that is active now. Turn it off. You will need to put the administrator password for going forward with the disabling.
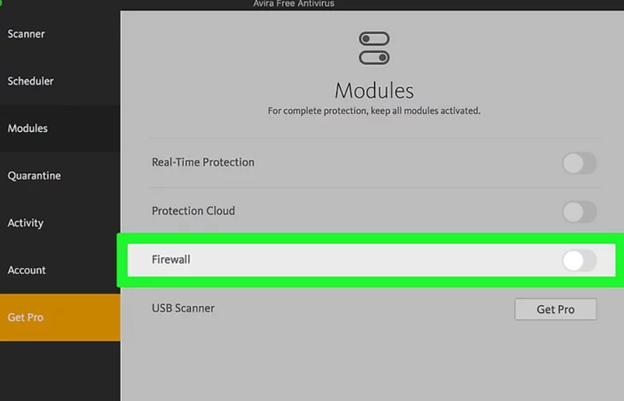
- Then, turn off the “Protection Cloud” option and the “Firewall” option that is beneath the “Real-Time Protection”. And, this will disable Avira completely.
So, following these instructions given above, you can easily disable antivirus on Mac.
Summary: Disable Antivirus on Mac
- Go to Mac Security Preference.
- Click General Tab.
- Uncheck the Mac Defender (or whatever your antivirus is named) on Full Disk Access list. And then click the padlock icon to unlock and make a change.
- Click unlock and enter your username and password to grant permission to make changes.
- Once you have add Full Disk Access, close the window, the Mac Defender won’t start up anymore and delete it permanently later.