The iPhone 6 is Apple’s newest model of the iPhone. It’s known as one of the best smartphones released this 2014. The device is stylish and quite powerful, as well. As you may know, its popularity has made it an endless source of information on the Internet. At numerous websites, you can find articles that talk about how to disassemble an iPhone 6 Plus.
INTRODUCTION
When something wrong happens with the physical components of the iPhone, the first thing you will most likely do is call Apple customer support or visit an Apple store near you. However, some people who belong to technical backgrounds take steps to fix their iPhone 6 on their own. Disassembling the iPhone on your own will void the manufacturer's warranty. So, be thoughtful about your decision. In this guide, you will learn how to disassemble an iPhone 6 with the help of images. All you need to do is walk through the below steps and safely disassemble your iPhone.
What You Need
Here are some of the tools you need to have to safely disassemble the iPhone 6.
- Pent lobe Screwdriver - 0.8mm
- Phillips screwdriver - PH00 1.5mm
- Hairdryer
- Plastic Card or Mediator
- Suction cup to remove iPhone screen
- Sim ejection tools
Guide to Disassemble an iPhone 6
The following step-by-step instruction will help you to disassemble your iPhone 6 without any complications as long as you follow them exactly as we have suggested.
First, you should remove the two pent lobe screws located at the bottom of the iPhone 6. You can take the help of the pent lobe screwdrivers to remove these screws.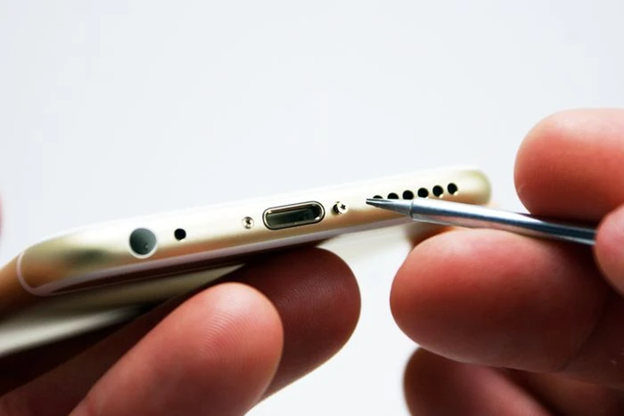
Next, pick the suction cup and place it on the screen above the home button of the iPhone 6. Pull up the suction cup to make enough room to insert the plastic opening tool between the screen and the back cover of the iPhone. By doing so, you will be able to separate your iPhone screen from the rear case.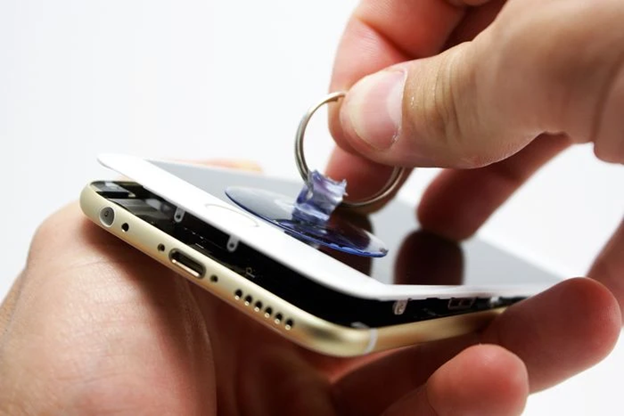
Once you have managed to separate the iPhone screen from the rear case, you will see a metal cover that is used to protect the LCD and the front panel of the iPhone. You need to remove the screws of the metal cover and then gently lift and separate the metal cover of the iPhone 6.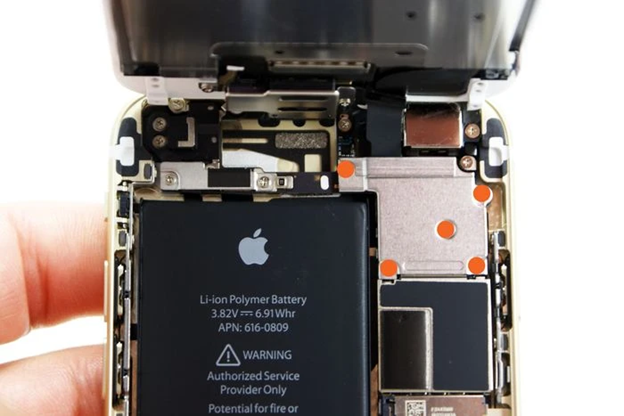
The four connections located beneath the metal cover need to be disconnected. The connections are responsible for the assembly of the iPhone display, home button, and the front camera.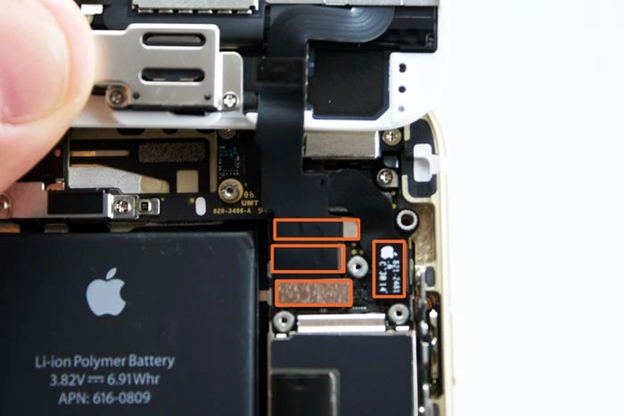
Home Button Assembly
Two Phillips screws hold the home button assembly and the metal bracket. You need to locate these screws and remove them utilizing the Phillips screwdriver.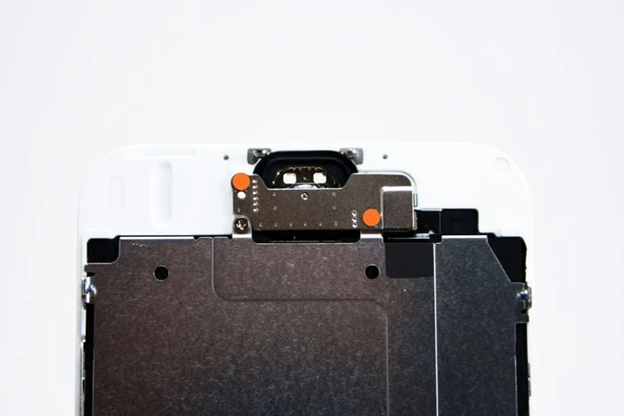
An adhesive is placed there to secure the home button assembly. Hence, before removing the assembly, you need to soften the adhesive utilizing the heat gun or blow dryer.
Front Facing Camera and Ear Speaker Assembly
Three small Phillips screws are located at the top; remove them to access the front-facing camera and ear speaker assembly.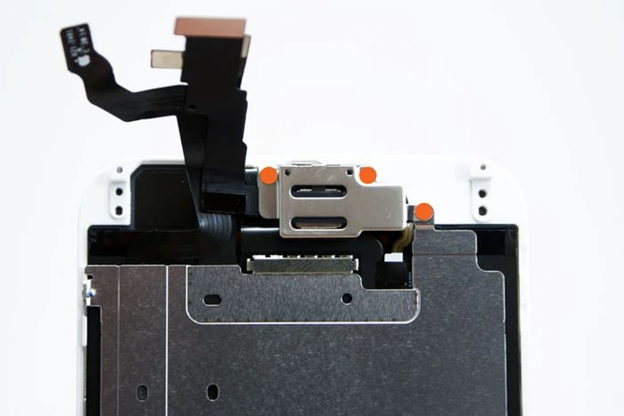
Once the metal bracket is removed, lift it and remove the ear speaker from the rear case of the iPhone 6.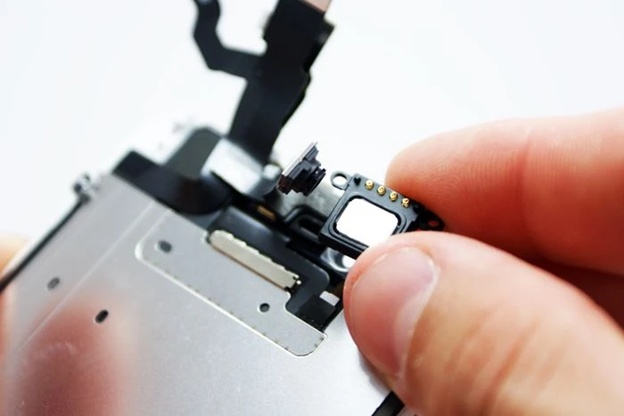
Display Assembly
The display assembly of the iPhone 6 is secured by seven Phillips screws that need to be removed.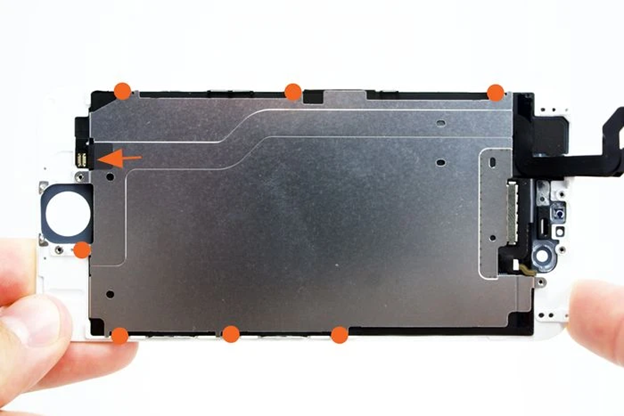
Now take the help of the blow dryer to soften the adhesive that secures the display assembly.
Sim Card Tray
You can easily remove the sim from your iPhone 6 with the help of the sim ejector pin that comes with the model.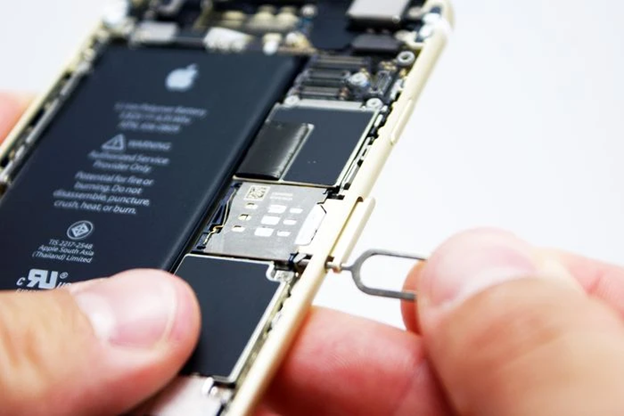
Battery
Two Phillips screws hold the battery of the iPhone 6. You need to remove those screws. After that, utilize a fine tip curved tweezers to remove the battery from the rear case of the iPhone.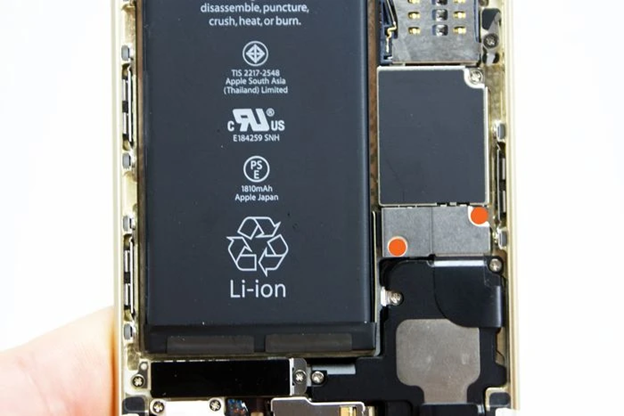
Summary: Disassemble an iPhone 6
- Power off the iPhone 6.
- Heat up the edge of the iPhone 6 with a heat gun.
- Pry up and pull the display assembly away from rear case.
- Remove three screws securing the battery plate to logic board.
- Lift the battery plate off and remove it after removing connector.
- Undo two screws at the bottom of protection plate.
- Remove protection plate and then remove vibration motor and camera module.
- Remove four screws near dock connector.
- Remove bottom screw cover and then unscrew five screws near dock connector.
- Disconnect speaker module connector and take out ear speaker, front camera module.
Conclusion
We don’t accept any liabilities or damages happening while following the iPhone 6 disassembly steps. Also, by following these steps, you will void your iPhone 6 warranty. We always suggest that you visit any of the nearest Apple Stores if your iPhone 6 comes under warranty, in case you aren’t confident enough to follow the steps mentioned in the guide.
