You may be using a Laptop to read this tech blog and have USB dongle of your broadband modem to connect internet. But, did you face a situation when the USB ports are disabled after installing the various drivers? You were not able to access internet or receive any message from MS saying that the port is already in use by another process. This tutorial will show you how to enable USB ports in Windows 10 computer by enabling USB port controller.
There are numerous risks that can harm your system and the data it contains. Even the strongest antivirus software may not be able to protect your computer from them. As a result, we sometimes take extra efforts to address these security concerns. One of them is turning off the USB port, which is one of the most popular ways for malware to infect a computer.
But, for various work purposes, we need to use USB ports for flash drives and other devices. In that case, we have to enable the USB ports in our Windows 10 computer. Today, I’ll explain how to use the “Command Prompt” application to enable the USB port in Windows 10.
Enabling USB Port Using Command Prompt
Utilizing the “command Prompt” application is certainly an effective and easy method of enabling USB ports in Windows OS. To enable USB port using the “Command Prompt” in Windows 10
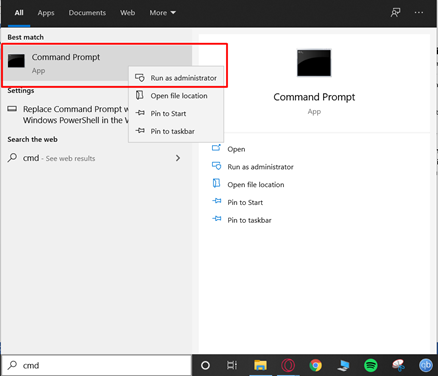
- Go to the Windows search bar and type “cmd.” Launch the “Command Prompt” program from the list.
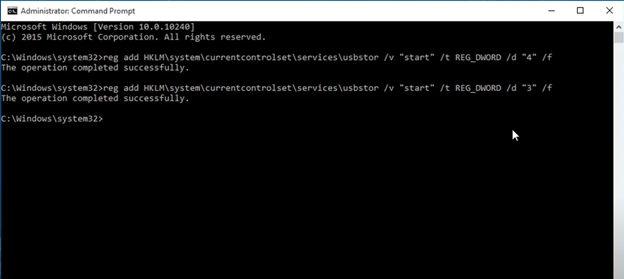
- Type: reg add HKLMSystemCurrentControlSetServicesUsbStor /v "Start" /t REG_DWORD /d "3” then press “Enter.” It will enable the USB port in your Windows 10 PC.
- If you want to disable the feature, put “4” instead of “3.”
How to Enable USB Port in Windows PC from Device Manager and Registry Editor?
While utilizing the “Command Prompt” application is the fastest way of enabling the USB port, you can always look for other attempts if you are not an experienced user. Using the “Device Manager” and “Registry Editor” features to enable/disable the USB port is an efficient way too. Follow the simple guide below to enable USB port using them
Using Device Manager
To enable the USB port using the “Device Manager” feature
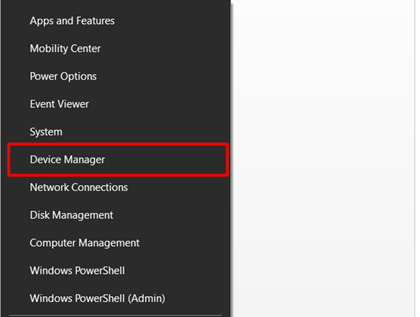
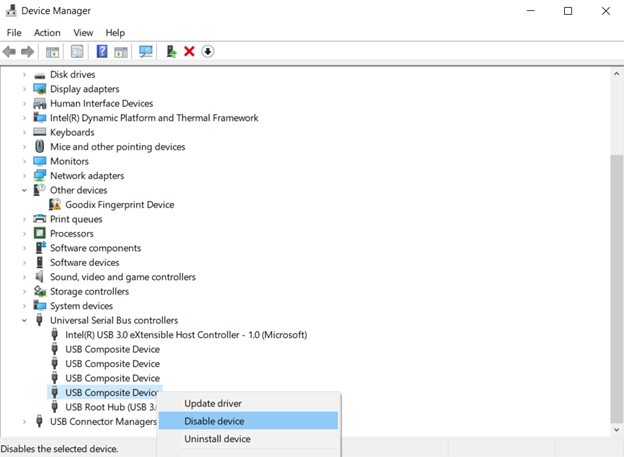
- Click on the Windows logo and launch “Device Manager.”
- Click the arrow of the “Universal Serial Bus controllers” section to expand it.
- Right-click on the USB port options and select “Enable Device.” If the USB ports are already enabled, you’ll see the “Disable Device” option.
Using Registry Editor
You can utilize the “Registry Editor” for sophisticated settings when you know the use and administration of Windows systems. To enable USB port using “Registry Editor” in your Windows PC
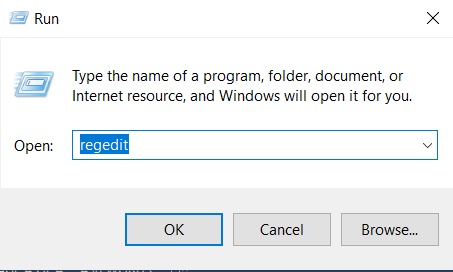
- Press “Windows + R” to launch the “Run” application.
- Type “Regedit” and click on “OK.” It will open the “Registry Editor” menu.
- Go to “HKEY_LOCAL_MACHINE > SYSTEM > CurrentControlSet > Services > USBSTOR.”
- Double-click on “Start.”
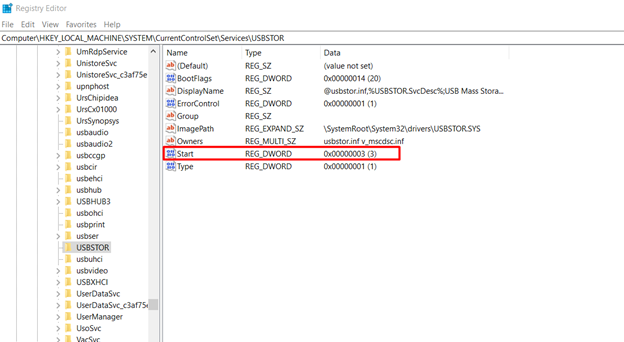
- Set the value data to “3” and save the settings. It will enable the USB port in your system.
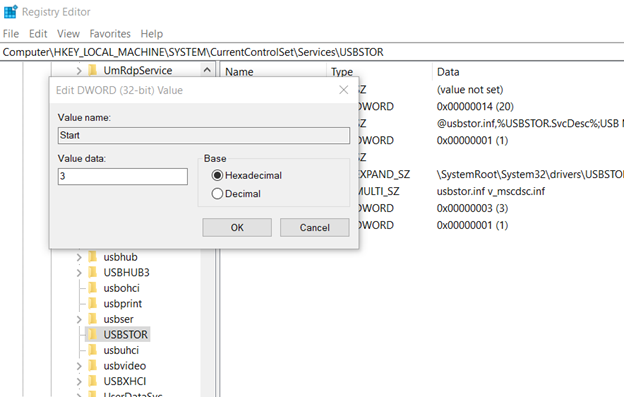
- If you’d like to disable it, change the value data to “4” and save the changes.
How to Activate USB Write Protection from the Registry Editor Menu?
To activate USB write protection from the “Registry Editor” menu
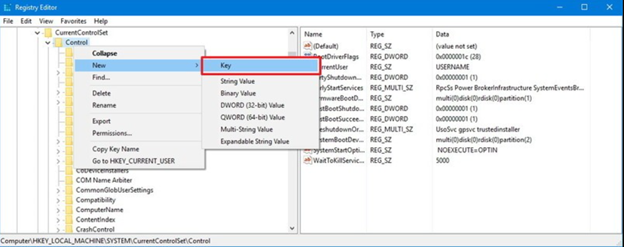
- Go to “HKEY_LOCAL_MACHINE > SYSTEM > CurrentControlSet > Control.”
- Right-click on the “Control” option and navigate to “New.” Select “Key,” then name it “StorageDevicePolicies.”
- Select the new key, then right-click on the right tab and click on “New.” Now, choose “DWORD (32-bit) Value.”
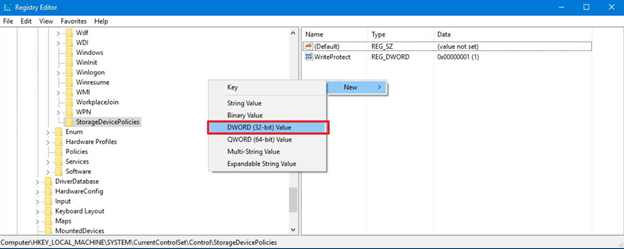
- Name the DWORD option “WriteProtection.”
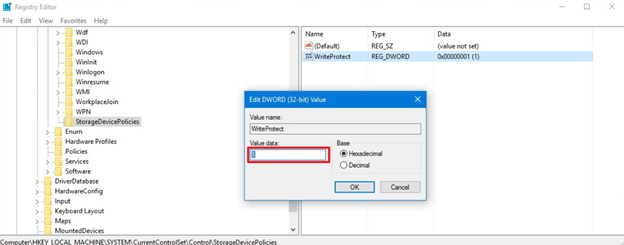
- Double-click on the new “WriteProtection” option and alter the value data from “0” to “1.” Click on “OK” and exit the registry to finish the task.
Summary: Enable USB Port in Windows 10 Using Command Prompt
- Open Command Prompt.
- Type the following command and hit Enter.
- On the next screen, you can execute any of the following commands and hit Enter in order to enable or disable USB Port.
