How To Fix "Cannot Start Microsoft Outlook" Or "Unable To Start Microsoft Outlook" Problems?
Being unable to start or run Microsoft Outlook is a frustrating problem that may cause you to lose work and productivity. While this may seem like a minor inconvenience, it can become a burden especially when you have to send an email or schedule a meeting with your employees. Microsoft Outlook is one of the most-used apps in businesses worldwide. It is a robust email and calendar application that allows users to sync messages and calendar events across devices without difficulties. As such, it is important that you fix any errors or issues in the app quickly before they cause any more problems.
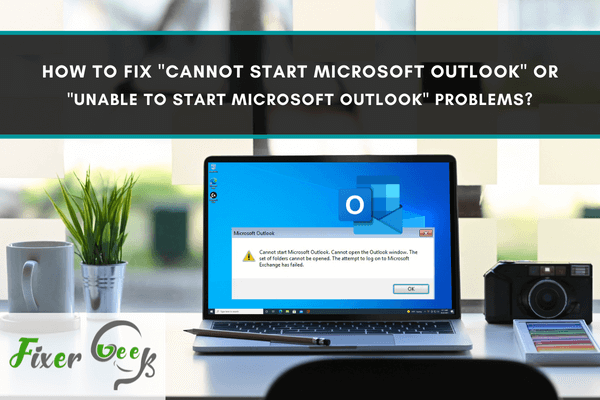
PST files are commonly used to store calendar events, emails, and other data on your computer. If these files become corrupted or damaged, you won't be able to open your Microsoft Outlook unless you repair them with these tools:
Kernel PST Repair Tool
- Click on the Select File icon.
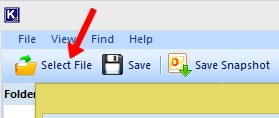
- In Source File Selection, select Recover Single File and click Search.

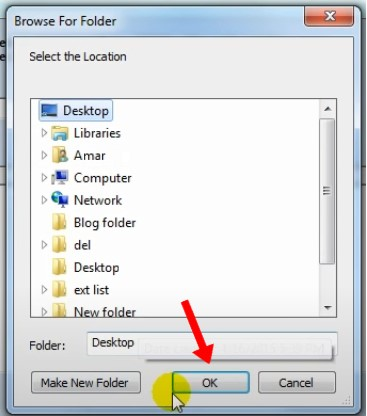
- Click on the Browse button in Search PST File(s).
- Browse and select a folder, then click OK.
- Click on the Search button in Search PST File(s).

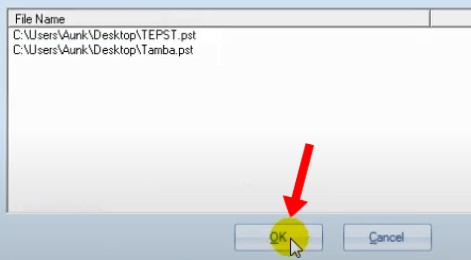
- Under File Name, you should see the PST files of the folder that you've chosen. Select a PST file from the list, then click OK.
- Back in the Source File Selection, click Next.
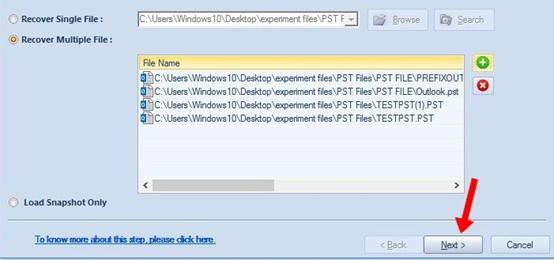
- Click Finish in the Information window.
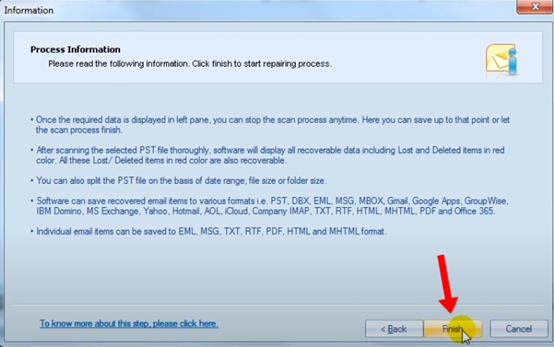
- When the process is complete, you should see e-mails and your chosen folder in the Folder List.
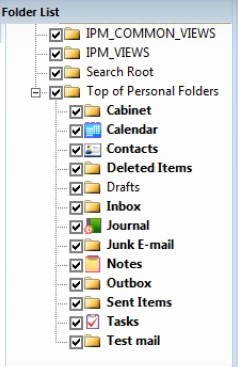
- Select a folder from the Folder List and click on the Save icon.
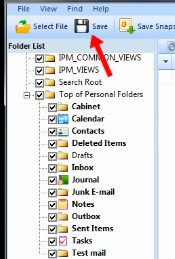
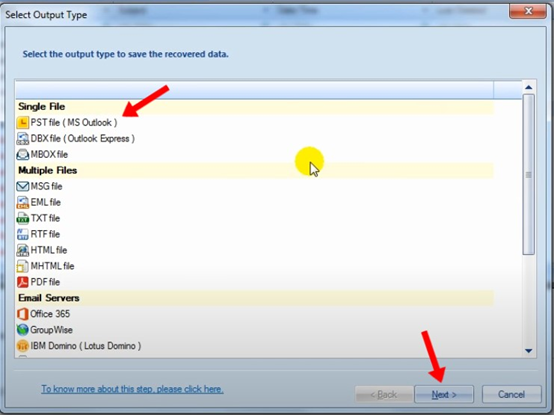
- In Select Output Type, select "PST file (Microsoft Outlook)" under Single File and click Next.
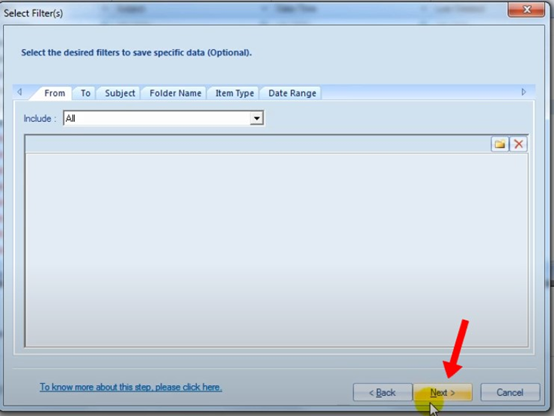
- In Select Filter(s), click Next.
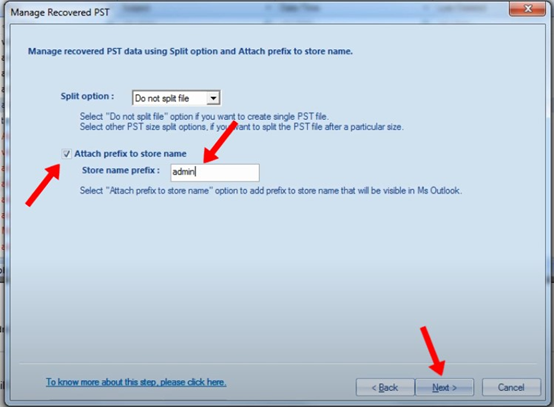
- In Manage Recovered PST, tick "Attach prefix to store name" and type "admin" in "Store name prefix". Click Next afterward.
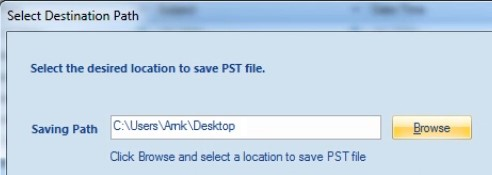
- In Saving Path, click Browse.

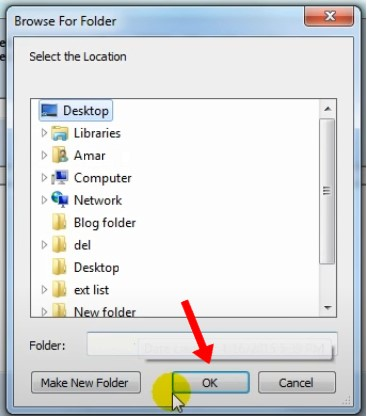
- Select a location and click OK.
- You should see your chosen location as your Saving Path.
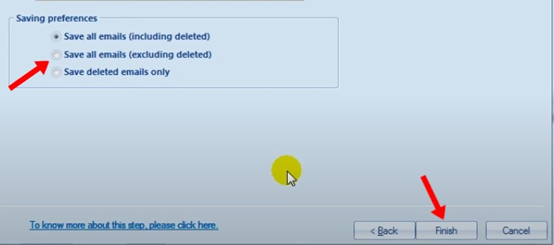
- Under Saving preferences, select "Save all emails (excluding deleted)" and click Finish.
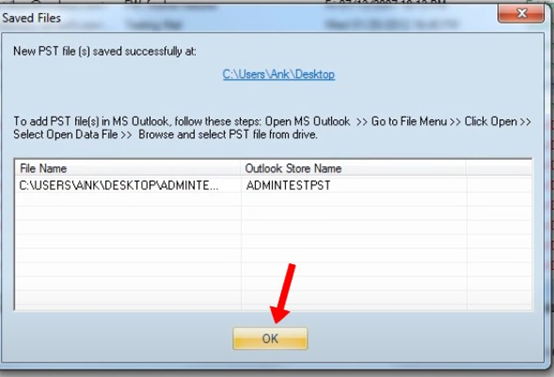
- When the process is complete, click OK.
EaseUS Data Recovery Wizard Free Edition
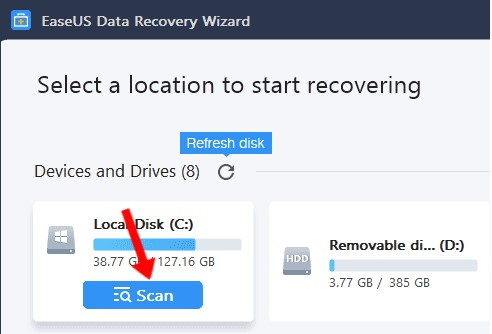
- Select the partition where you saved the PST files, then click Scan.
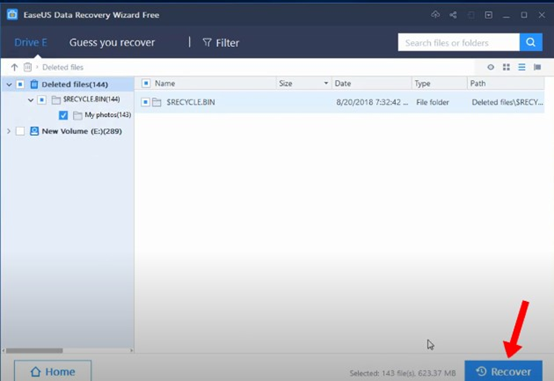
- Wait for the scan to finish. Tick your chosen PST files from the left sidebar and click Recover.
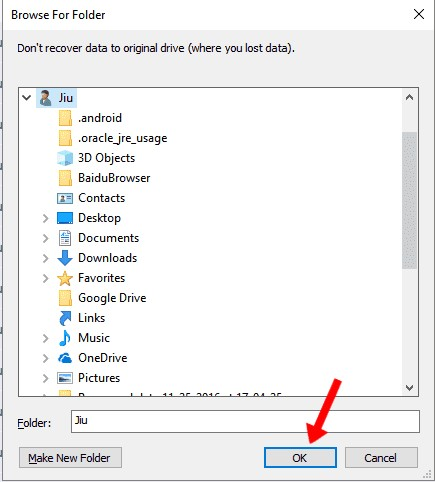
- In the Browse For Folder window, choose where you want to save your recovered PST files and click OK.
Recoveryfix for Outlook PST Repair
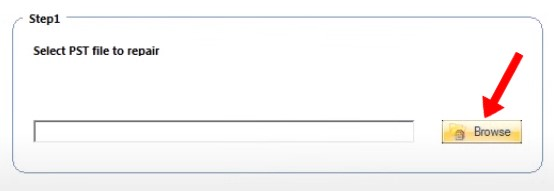
- click Browse.
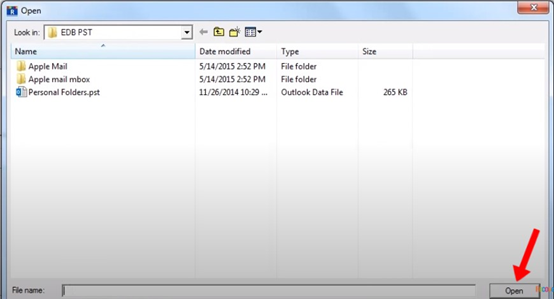
- Select your PST file and click Open.
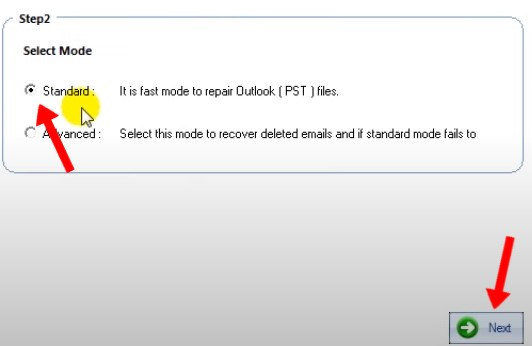
- Choose Standard and click Next.
- Wait for the software to display all recovered PST folders on the left sidebar, then choose a folder from that list.
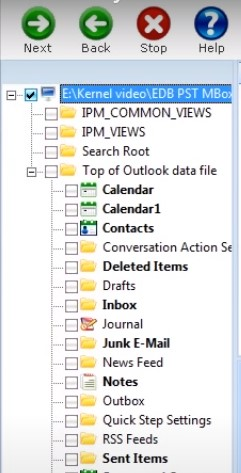
- On the right sidebar, you should see your recovered emails. Click Next afterward.
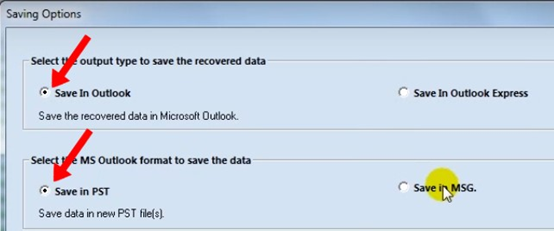
- In Saving Options, choose "Save in Outlook" and "Save in PST".
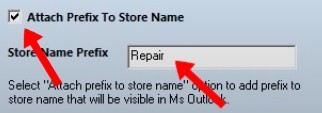
- Tick "Attach Prefix To Store Name" and type "Repair" in Store Name Prefix.
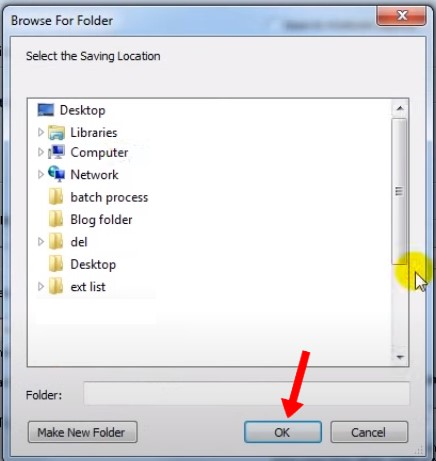
- In Saving Path, click Browse and select a location.

- Then click OK.
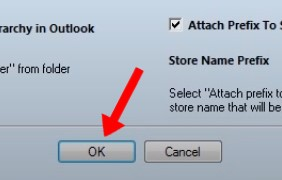
- Back in the Saving Options, click OK.
- Once the saving process is complete, click OK in the Saved Files window.

DataNumen Outlook Repair
- Click on the ellipsis button for "Select PST file/source to be repaired".
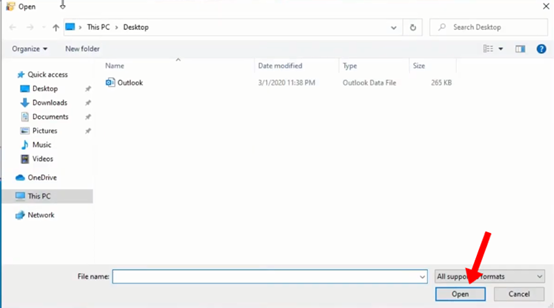
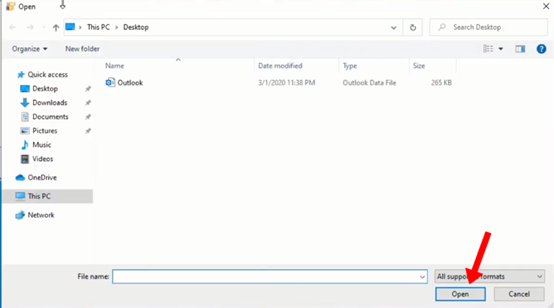
- Browse and select your chosen PST file, then click Open.
- In "Output fixed file as", your chosen PST file will have "_fixed.pst" at the end of its filename.

- Set the formats of "Select PST file/source to be repaired" and "Output fixed file as" to Auto Determined. Click the Start Repair button.

- Wait for the repair progress bar to be at 100%.

- Once the repair is complete, click OK in the Information window.

DiskInternals Outlook Recovery
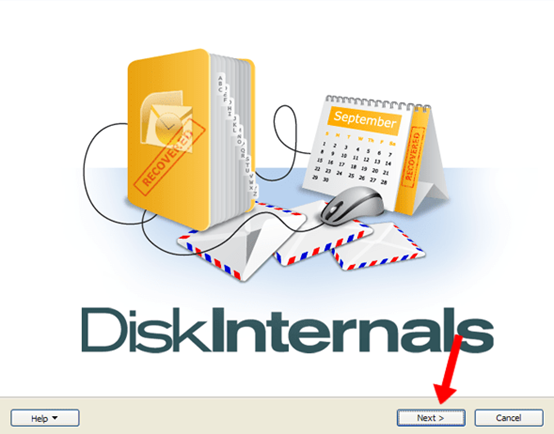
- Click Next in the Welcome window.
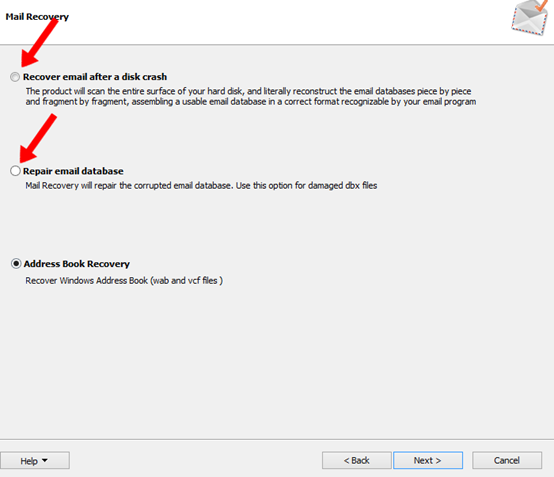
- Select "Recover email after a disk crash" or "Repair email database" under Mail Recovery.
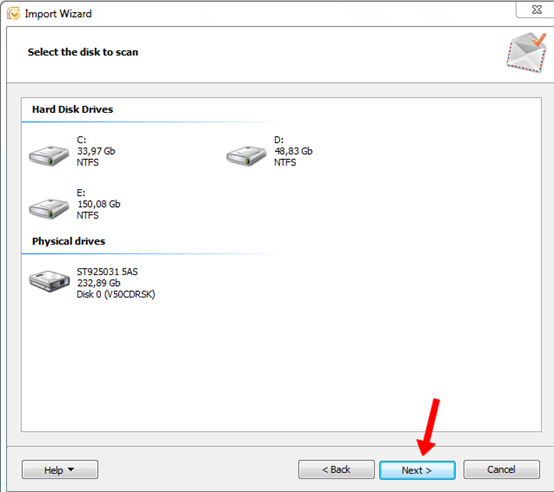
- If you choose "Recover email after a disk crash", select the disk where you saved your PST files. Then click Next.
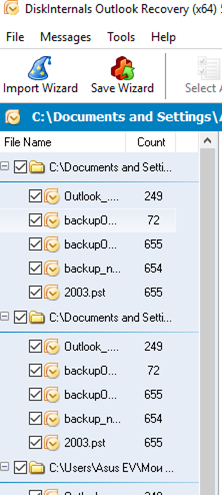
- Wait for all recovered PST files to appear on the left sidebar.
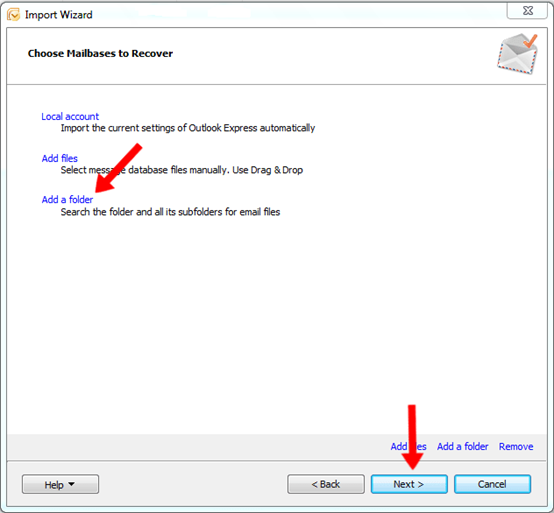
- If you choose "Repair email database", choose "Add a folder" under "Choose Mailboxes to Recover". Then click Next once you've selected the folder where you saved your PST files.
- On the left sidebar, wait for all recovered PST files to appear.
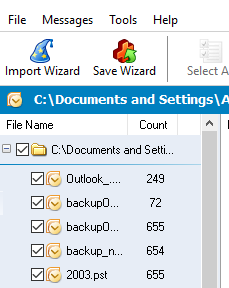
- Click on the Save Wizard icon to save your recovered files.

Summary: fix "Cannot start Microsoft Outlook" or "Unable to start Microsoft Outlook" problems
- launch the Sound control panel.
- Click the Recording tab.
- Select the Microphone.
- Click the Properties button.
- Switch to the Advanced tab.
- Disable Allow applications to take exclusive control of this device and Allow this device to be disabled when computer is locked.
Conclusion
Microsoft Outlook commonly relies on PST files for storing data on your computer. Without these files, you won't be able to access emails and calendar events. Hopefully, these solutions can help you solve your problem.