How To Fix "Outlook Data File Cannot Be Accessed" Error?
If you've got this problem with Outlook, you've probably tried to find a solution online. You may have found manuals telling you: "Close Outlook," "Delete this file," or "Update your computer." The fact is that these solutions only tell half of the story. If you're getting this error — wondering, how to fix ? Outlook data file cannot be accessed? error? — I urge you to read on and find an easier way to fix it.
Outlook is one of the best email service providers that are available today. It has plenty of features that make the email experience easier and more convenient.
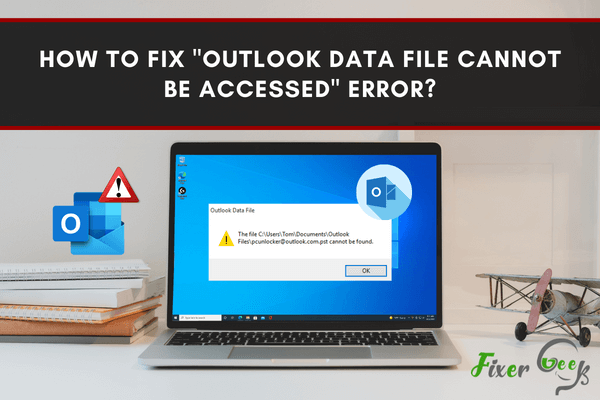
However, as with any program or service online, there are errors that users experience. One of these issues is when Outlook can’t access your personal data file. The exact error message looks like this:
0x8004010F: Outlook data file cannot be accessed.
Let’s look at how some ways how we can fix this error and why it happens in the first place.
Why The Error Happens?
The “Data File Cannot Be Accessed” error can happen due to various reasons. It can occur due to oversized files, corruption due to unexpected shutdown, or a virus attack. However, the error can also happen due to human errors.
Create A New Outlook Profile
One of the simplest ways to fix the “Outlook Data File Cannot Be Accessed” error is to create a new outlook profile. Creating a new Outlook profile and setting it as the primary profile will overwrite the previous configuration, making a fresh one.
Find the Outlook Data File Location
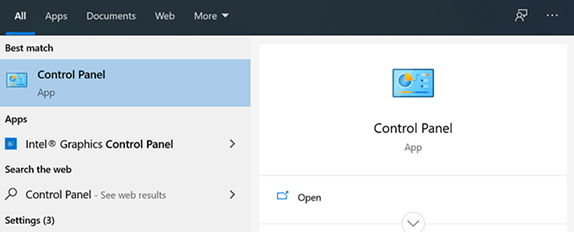
- Open your computer’s Control Panel.
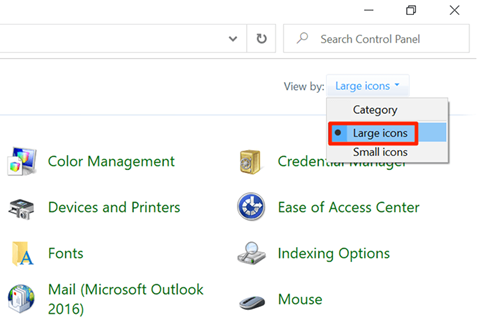
- Press the View by menu located at the top-right corner and make sure that the Large icons option is selected.
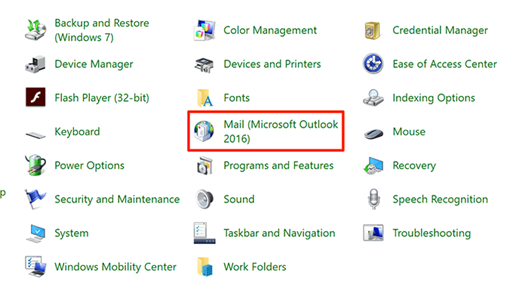
- Look for the Mail option and click it. Here, you’ll be able to view your email settings.
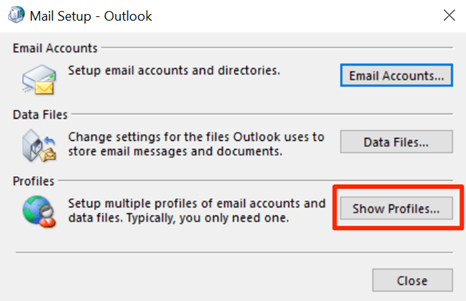
- Next, left-click the Show Profiles button to access your Outlook profiles.
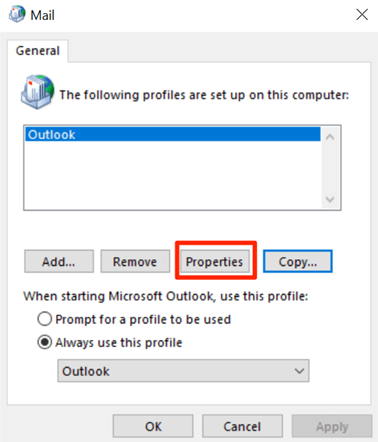
- Choose the problematic profile you’re currently using and click the Properties button.
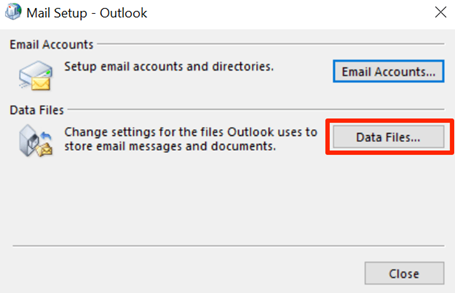
- Once inside the Properties tab, click the Data Files button. This is where the data file is saved.
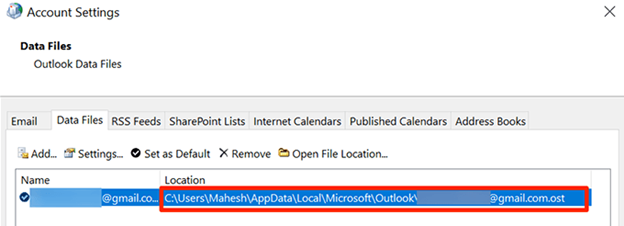
- The screenshot below shows a file entry with a checkmark to the left of it. The location provided is where your Outlook data file is located.
Create a New Outlook Profile
To refresh corrupted configurations, you can create a new Outlook Profile to override the old one. To do so, follow the steps below.
- Open your PC’s Control Panel and press the Mail option.
- Find and select the Show Profiles option to view your email profiles.
- Press the Add button to make a new profile.
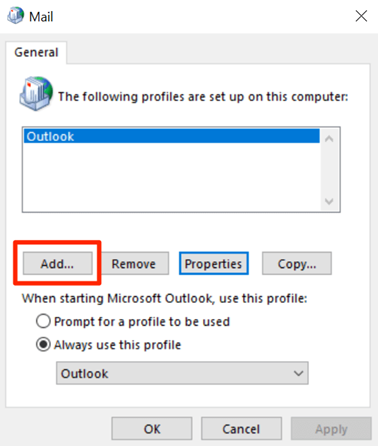
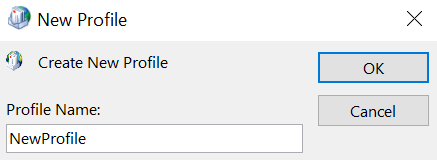
- Choose a name for your brand new profile and enter it in the Profile Name box. Click OK to save once done.
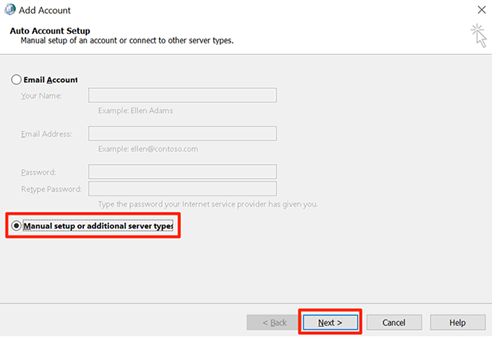
- Once you press OK, an email setup wizard will pop up. What you want to do is select the Manual setup or additional server types option as seen below. After, click Next to continue setting up your new Outlook email account.
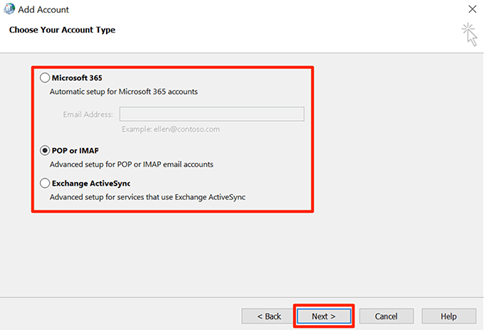
- Choose your email account type and press Next after. Make sure to select either the POP3 or IMAP if you have the appropriate details in your email account. Doing so will let you manually configure the settings in your account.
- Next, you need to fill in all the information needed for your email account. Once done, make sure to select Existing Outlook Data File under the Deliver new messages to section of the window. Once that is selected, click on the Browse button as seen below.
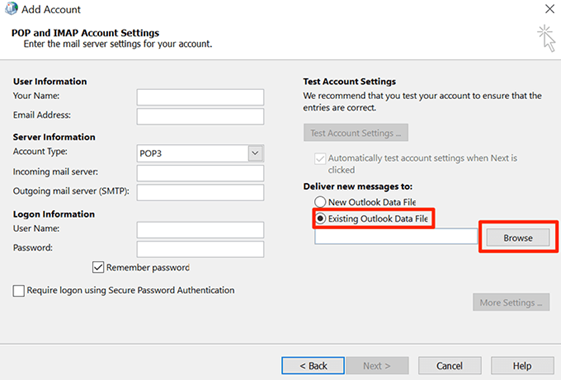
- Navigate to your Outlook data file path that we found in the previous section and select the file.
- After finding and selecting your old Outlook data file, continue the setup wizard until you finish.
- Finally, go back to your PC’s Control Panel and click the Mail option. Go to the Always use this profile menu and choose the newly created Outlook Profile. This ensures that the new one is always used in Outlook.
Summary: Fix ! Outlook data file cannot be accessed - error
- Click the File tab.
- Click Account Settings and then click Account Settings.
- On the Data files tab, double-click to open the data file that you want to check.
- On the Data Files tab, double-click to open the data file that you want to check.
- On the Data Files tab, select the default Outlook data file and then click Open File Location.
- Under Device Configuration on the left panel, click Certificate Templates and click Duplicate Template on the right panel.
- The Properties window will open up which includes General, Subject Name, Extensions and Security tabs by default.
- In ?General? tab, give it a template name like ?Outlook Data File - User??.
- Scroll down to ?File System? and select Allow full control check box under Permissions box. Click OK when done.
Conclusion
That’s it, the error should’ve been fixed. Outlook can both be a great tool for your email needs and a hassle due to bugs such as this. We hope that this article has helped you fix your problem.