How To Get Photos Off The IPhone Without Using ITunes To Windows 7?
523 Views
So you want to copy photos from your iPhone to your computer, but you don't know how to do that. Perhaps you tried using iTunes and it only made the problem worse. In this article I'll show you how to transfer photos from your iPhone so that you can enjoy them on your computer.

There are various reasons due to which you would like to save your photos and videos from your iPhone to your PC. Some of t1hem could be that your storage is full or you want to create a backup. Whatever the reason may be, there are a lot of different ways in which you can import photos from your iPhone to your Windows 7 PC.
You can use iTunes or other third-party apps like WALTR 2 and MacX media trans and many others. If you want to avoid all that and keep the process simple, follow the steps in the article.
What do you need?
- A USB cable
- A computer with window 7
Steps To follow to save photos from your iPhone to Windows 7
There are a lot of ways through which you can achieve it. We have proposed some of the procedures that can help you.
Using Window Explorer
Yes, you heard it correctly. You can use the good old window explorer to save photos from your iPhone to Windows 7. It allows users to copy their images from the iPhone to the PC. Just connect your iPhone and computer using the USB cable. Go through the subsequent steps to configure it.
Plug your iPhone into your computer using a USB cable and unlock your phone using your passcode, touch id, or face id because your PC cannot find a device that is locked. If you are connecting your iPhone to your computer for the first time, a prompt will pop-up on your screen asking you to trust the computer. Tap on the trust button to allow your computer access to your iPhone files.
After you click on the trust button, an AutoPlay window wills pop-up on your screen. Once your PC recognizes your iPhone, click on Import pictures and videos to start the importing process.
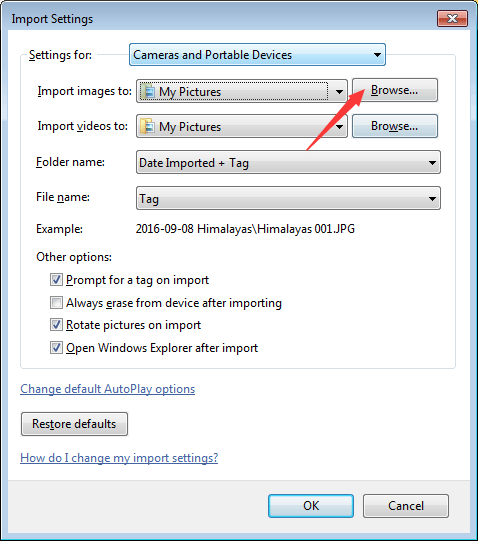
By default, the photos will be imported to the “My Pictures” folder. If you want to change the import location of your pictures, click on the ”import settings’” in the left bottom corner of the window. It will open the Import settings dialogue box.

Click on the “browse” button, select the location where you want to import the pictures and click on the ”ok” button to save the changes. After you click on “ok”, the import will restart and the pictures will be saved to your desired location.
NOTE: The autoplay method will import all of the pictures and video files present on your iPhone. If you want to import just a few specific pictures or video files, follow the next step.
Using Copytrans Photos
This solution is for the individuals who want their photos in the right order and appearance. It even sorts the structures of the images according to the albums. CopyTrans photo provides you with all the features for transferring your photos between your iPhone and Windows 7. The first step is to connect your iPhone to your computer and start “CopyTrans photo”. It will start loading all your images automatically.

Now, you can select any of the images you want to save in your Windows 7. You can save them by making folders of the particular album or you can drag-and-drop the whole album to your PC pane. This method is the easiest way to complete the transfer process.

Summary: Get photos off the iPhone without using iTunes to windows 7
- Plug iPhone into computer.
- Open "This PC" in windows explorer.
- Open iPhone in "This PC."
- Copy pictures from folder on iPhone to location on hard drive.
Conclusion
We discussed the steps by which you can transfer your pictures from your iPhone to your Windows 7 PC without using iTunes. Follow these simple and easy steps to avoid using iTunes or any other third-party file manager.
