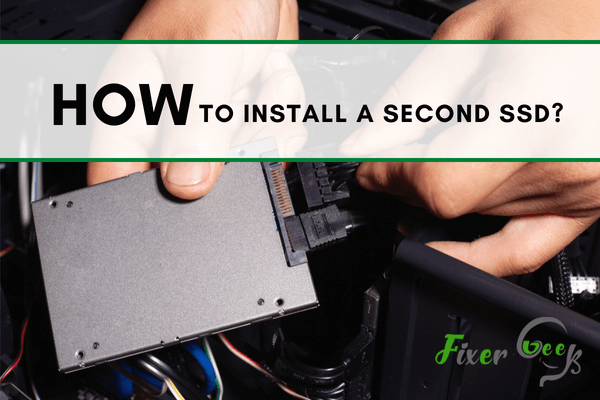
Installing a second SSD is a great way to boost your PC's performance and improve its usability. This procedure is also known as installing a boot drive because that's the type of SSD you're going to mount; but actually you can install any type of SSD as long as it meets your requirements.
You may have to delete outdated data or use an additional disk drive even though you began with massive space on the PC. You can do this easily by connecting external storage to the computer. This method is not too complicated, provided that there is space on the PC to fit a new SSD. However, you’ll have to access the PC, connect several wires, and then configure up the second drive with the help of Disk Management.
Installing a Second SSD
- First, disconnect the power cable from the computer. Open it up from the backside. Find the drive bay. The computer case may feature several different size drive bays, including the peripheral bays. If there are no 2.5-inch drive bays, you have to buy a 2.5 to a 5.25-inch adapter for the additional hard disk and work with the 5.25-inch bay.
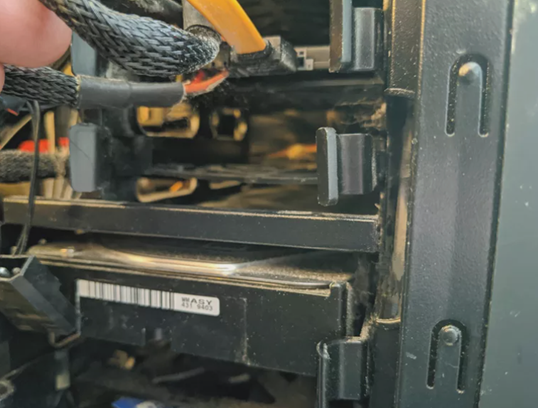
- Pick the drive caddy and take it out. Then, set up the additional SSD in it. Sometimes, there is no drive caddy in the computer case. You may have to put the SSD into the bay directly and fit it in its place. Look at the manual of the case if you need help.
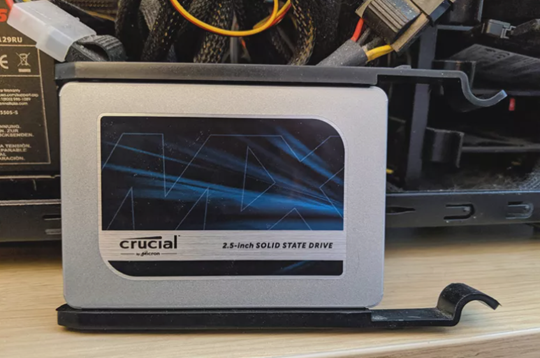
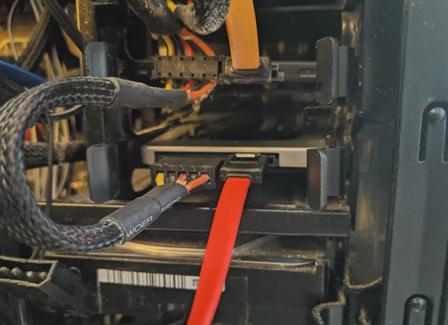
- Fit the caddy into the drive bay in its place. You may have to fit it with a screw or fastener, or it may fit in its place automatically, depending on the type of case. Pick a SATA data cable. Then, look for an available SATA data cable port on the motherboard and set it up.
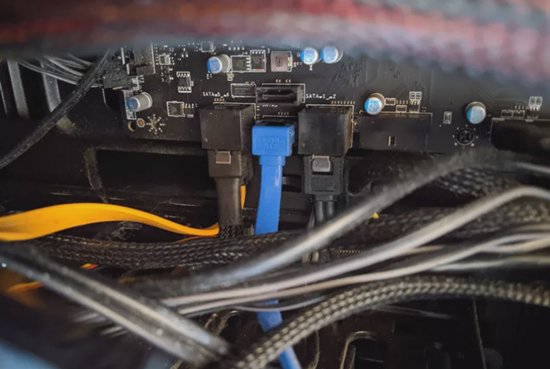
- Find an available SATA power connector. If you don’t have any SATA power connector, you may work with a Molex to SATA power adapter or splitter.

- Connect the SATA power connector and the data connector to the second SSD. Carefully fit the connectors into the appropriate position. Check every cable and connection. Close the computer case properly and plug everything in. Start the PC.
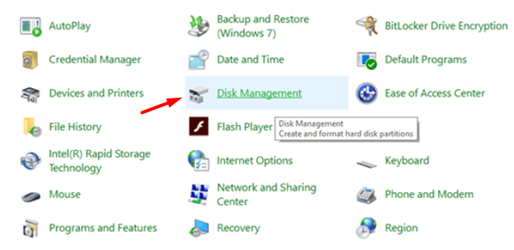
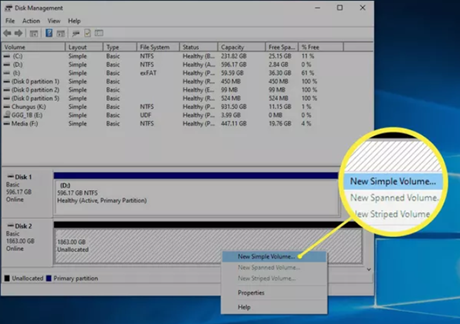
- The Windows system will automatically detect the second SSD. However, if it doesn’t, recheck the cables and connections and ensure you didn’t miss anything. Select “Control Panel.” Then, locate the “Disk Management” option and pick it. For Windows 7 operating system, select the “Start” option and choose the “manage” option from the “Computer” by right-clicking on it.
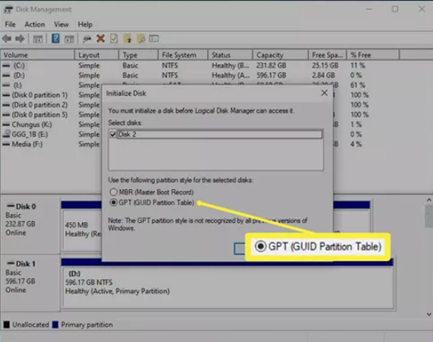
- Pick the “GPT (GUID Partition Table” option from the “Initialize Disk” page. Select “OK.” For Windows 7, go for the “MBR (Master Boot Record)” option.
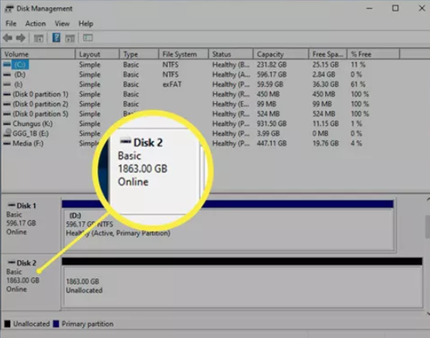
- If the install process begins automatically, then proceed by selecting “Next.” If not, find out the second SSD from the “Disk Management” page.
- Select the second SSD and right-click on it. Choose “New Simple Volume.” Proceed to the next window by selecting “Next.”
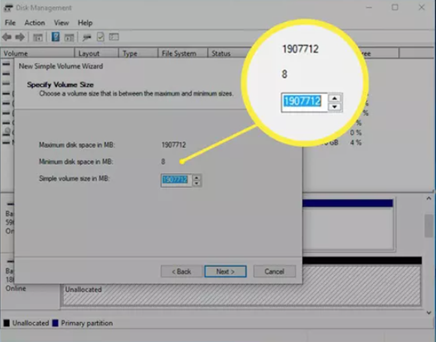
- A new window with two numbers will show up. Match them. If you wish to create several partitions on the SSD, put the required partition size and not match the numbers. Select “Next.”
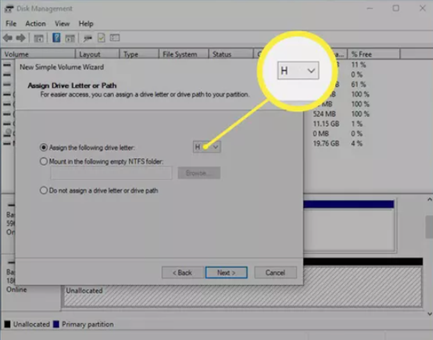
- Pick a drive letter or keep the default one and choose “Next.”
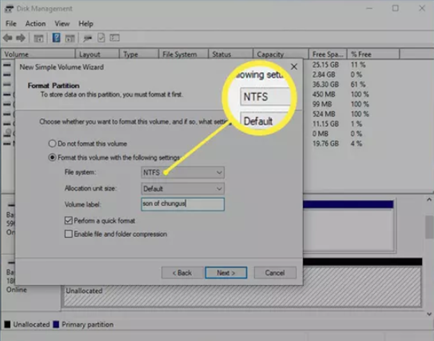
- Choose the “NTFS” file system. Put a volume if you wish and select “Next.”
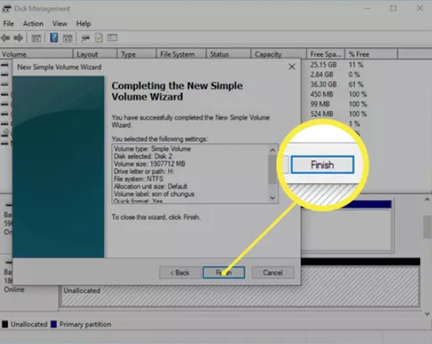
- Recheck the information and pick “Finish.” You can use the second SSD now.
Summary: Install a Second SSD
- Prepare Your Computer.
- Create a Partition for your Second Drive.
- Format the Second Drive.
- Install the Second SSD.
- (Optional) Move Files and Folders to the New Drive.
